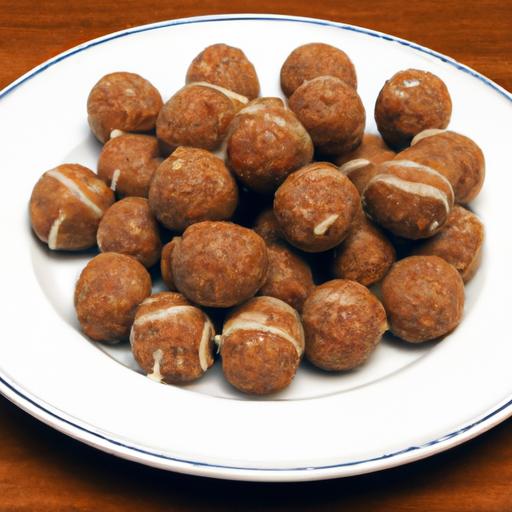
When cravings strike for something sweet, creamy, and utterly satisfying, peanut butter balls are frequently enough the go-to treat that delivers on all fronts. But what if indulging in these delightful bites didn’t have to stretch your wallet? Welcome to the world of peanut butter balls on a budget-where rich flavors meet affordable ingredients, proving that deliciousness doesn’t have to come with a high price tag. In this article, we’ll explore how to whip up these crowd-pleasing morsels using simple, cost-effective pantry staples that turn every bite into a moment of joy without breaking the bank. Get ready to savor the perfect blend of nutty goodness and wallet-friendly wisdom!
Peanut Butter Balls on a budget are the ideal homemade treat when you crave rich, nutty sweetness without stretching your grocery bill. Rooted in simple pantry staples yet bursting with flavor, these no-bake delights combine creamy peanut butter, a touch of honey, and crunchy add-ins to create a satisfying bite. Weather enjoyed as an afternoon snack or a swift dessert, crafting peanut butter balls at home means you control every ingredient-maximizing taste and minimizing cost.
Prep and Cook Time
Preparation: 15 minutes
Chill Time: 30 minutes
Total Time: 45 minutes
Yield
Makes approximately 20 peanut butter balls
Difficulty Level
Easy – perfect for beginners and experienced cooks alike
Ingredients
- 1 cup creamy peanut butter (natural or classic, no added sugar preferred)
- 2 cups powdered sugar (for a smooth, sweet binding)
- 1 cup crushed graham crackers (or substitute with inexpensive digestive biscuits)
- 2 tbsp honey (adds natural sweetness and moisture)
- ½ tsp vanilla extract
- Optional coatings: ½ cup mini chocolate chips, cocoa powder, or finely chopped nuts
Choosing Budget-friendly Ingredients for Maximum Flavor
Focus on pantry basics that do double duty: peanut butter offers protein and creaminess, while powdered sugar smooths texture and sweetness without needing expensive syrups. By opting for crushed graham crackers or store-brand cookies, you add crunch and bulk at a minimal cost. Honey may seem like a splurge but it’s used sparingly, bringing a subtle, deep flavor that elevates the treat.keep vanilla extract simple – even a small bottle goes a long way. This combination balances richness and affordability, so you enjoy full flavor without the premium price tag.
Step-by-step guide to Making Peanut Butter Balls at Home
- Combine the base: In a large mixing bowl, stir together the creamy peanut butter, honey, and vanilla extract until glossy and well mixed.
- Add dry ingredients: Gradually fold in the powdered sugar and crushed graham crackers until a pliable dough forms. It should hold together without being sticky. If too dry,add a teaspoon of milk; if too wet,dust with more powdered sugar.
- Shape the balls: Scoop tablespoons of dough and roll them between your palms into smooth, uniform balls. Aim for about 1-inch diameter for the perfect bite.
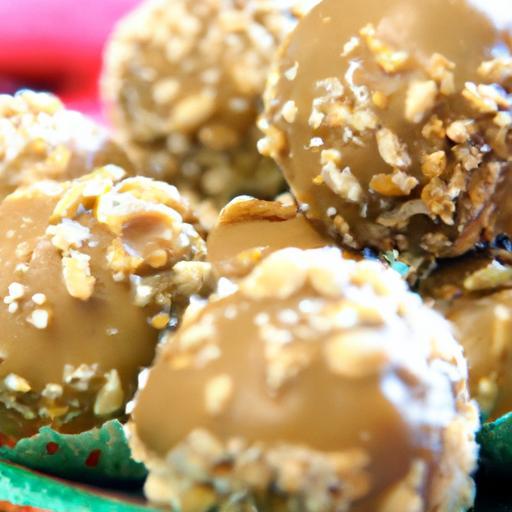
- Coat your creations: Choose a coating from mini chocolate chips, cocoa powder, or chopped nuts. Roll each ball gently in the coating of choice for texture and an extra flavor punch.
- chill and set: Arrange the peanut butter balls on a parchment-lined tray and refrigerate for at least 30 minutes. This step firms them up, making handling and serving easier.
- Enjoy instantly or store: Once chilled, these affordable treats are ready to delight. Keep reading for storage tips to maintain freshness.
Creative Variations to Stretch your Ingredients Further
When working with budget-friendly ingredients, think outside the box to multiply your treats:
- Oats Deluxe: Swap half the graham crackers for quick oats to add fiber and chewiness while saving costs.
- Chocolate swirl: melt inexpensive baking chocolate and drizzle over chilled balls for a decadent look that’s easy on your wallet.
- Seasonal spins: Add a pinch of cinnamon or pumpkin spice to mix up flavors throughout the year.
- Nutty textures: incorporate crushed peanuts or sunflower seeds to enhance crunch without extra cost.
- Mini bites: roll smaller balls to stretch the recipe further-perfect for parties and portion control.
Tips for Storing and Serving Your Affordable Treats
Store your peanut butter balls in an airtight container in the fridge for up to two weeks. If you want to keep them longer, freeze on a tray and transfer to a freezer-safe bag-defrost in the fridge overnight before serving.For presentation, stack these treats on a decorative plate or tiered tray, dust with powdered sugar, or garnish with fresh mint leaves for a pop of color. pair with a cup of chai tea or cold milk to highlight their rich, nutty sweetness. These budget-conscious bites are as remarkable visually as they are delicious!
Nutritional Information Per serving
| Calories | protein | Carbs | Fat |
|---|---|---|---|
| 110 | 4g | 12g | 6g |
for those eager to explore more budget-friendly snack recipes, check out our guide to Healthy Peanut Snacks on a Budget. To understand the nutritional benefits of peanuts,visit USDA Nutrient Database.

Q&A
Q&A: Peanut Butter Balls on a Budget – Delicious & Affordable Treats
Q1: What makes peanut butter balls such a popular treat?
A1: Peanut butter balls are beloved for their rich, creamy texture and irresistible combination of sweet and nutty flavors. Plus, they’re bite-sized, making them perfect for sharing-or sneaking a few when no one’s watching!
Q2: How can I make peanut butter balls without breaking the bank?
A2: The key is using simple, affordable ingredients like creamy peanut butter, powdered sugar, and crushed graham crackers or oats. These pantry staples are inexpensive and often already on hand, so you can whip up a batch without a special trip to the store.
Q3: Are there budget-friendly variations to the classic recipe?
A3: Absolutely! Swap crushed cookies for oats or rice cereal, use honey instead of syrup, or add a dash of cinnamon for a warm twist.Even dipping them in melted chocolate chips (a small investment) can elevate your peanut butter balls without costing a fortune.
Q4: How long do peanut butter balls last, and how should I store them?
A4: Stored in an airtight container in the fridge, peanut butter balls stay fresh for up to two weeks. You can also freeze them for longer storage-just thaw at room temperature before enjoying.
Q5: Can peanut butter balls be made allergen-friendly on a budget?
A5: Definitely! Use sunflower seed butter or soy nut butter as a substitute for peanut butter. For coating, consider crushed allergen-free cereal or coconut flakes. Many allergen-friendly ingredients are surprisingly affordable, especially when bought in bulk.
Q6: what’s the easiest way to make peanut butter balls kid-friendly and fun?
A6: Get kids involved by letting them roll the mixture into balls and decorate with sprinkles or mini chocolate chips. It’s an easy, hands-on activity that doubles as a tasty treat and budget-friendly bonding time.
Q7: How can I incorporate health benefits without upping the cost?
A7: Add a sprinkle of ground flaxseed or chia seeds into the mix. These boost fiber and omega-3s, and a small amount goes a long way without impacting flavor or budget. Using natural peanut butter (no added sugar) also keeps things wholesome and wallet-wise.
Q8: Any pro tips for making peanut butter balls perfectly every time?
A8: Chill the mixture before rolling to make shaping easier. Use gloves or lightly oil your hands to prevent sticking. And if the mixture is too sticky, add a bit more powdered sugar or crushed crackers to balance it out.
Peanut butter balls prove that you don’t have to drain your wallet to enjoy a tasty treat. With simple tweaks and pantry basics, you can create delicious snacks that satisfy both cravings and budgets!
The Way Forward
Whether you’re whipping up a quick snack for the kids or craving a sweet treat that won’t break the bank, these peanut butter balls prove that deliciousness doesn’t have to come with a hefty price tag. Simple ingredients, minimal effort, and maximum flavor combine to make these bites a budget-friendly delight perfect for any occasion. So next time you want to satisfy your sweet tooth without splurging, remember: a little creativity and peanut butter can go a long way in turning everyday pantry staples into irresistible, affordable treats. Happy snacking!