
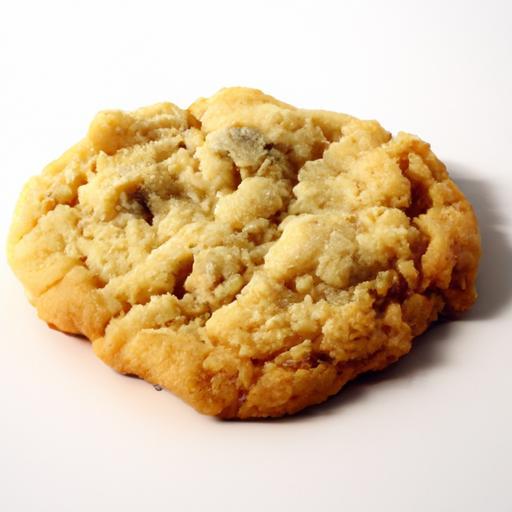
There’s an irresistible magic in the first bite of a cookie-where the edges deliver a perfect, golden crispness that gives way to a soft, chewy center melting on your tongue. Achieving that flawless balance between crunchy and tender might seem like a baker’s myth, but it’s entirely within your reach. Welcome to your ultimate guide to homemade cookies, where science meets artistry to help you create treats that satisfy every craving. Whether you’re a novice baker or a seasoned sweet-tooth enthusiast, get ready to unlock the secrets behind perfectly crispy and chewy cookies that will have everyone asking for more.
Perfectly crispy & chewy cookies evoke the nostalgic magic of home baking-the delicate dance between crunch and tenderness that makes each bite unforgettable. This recipe guide will lead you through the art of mastering dough texture, selecting premium ingredients, and employing baking techniques that guarantee consistency, turning your kitchen into a cookie haven.
Prep and Cook Time
- Readiness: 20 minutes
- Chill Time: 1 hour (optional but recommended)
- Baking: 10-12 minutes
- Total Time: Approximately 1 hour 30 minutes
Yield
- About 24 medium-sized cookies
Difficulty Level
- Easy to Medium – perfect for home bakers looking to elevate cookie texture
Ingredients
- 2 1/4 cups all-purpose flour,sifted
- 1/2 teaspoon baking soda
- 1/2 teaspoon fine sea salt
- 3/4 cup unsalted butter,melted and cooled
- 1 cup packed light brown sugar
- 1/2 cup granulated sugar
- 1 large egg plus 1 large egg yolk,at room temperature
- 2 teaspoons pure vanilla extract
- 1 1/2 cups chocolate chips or chunks (your choice)
Instructions
- Preheat your oven to 325°F (163°C) and line baking sheets with parchment paper or silicone mats for even baking without sticking.
- Combine dry ingredients: In a medium bowl, whisk together sifted flour, baking soda, and fine sea salt. Set aside.
- Mix sugars and butter: In a large bowl,blend the melted butter with brown and granulated sugars until smooth and glossy,about 2 minutes using a spatula or handheld mixer.
- Add eggs and vanilla: Beat in the egg and egg yolk one at a time, ensuring each is fully incorporated before adding the next. Then, stir in the vanilla extract.
- Fold in dry mixture: Gradually incorporate the dry ingredients into the wet mixture in batches, gently folding with a spatula to maintain airiness without overmixing to avoid toughness.
- Stir in chocolate chips: Evenly distribute the chocolate throughout the dough, enhancing pockets of gooey delight.
- Chill the dough: Cover the bowl tightly and refrigerate for at least 1 hour. Chilling thickens the dough,encouraging a chewier interior and preventing excessive spread during baking.
- scoop and space: Using a cookie scoop or tablespoon, place dough balls 2 inches apart on your baking sheets to allow room for spreading and crisp edges.
- Bake to perfection: Bake for 10-12 minutes, or until edges turn golden while centers remain soft and slightly underbaked. This balance is key to achieving that dreamy contrast.
- Cool strategically: Let cookies rest on the baking sheet for 5 minutes before transferring to a wire rack to cool completely. this brief resting period lets residual heat finish the chewy center while crisping the edges.
Tips for success and Troubleshooting
- Adjust butter temperature: Melted butter promotes chewiness, while creamed cold butter yields lighter, cakier cookies. Feel free to experiment based on your texture preference.
- Choose sugars wisely: Brown sugar adds moisture and depth of flavour; granulated sugar encourages crispness. Tweaking their ratio fine-tunes your cookie’s bite.
- Sift flour: This prevents lumps and ensures tender crumb structure.
- Don’t skip chilling: It’s essential for controlling spread and intensifying flavor.
- Baking time matters: Pull cookies out just at the golden edge to keep centers chewy; overbaking leads to dry, brittle treats.
- Common problems & fixes: Flat cookies? Add a tablespoon more flour or chill longer. Dry crumbly cookies? reduce baking time or add an extra egg yolk for moisture.
- Variations: Swap chocolate chips for nuts, toffee, or dried fruit for exciting flavor twists.
Serving Suggestions
Savor your perfectly crispy & chewy cookies fresh with a cold glass of milk, or warm alongside a scoop of vanilla ice cream for an indulgent dessert. Garnish plates with fresh berries and a dusting of powdered sugar to elevate presentation. For a fun twist, dip halves of cookies in melted chocolate and sprinkle with sea salt or crushed nuts.

| Nutrient | Per Cookie |
|---|---|
| Calories | 150 kcal |
| Protein | 2 g |
| Carbohydrates | 20 g |
| Fat | 7 g |
For more baking insights and advanced cookie recipes, be sure to check our Best Chewy Chocolate Chip cookies guide. Also, learn about the science behind sugar caramelization on Serious Eats to deepen your understanding of flavor development.
Q&A
Q&A: Perfectly Crispy & Chewy – Your Guide to Homemade Cookies
Q: What’s the secret to getting cookies that are perfectly crispy on the edges yet chewy in the center?
A: The magic lies in balancing ingredients and baking time. Use a combination of brown sugar and white sugar-brown sugar adds moisture and chewiness,while white sugar contributes to crispiness. Also,slightly underbaking your cookies and letting them cool on the baking sheet helps achieve that perfect texture contrast.
Q: How dose the type of flour affect cookie texture?
A: All-purpose flour is the classic choice for cookies-providing structure without toughness. For chewier cookies, some bakers incorporate bread flour, which has higher protein content for more gluten development. Just be careful not to overmix, or your cookies could become dense.
Q: Can I tweak the fat to control chewiness?
A: Absolutely! using melted butter can encourage a denser, chewier cookie, while softened or cold butter tends to produce fluffier, cakier results. Also, consider adding a tablespoon of oil alongside butter for extra chew.Q: How meaningful is chilling the dough?
A: Chilling is crucial! It solidifies the fats, preventing your cookies from spreading too thin during baking, which preserves that chewy center and crispy edge contrast. Plus, chilling enhances flavor by allowing ingredients to meld.
Q: Does baking temperature affect cookie texture?
A: Yes! Baking at a higher temperature (around 375°F/190°C) sets the edges quickly, giving you that crisp perimeter, while the inside stays soft and chewy. Lower temps lead to more even baking, which can make cookies cakier.
Q: What role do eggs play in cookie chewiness?
A: Eggs add moisture and help bind ingredients,but their protein also impacts texture. Using an extra egg yolk or substituting some egg whites with yolks increases chewiness due to the fat content. Too many eggs, however, can make cookies cakey.
Q: Can I make crispy and chewy cookies without specialized equipment?
A: Definitely! Your oven, a basic baking sheet, and parchment paper or silicone mats are all you need. The trick is in technique: measure carefully, chill your dough, and monitor baking times closely.
Q: How do I store cookies to maintain that crispy-chewy balance?
A: Store cookies in an airtight container at room temperature. To keep edges crisp, place a paper towel at the bottom of the container to absorb moisture. For maintaining chewiness, add a slice of bread to the container-its moisture keeps cookies soft without making them soggy.
Q: What’s a fun tip to elevate homemade cookies?
A: Sprinkle a tiny pinch of flaky sea salt on top just before baking or right after they come out of the oven.That salty hit perfectly complements the sweet, enhancing both the crispy edges and chewy centers.
Enjoy your journey toward cookie perfection-crispy edges,chewy middles,and endless smiles!
To Wrap It Up
Whether you crave the satisfying snap of a perfectly crispy edge or the tender chew of a warm,gooey center,mastering homemade cookies is an art-and now,it’s one well within your reach. With these tips and tricks tucked into your baking toolkit, every batch you pull from the oven will be a delicious harmony of textures, time, and taste. So preheat that oven, gather your ingredients, and get ready to create cookies that don’t just satisfy a sweet tooth-they tell a story of homemade love, one bite at a time. Happy baking!