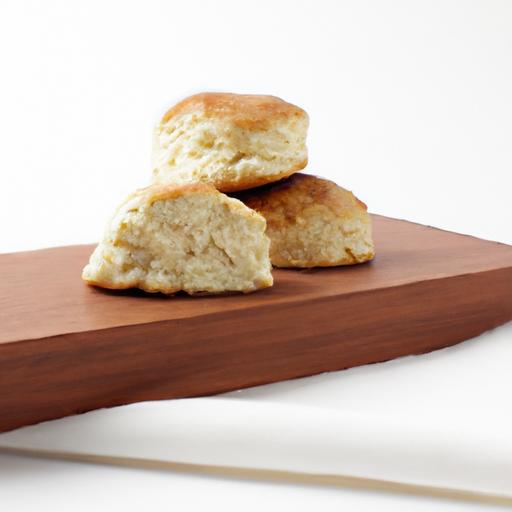
There’s something undeniably comforting about the warm, crumbly goodness of a freshly baked scone-its golden crust giving way to a tender, buttery center that melts in your mouth. Whether enjoyed with a slather of clotted cream and jam or simply savored alongside a steaming cup of tea, scones have long held a special place in the hearts (and kitchens) of bakers worldwide. But mastering the art of baking perfect scones from scratch doesn’t have to be an elusive dream. In this article, we’ll guide you through easy, foolproof recipes and share insider tips to help you create scones that rise beautifully, boast that quintessential crumbly texture, and satisfy every craving.Ready to turn your kitchen into a cozy bakery? Let’s dive in and bake the perfect scones-one delicious bite at a time.
Bake perfect scones from scratch brings the timeless comfort of freshly baked, golden-topped treats right to your kitchen. Rooted in British teatime tradition, scones are delicate by nature-fluffy inside and tender to the bite, crowned with a crisp, buttery crust. My love affair with scones began on a misty morning in the English countryside, where each bite paired with clotted cream and jam felt like a warm hug. This recipe post unlocks the secrets behind achieving that flawless texture and invites you to experiment with creative flavor twists that transform humble scones into memorable delights.
prep and Cook Time
- Preparation: 15 minutes
- Resting: 10 minutes
- Baking: 12-15 minutes
- Total: 40 minutes
Yield
Yields 8 medium-sized scones-perfect for sharing or savoring over a few days.
Difficulty Level
Easy. Ideal for beginners, with simple steps that guarantee impressive results.
Ingredients
- 2 cups all-purpose flour, sifted for a light, airy crumb
- 1/4 cup granulated sugar, to add subtle sweetness
- 1 tablespoon baking powder, for that essential lift
- 1/2 teaspoon fine sea salt, to enhance flavor balance
- 6 tablespoons unsalted butter, cold and cubed for flakiness
- 3/4 cup whole milk, chilled to bind the dough gently
- 1 large egg, for richness and color
- Optional: 1 teaspoon vanilla extract or zest of 1 lemon for floral brightness
Instructions
- Preheat your oven to 400°F (200°C) and line a baking sheet with parchment paper or a silicone mat.
- Combine the dry ingredients: In a large mixing bowl,whisk together the flour,sugar,baking powder,and salt,ensuring even distribution for consistent rise.
- Cut in the butter: Using a pastry cutter or your fingertips, quickly work the cold butter into the dry mix until the mixture resembles coarse crumbs dotted with pea-sized butter pieces. Keep everything chilled to maintain flakiness.
- Mix wet ingredients: In a small bowl, beat the egg with milk and optional vanilla or citrus zest.
- Form the dough: Pour the wet mixture into the dry ingredients and stir gently with a fork or spatula until just combined. The dough should be slightly sticky but hold together-avoid over-mixing to preserve tenderness.
- Knead lightly: Turn the dough out onto a lightly floured surface and fold it over itself 3 to 4 times. This brief kneading develops the structure without toughening the scones.
- Shape and cut: Pat the dough into a 1-inch thick circle. Using a floured round cutter,cut out scones and place them on the prepared baking sheet,spacing them about 2 inches apart.
- Brush tops: Lightly brush each scone with a bit of milk or beaten egg for a luminous golden crust.
- Bake: Bake until risen and golden brown,about 12-15 minutes. Rotate the tray halfway through for even color.
- Cool briefly: Let scones rest for 5 minutes on a wire rack before serving to lock in softness.
Tips for Success
- Butter temperature: Use cold butter straight from the fridge to ensure flaky layers instead of dense dough.
- Avoid overworking: Handle dough as little as possible to keep scones tender and crumbly rather than tough.
- Resting time: Allowing the dough to rest for 10 minutes before cutting encourages better rise and flakiness.
- Milk substitutes: Whole milk offers richness, but you can use buttermilk for tang or dairy-free alternatives for dietary needs.
- Flavor variations: Add mix-ins like dried fruits, chopped nuts, or grated cheese to complement your sweet or savory preferences.
- Make ahead: Freeze unbaked scones on a tray, then transfer to a freezer bag.Bake them frozen, adding a few extra minutes to the bake time.
Serving Suggestions
Warm scones fresh from the oven and serve with a generous spoonful of clotted cream and fruit preserves, such as strawberry or raspberry jam. For a modern twist, spread goat cheese and honey or serve alongside a cup of Earl Gray tea or freshly brewed coffee. Garnish with a few edible flowers or a dusting of powdered sugar to elevate presentation for special occasions.

| Nutrient | Per Scone (approx.) |
|---|---|
| Calories | 190 |
| Protein | 4g |
| Carbohydrates | 26g |
| Fat | 7g |
For even more delightful baked treats,discover our Ultimate Batched Butter Biscuits recipe. For expert culinary science behind baking powders and dough aeration, visit King Arthur Baking’s official guide.
Q&A
Q&A: Bake Perfect Scones from Scratch – Easy Recipes Inside
Q: What’s the secret to baking perfect scones from scratch?
A: The secret lies in using cold ingredients, working quickly, and not overmixing the dough. Cold butter creates those flaky, tender layers, while minimal mixing keeps the scone light and crumbly instead of dense and tough. Think of it as a gentle dance with your dough!
Q: Can I customize the flavors in my scones?
A: Absolutely! Scones are a blank canvas waiting for your creativity. Classic add-ins include dried fruits like currants or cranberries, fresh berries, citrus zest, or even savory ingredients like cheese, herbs, or bacon bits. Just fold them in gently before shaping.
Q: Should I use baking powder or baking soda in my scones?
A: Baking powder is your best friend here because it provides a reliable rise in slightly acidic doughs. Baking soda needs an acidic ingredient to activate properly-so unless your recipe has buttermilk or yogurt, stick to baking powder for fluffier scones.
Q: How do I know when my scones are properly baked?
A: Golden brown tops and a skewer inserted into the center coming out clean are your go-to signals. They should feel firm but yield softly under gentle pressure. Don’t overbake - you want moist, tender insides with a lightly crisp crust.
Q: Can I make scones ahead of time?
A: Yes! You can prepare the dough, cut the scones, and freeze them on a baking sheet. Once frozen, transfer to a zip-top bag. Bake straight from frozen, adding a few extra minutes to the baking time. This way, fresh scones are always just minutes away.Q: What’s the ideal accompaniment for homemade scones?
A: Traditionalists love a dollop of clotted cream and a spoonful of jam. But don’t stop there-try honey, lemon curd, or even a smear of your favorite nut butter. Pair with a steaming cup of tea or freshly brewed coffee for the ultimate cozy experiance.
Q: Any tips for shaping scones without a cutter?
A: Certainly! You can shape the dough into a circle about one inch thick, then slice it like a pie into wedges. Alternatively, pat the dough into a rectangle and cut into squares or rectangles with a knife. Just be sure to handle the dough gently to keep those flaky edges intact.
Q: How do I avoid dry scones?
A: Overbaking is frequently enough the culprit. Keep an eye on your oven and remove scones as soon as they turn golden. also, ensure your dough isn’t too dry-if it feels crumbly before baking, a splash of milk or cream can bring it together perfectly.
Baking perfect scones isn’t just science; it’s a joyful ritual. With these tips and easy recipes at your fingertips, your homemade scones will be the star of every teatime!
Insights and Conclusions
Whether you’re a seasoned baker or just starting your culinary journey, mastering the art of perfect scones from scratch is a rewarding adventure that fills your kitchen with irresistible aromas and your table with warm, flaky delights. With these easy recipes in hand,you’re well-equipped to experiment,customize,and create scones that suit every taste-from classic buttery bites to adventurous berry-studded treats.So preheat your oven, gather your ingredients, and let each batch be a delicious reminder that homemade goodness is always just a whisk away. Happy baking!