power-Packed Vegan Gluten-Free Protein Recipes to Fuel You bring a fresh wave of vitality, combining nutrient-dense ingredients that transform ordinary meals into sensational, protein-rich experiences. Whether you’re seeking to nourish your body post-workout or craft a balanced meal that keeps you energized throughout the day, these creative ingredient swaps and vibrant dish ideas unlock the true potential of plant-based eating without gluten.
Prep and Cook Time
Planning: 15 minutes | Cooking: 20 minutes | Total: 35 minutes
Yield
Serves 4 generous portions
Difficulty Level
Easy to Medium – Perfect for everyday cooks looking to boost nutrition and flavor with ease
Ingredients
- 1 cup cooked quinoa (rinsed and drained for fluffiness)
- 1 cup canned chickpeas, drained and rinsed
- 2 tbsp nutritional yeast (for a cheesy, umami boost)
- 1/2 cup finely chopped kale (stems removed)
- 1/4 cup chopped red bell pepper (for vibrant color and sweetness)
- 1 tbsp tahini (creamy and rich plant-based fat)
- 2 cloves garlic, minced
- 1 tbsp fresh lemon juice (shining acidity to balance flavors)
- 1/2 tsp smoked paprika
- 1/2 tsp ground cumin
- Salt and freshly cracked black pepper, to taste
- 2 tbsp olive oil or avocado oil for sautéing
- 1/4 cup chopped fresh parsley (for garnish)
Instructions
- Heat the olive oil in a large skillet over medium heat. Add the minced garlic and sauté until fragrant but not browned, about 1 minute.
- Add the chopped kale and red bell pepper to the skillet. Sauté for 5 minutes, stirring frequently, until kale wilts and peppers soften.
- Stir in the cooked quinoa and chickpeas, breaking up any chickpeas gently with the back of your spoon. Cook for another 3 minutes to warm through.
- Sprinkle the nutritional yeast, smoked paprika, and cumin evenly over the mixture. Stir well to combine so every bite is bursting with flavor.
- Remove from heat and mix in the tahini and lemon juice. Stir thoroughly until creamy and well integrated. Season with salt and freshly cracked black pepper to taste.
- Serve promptly, garnished with fresh parsley for a pop of color and freshness.
Tips for success
- Quinoa Tip: Rinse quinoa under cold water before cooking to eliminate bitterness and achieve a fluffy texture.
- Protein Boost: For an extra punch, add roasted hemp seeds or pumpkin seeds just before serving – they add crunch and more plant protein.
- Meal Prep: This dish reheats beautifully and is perfect for packed lunches; store in an airtight container for up to 3 days.
- Flavor Variations: Swap kale for spinach or Swiss chard depending on season availability. Add a pinch of chili flakes for heat!
- Chickpea Substitute: Replace chickpeas with lentils or edamame for a different protein profile without compromising gluten-free status.
Serving Suggestions
Serve this colorful, protein-packed quinoa chickpea sauté in a wide bowl to showcase its vivid hues.Top with a drizzle of extra tahini or your favorite vegan yogurt to create a luscious creaminess. Pair with a side of roasted sweet potatoes or a crunchy cucumber salad with a lemon-tahini dressing for a complete balanced dinner. Garnish with freshly chopped parsley or cilantro and a wedge of lemon to excite the palate.

| Nutrient | Per Serving |
|---|---|
| Calories | 320 kcal |
| Protein | 15g |
| Carbohydrates | 42g |
| Fat | 8g |
Discover more wholesome vegan and gluten-free recipes to enrich your kitchen by visiting our Complete Vegan Gluten-Free Recipe Collection. For an in-depth understanding of plant-based protein benefits,explore this Healthline article on plant-based complete proteins.
Q&A
Q&A: Power-Packed Vegan Gluten-Free protein recipes to Fuel You
Q1: Why is protein notable in a vegan and gluten-free diet?
A1: Protein is essential for building and repairing tissues,supporting immune function,and maintaining muscle mass. For those following a vegan and gluten-free lifestyle, getting enough protein can be challenging because many conventional protein sources like meat, dairy, and gluten-containing grains are off the table. ThatS why incorporating diverse plant-based protein sources is key to staying energized and nourished.
Q2: What are some of the best vegan and gluten-free protein sources?
A2: Think legumes like lentils, chickpeas, and black beans; seeds such as chia, hemp, and pumpkin seeds; nuts; quinoa; tofu and tempeh; and gluten-free grains like amaranth and buckwheat. These ingredients not only pack a protein punch but also provide fiber, vitamins, and minerals.
Q3: Can I get complete protein from plant-based, gluten-free foods?
A3: Absolutely! While many plant proteins lack one or more essential amino acids individually, combining different sources throughout the day ensures you get the full spectrum of amino acids your body needs. For example, pairing quinoa (a complete protein) with beans or enjoying hemp seeds sprinkled over a salad offers balanced nourishment.
Q4: What makes a recipe “power-packed” in this context?
A4: A power-packed recipe is nutrient-dense, rich in quality protein, and easy to digest-fuel that keeps your energy steady and your body strong.In vegan gluten-free recipes, this means combining complementary proteins, including healthy fats, and using natural, whole-food ingredients to maximize health benefits.
Q5: Could you share a simple power-packed vegan gluten-free recipe?
A5: Certainly! Try this quinoa lentil salad: Cook 1 cup of quinoa and 1 cup of green lentils separately. Toss together with diced bell peppers, cherry tomatoes, chopped parsley, pumpkin seeds, and a lemon-tahini dressing. It’s colorful, filling, and delivers ample protein and fiber to power your day.
Q6: How can I make these recipes more flavorful without compromising nutrition?
A6: Herbs, spices, and citrus zest are your best friends! Garlic, cumin, smoked paprika, fresh basil, or ginger add depth and excitement. nutritional yeast can lend a cheesy umami flavor. Using flavorful dressings made from tahini, avocado, or apple cider vinegar can round out dishes beautifully without extra calories or allergens.
Q7: Are there any tips to boost protein absorption from these plant-based meals?
A7: Yes! soaking and sprouting legumes and seeds can reduce anti-nutrients like phytic acid, enhancing mineral absorption. Pairing meals with vitamin C-rich foods (like bell peppers or lemon juice) can increase iron uptake. Also, chewing thoroughly aids digestion and nutrient absorption.
Q8: How do power-packed protein meals impact energy and wellness?
A8: Balanced protein meals stabilize blood sugar, prevent mid-day energy dips, support muscle repair, and promote satiety. For vegans avoiding gluten, this means fewer cravings, sustained focus, and overall vitality-fuel that keeps you thriving no matter your lifestyle.
Embrace the vibrant world of vegan gluten-free cooking with these power-protein recipes, and let every meal be an energizing celebration of health and flavor!
Closing Remarks
As you embark on your journey to nourish your body with clean, plant-powered energy, these vegan gluten-free protein recipes stand ready to fuel your every move. Whether you’re hitting the gym, powering through a busy workday, or simply seeking wholesome meals that satisfy and sustain, these vibrant dishes prove that eating well doesn’t have to be complicated or mundane. Embrace the bounty of nature’s finest ingredients, and let your meals be a celebration of vitality, flavor, and resilience-because fueling your body right is the ultimate form of self-care. Here’s to vibrant health, boundless energy, and a deliciously empowered you!
Delicious Gluten-Free Vegan banana Oat Chocolate Chip Muffins
delicious Gluten-Free Vegan Banana Oat Chocolate Chip muffins are a delightful treat that perfectly marries wholesome ingredients with irresistible flavors. Inspired by my journey to craft a snack that’s both nourishing and indulgent, these muffins celebrate the natural sweetness of ripe bananas combined with the hearty texture of gluten-free oats.Each bite offers a symphony of soft, fluffy crumb dotted with melty vegan chocolate chips-making them an ideal companion for breakfast, an afternoon pick-me-up, or a guilt-free dessert.
Prep and Cook Time
- Preparation: 15 minutes
- Baking: 22-25 minutes
- Total time: 40 minutes
Yield
Makes 12 generously sized muffins
Difficulty Level
Easy – perfect for beginner and seasoned bakers alike
Ingredients
- 2 large ripe bananas,mashed (about 1 cup)
- 1 ½ cups gluten-free rolled oats,blitzed into flour
- ½ cup almond flour (for extra moisture and tenderness)
- ¼ cup organic coconut sugar (natural sweetness,adjustable)
- 1 tsp baking powder (gluten-free)
- ½ tsp baking soda
- ½ tsp ground cinnamon (optional,adding warmth)
- ¼ tsp sea salt
- ⅓ cup unsweetened almond milk (or any plant-based milk)
- 2 tbsp melted coconut oil
- 1 tsp vanilla extract
- ¾ cup high-quality vegan chocolate chips (see note below)
Instructions
- Preheat your oven to 350°F (175°C) and line a 12-cup muffin tray with paper liners or grease with coconut oil.
- place the gluten-free rolled oats in a blender or food processor and pulse until they form a fine oat flour.
- In a large bowl, whisk together the oat flour, almond flour, coconut sugar, baking powder, baking soda, cinnamon, and sea salt until evenly combined.
- in a separate bowl, mash the ripe bananas until smooth, then stir in the almond milk, melted coconut oil, and vanilla extract.
- Pour the wet ingredients into the dry ingredients and gently fold them together until just combined-avoid overmixing to maintain a tender crumb.
- Fold in the vegan chocolate chips, reserving a few to sprinkle on top for a stunning finish.
- Divide the batter evenly among the muffin cups, filling each about three-quarters full.
- Sprinkle the reserved chocolate chips on top of each muffin for a tempting visual and extra melty pockets.
- Bake for 22-25 minutes, or until a toothpick inserted into the center comes out clean with just a few moist crumbs attached.
- Allow the muffins to cool in the pan for 10 minutes, then transfer to a wire rack to cool completely. This prevents sogginess and keeps the texture perfect.
Tips for Baking Moist and Fluffy Muffins Every Time
- Use very ripe bananas (with plenty of brown spots) to naturally enhance sweetness and moisture without added sugar.
- Blending the oats into flour ensures a consistent texture and prevents dense patches.
- Do not overmix the batter; stir until ingredients are just combined for loftier muffins.
- Adding almond flour increases tenderness, balancing the heartiness of oats.
- Try warming your almond milk slightly to activate the baking soda and powder better, providing extra rise.
Crafting the Perfect Texture with Gluten-Free Oats and Ripe bananas
Combining gluten-free oats with ripe bananas creates a unique texture that’s both sturdy and soft.Oats bring a subtle chewiness and hearty bite, while bananas infuse every crumb with natural moisture, ensuring the muffins stay fresh and juicy even days after baking. If you want to further enhance texture,sprinkle a handful of chopped walnuts or Pecans into the batter for a delightful crunch or swap almond flour with oat bran for extra fiber.
Balancing Sweetness Naturally for a Healthier Muffin Experience
These muffins rely on the natural sweetness of ripe bananas and a touch of coconut sugar, a less refined sweetener with a lower glycemic index then white sugar. this approach maintains flavor without overwhelming added sugars, perfect for those mindful of healthier choices. Feel free to adjust the sweetness by swapping coconut sugar for maple syrup or agave nectar-just reduce other liquid accordingly to keep batter consistency.
Choosing the Best Vegan Chocolate Chips for Ultimate Indulgence
The choice of vegan chocolate chips makes a difference in every bite of your muffin. Opt for ethical, high-cocoa content vegan chips for deep richness and smooth melting. Brands free from dairy and palm oil offer the best guilt-free indulgence, with hints of dark chocolate cutting through the sweetness perfectly. You can also experiment with adding cocoa nibs or chopped dairy-free dark chocolate chunks for texture and intensity.
Chef’s Notes
- To make these muffins nut-free,substitute almond flour with an additional ¼ cup oat flour or gluten-free all-purpose flour.
- Make-ahead tip: Store cooled muffins in an airtight container and refrigerate for up to 5 days or freeze individually wrapped for up to 3 months.
- For a more decadent twist, fold in 2 tablespoons of dairy-free peanut butter into the batter before baking.
- Swap coconut oil for melted vegan butter to introduce a subtle buttery flavor.
Serving Suggestions
For a picture-perfect presentation, serve these muffins with a dusting of powdered coconut sugar or a light drizzle of vegan chocolate sauce. They pair beautifully with a hot cup of vanilla almond milk latte or a fresh herbal tea. Garnish with a small slice of banana and a few chocolate chips on the side for a charming touch that invites indulgence.

| Nutrient | Per muffin |
|---|---|
| Calories | 180 kcal |
| protein | 3 g |
| Carbohydrates | 30 g |
| Fat | 6 g |
| Fiber | 4 g |
Ready to explore more wholesome baking? Try our Gluten-Free Vegan Blueberry Muffins recipe for another fruity favorite.
Q&A
Q&A: All About Delicious Gluten-Free Vegan Banana Oat Chocolate Chip Muffins
Q1: What makes these banana oat chocolate chip muffins both gluten-free and vegan?
A1: These muffins swap out conventional wheat flour for nutrient-packed oats, naturally gluten-free when certified, and ditch eggs and dairy in favor of plant-based ingredients like mashed bananas and plant milk. this combination ensures everyone-from celiacs to vegans-can enjoy a moist, flavorful treat without worries.
Q2: How do bananas contribute to the texture and taste of these muffins?
A2: Bananas are the unsung heroes here! They add natural sweetness,moisture,and that tender crumb everyone loves in a muffin. Plus, they act as a natural binder, helping ingredients meld together smoothly without the need for eggs.
Q3: Can I use regular chocolate chips rather of vegan ones?
A3: While regular chocolate chips will work, vegan chocolate chips keep this recipe 100% plant-based. They’re free from dairy and sometimes expensive emulsifiers too. For a small splurge, you get creamy, dairy-free bursts of chocolate that keep the muffins aligned with vegan values.
Q4: How do I ensure my oats are truly gluten-free?
A4: Oats themselves don’t contain gluten, but cross-contamination is common during processing. Look for oats labeled “gluten-free” on the package.This certification means they’ve been processed in gluten-free facilities-safe for those with gluten sensitivities.
Q5: Can these muffins be frozen for later?
A5: Absolutely! After baking, let the muffins cool completely, then store them in an airtight container or freezer bag. Pop them in the freezer for up to three months.When ready to enjoy, thaw at room temperature or warm gently in the oven for that fresh-baked magic.
Q6: What’s the secret to getting the perfect rise without eggs?
A6: Baking soda and apple cider vinegar team up in this recipe, creating a bubbly reaction that gives your muffins a fluffy lift.Combined with the moisture from bananas and plant milk, this natural combo ensures tender, airy muffins every time.
Q7: Can I tweak the recipe for added nutrition?
A7: Definitely! Toss in a handful of chopped nuts for crunch, sprinkle chia or flax seeds for omega-3s, or add a dash of cinnamon for warmth. Each addition can elevate both flavor and nutrition-making these muffins a powerhouse snack!
Q8: Are these muffins suitable for kids?
A8: Kids love them! Sweet,chocolaty bites packed with wholesome ingredients make these muffins a perfect lunchbox treat or after-school snack. Plus, knowing they’re free from gluten and animal products gives parents peace of mind.
Q9: How do these muffins compare nutritionally to traditional muffins?
A9: Swapping refined flour and butter for oats and bananas boosts fiber content and reduces unhealthy fats. The natural sweetness means less added sugar, and with plant-based ingredients, these muffins are easier to digest and great for anyone looking for a wholesome, guilt-free indulgence.
Q10: What’s the best way to enjoy these muffins?
A10: Wonderfully versatile! Have them warm for breakfast with a smear of almond butter, pack them for a midday energy boost, or serve them alongside a cup of tea for a cozy afternoon treat.No matter when, these muffins never disappoint!
The Conclusion
Whether you’re navigating dietary restrictions or simply seeking a wholesome treat, these Delicious Gluten-Free Vegan Banana Oat Chocolate Chip Muffins prove that indulgence and nutrition can coexist beautifully. With the natural sweetness of ripe bananas, the hearty goodness of oats, and just the right touch of chocolate, each muffin offers a perfect bite of comfort and energy. easy to whip up and satisfying to eat, they’re an ideal addition to your breakfast table, snack stash, or anytime craving. So go ahead-bake a batch, share with loved ones, and savor the delightful harmony of flavors that make healthy living both simple and scrumptious.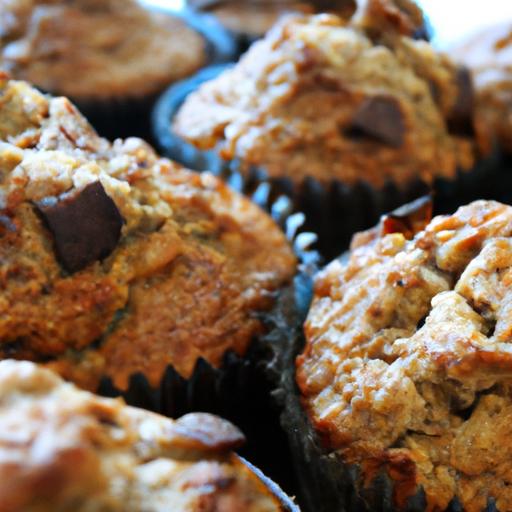
Morning Fuel: Wholesome Vegan Gluten-Free Breakfast Hash is a vibrant celebration of texture,colour,and nourishment all in one skillet. Inspired by both rustic farm breakfasts and modern plant-based cuisine, this dish combines crunchy vegetables and hearty plant-powered proteins to kickstart your day with energy and satisfaction. The interplay of roasted sweet potatoes, crisp bell peppers, and tender kale alongside protein-rich chickpeas and smoky spices makes every forkful an irresistible blend of hearty and fresh flavors.
Prep and Cook Time
Preparation: 15 minutes
Cooking: 25 minutes
Total Time: 40 minutes
Yield
Serves 4 generous portions
Difficulty Level
Easy to Medium – Perfect for any skill level
Ingredients
- 2 cups diced sweet potatoes (about 1 medium-large)
- 1 cup diced red bell pepper
- 1 cup chopped kale leaves, tough stems removed
- 1/2 cup cooked chickpeas (rinsed and drained if canned)
- 1 small red onion, finely chopped
- 2 cloves garlic, minced
- 1 tsp smoked paprika
- 1/2 tsp ground cumin
- 1/4 tsp cayenne pepper (optional, for heat)
- 2 tbsp olive oil or avocado oil
- Salt and black pepper to taste
- Fresh parsley, chopped, for garnish
- 1 tbsp nutritional yeast (optional, for an umami boost)
Instructions
- Prepare the sweet potatoes: Heat 1 tablespoon of oil in a large nonstick skillet over medium heat. Add sweet potatoes and sauté until golden and slightly crisp on the edges, about 10 minutes. stir occasionally to prevent sticking.
- add aromatics: add the chopped red onion and garlic to the skillet with the sweet potatoes.cook until onions are translucent and fragrant, about 3-4 minutes.
- Season and spice: Sprinkle smoked paprika, cumin, cayenne, salt, and pepper over the vegetables. Stir well to evenly coat the mix with spices, releasing their fragrance.
- incorporate bell peppers and chickpeas: Toss in the diced bell peppers and chickpeas. Continue cooking for 5 minutes, allowing the bell peppers to soften while retaining their crunch and the chickpeas to warm through.
- Add kale and finish: Stir in the kale, cooking just until wilted, about 2-3 minutes. If the skillet looks dry, dribble the remaining oil to keep ingredients glistening and prevent sticking.
- Final flavor boost: Stir in nutritional yeast for a subtle cheesy note, if desired. Adjust seasoning with additional salt and pepper to your taste.
- Serve and garnish: Transfer to plates, garnish with freshly chopped parsley, and enjoy the vibrant colors and textures.
Tips for Success
- Maximize crunch: Par-cook the sweet potatoes by microwaving for 2 minutes before sautéing to ensure a tender inside and crisp outside.
- Protein variations: Swap chickpeas with black beans,lentils,or firm tofu cubes for a different protein punch without losing the plant-powered essence.
- Meal prep: Store cooled hash in airtight containers for up to 4 days. Reheat gently in a skillet or microwave to maintain texture.
- Add a zing: A squeeze of fresh lemon or a drizzle of hot sauce elevates the flavors and adds freshness.
- Don’t overcrowd the pan: Maintain space to allow vegetables to brown properly instead of steaming.
Serving Suggestions
This wholesome vegan gluten-free breakfast hash shines when paired with creamy avocado slices or a cooling cashew sour cream. For added richness, sprinkle hemp seeds or toasted pumpkin seeds on top, enhancing texture and nutrition. Serve alongside a side of gluten-free toast or wrapped inside a warm corn tortilla for a portable breakfast. Brighten the plate with microgreens or cilantro for a fresh herbal finish.

| Nutrient | Per Serving |
|---|---|
| Calories | 280 kcal |
| Protein | 10 g |
| Carbohydrates | 40 g |
| fat | 8 g |
| Fiber | 7 g |
Looking to further explore nutritious and colorful vegan breakfasts? Check out our Vegan Gluten-Free Oatmeal Bowls for more inspiration. For additional insights on plant-powered protein, the Healthline article on vegan protein sources is an excellent resource to deepen your knowledge.
Q&A
Q&A: Morning Fuel – Wholesome Vegan Gluten-Free Breakfast Hash
Q1: what makes this breakfast hash a great morning fuel?
A1: This hash is packed with nutrient-dense veggies, plant-based protein, and wholesome spices that awaken your senses and energize your body. It’s a vibrant, colorful dish designed to kickstart your metabolism and keep hunger at bay, making your morning both productive and delicious.
Q2: How do you ensure the hash is both vegan and gluten-free?
A2: The magic lies in choosing ingredients that naturally fit both diets. We use fresh vegetables, crispy potatoes or sweet potatoes, beans or tofu for protein, and flavor everything with herbs and spices – all without any animal products or gluten grains. this way, it’s safe, healthy, and inclusive for various dietary needs.
Q3: Which veggies work best in a breakfast hash?
A3: Think rainbow on your plate! Bell peppers, zucchini, cherry tomatoes, spinach or kale, onions, and mushrooms add layers of texture, flavor, and color. Each bite delivers vitamins, antioxidants, and fiber, making your morning meal nourishing and satisfying.Q4: Can I prepare this hash ahead of time?
A4: Absolutely! This hash tastes even better the next day as the flavors meld together. You can prep all your veggies the night before and store them in the fridge. In the morning, just sauté everything quickly, and voilà – a hassle-free nutritious breakfast that fits even the busiest mornings.
Q5: How can I spice up my morning hash for extra flavor?
A5: Play with spices like smoked paprika, cumin, turmeric, or chili flakes for warmth and depth.A dash of nutritional yeast lends a cheesy, umami kick without dairy. Fresh herbs like cilantro or parsley brighten the dish, and a squeeze of lemon or a drizzle of hot sauce adds lively contrast.
Q6: Is this breakfast hash good for weight management?
A6: Yes! With its balance of fiber-rich veggies,plant protein,and healthy fats (like olive oil or avocado),this hash promotes satiety and steady blood sugar levels. Fueling your day with wholesome, unprocessed ingredients helps curb cravings and supports mindful eating habits.
Q7: How can beginners make this hash without feeling overwhelmed?
A7: Start simple: chop your favorite veggies, roast or pan-fry cubed potatoes until crispy, then toss everything together with your chosen seasonings. There’s no perfect recipe - customize it freely, and enjoy the process of creating a nourishing, colorful plate to brighten your morning.
Q8: What beverage pairs best with this vegan gluten-free breakfast hash?
A8: A refreshing green smoothie, a robust cup of herbal tea, or a freshly brewed coffee with plant-based milk complements the hearty flavors perfectly. These choices hydrate, energize, and round out your wholesome breakfast ritual.
Bright, bold, and bursting with life – this vegan gluten-free breakfast hash is your new morning go-to, fueling both body and soul with every savory bite!
Wrapping Up
As the morning sun spills its golden light across your kitchen counter, this wholesome vegan gluten-free breakfast hash stands ready to fuel your day with vibrant flavors and nourishing ingredients. More than just a meal,it’s a celebration of mindful eating – colorful,comforting,and crafted to energize your body without compromises. Whether you’re vegan, gluten-free, or simply seeking a fresh start to your mornings, this hash offers a delicious invitation to embrace health, happiness, and wholehearted mornings. So go ahead, dig in, and let every bite be a spark that powers your day forward.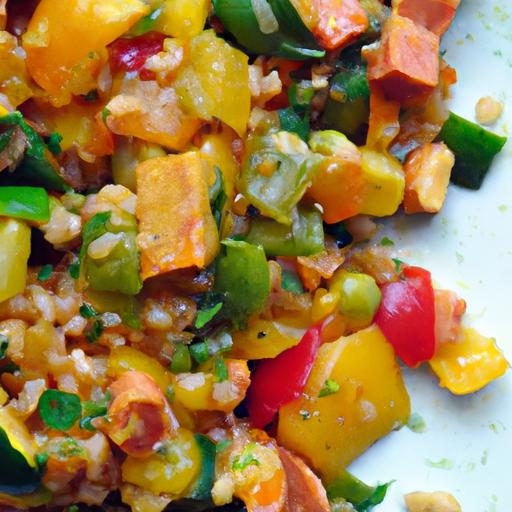
Zesty Lemon garlic Green Beans introduce a vibrant twist to a classic vegetable side, balancing bright citrus notes with the deep umami of garlic.This dish, beloved for its simplicity and bold flavor, transforms humble green beans into a star of any table, perfectly suited for vegan and gluten-free lifestyles.Whether you’re looking for a fresh, light side or a zesty addition to your meal, these green beans deliver crisp texture and tangy appeal that awaken the palate.
Prep and Cook Time
- Planning: 10 minutes
- Cooking: 12 minutes
- Total Time: 22 minutes
Yield
Serves 4 as a side dish
Difficulty Level
Easy
Ingredients
- 1 lb fresh green beans, trimmed and rinsed
- 3 cloves garlic, minced
- 1 large lemon, zested and juiced
- 2 tbsp olive oil (extra virgin preferred)
- 1/4 tsp sea salt, adjust to taste
- 1/8 tsp freshly ground black pepper
- 1 tbsp toasted sliced almonds (optional garnish)
- Fresh parsley, finely chopped for garnish
Instructions
- Blanch the green beans: Bring a large pot of salted water to a boil.Add the green beans and cook for 3-4 minutes until they turn bright green and begin to soften but remain crisp. Immediately drain and plunge into an ice bath to stop cooking and preserve that vibrant hue.
- Prepare the lemon garlic mixture: In a small bowl, combine the minced garlic, lemon zest, and lemon juice. Set aside to let flavors meld.
- Sauté the garlic: Heat olive oil in a large skillet over medium heat. Add the garlic and sauté until fragrant and lightly golden, about 1-2 minutes. Be careful not to burn the garlic, as it will turn bitter.
- Add the green beans: Drain the blanched green beans and add them to the skillet. Toss gently to coat with olive oil and garlic. Sauté for 4-5 minutes, stirring occasionally until beans develop slight browning and crisp-tender texture.
- Finish with lemon and seasoning: Pour the lemon juice and zest mixture over the green beans. Sprinkle with sea salt and black pepper. Toss well to evenly distribute the zesty flavors.
- Serve: Transfer to a serving dish and garnish with toasted almonds and freshly chopped parsley for added crunch and freshness.
Chef’s Notes & Tips for Success
- For crunchier beans: Skip the blanching and roast green beans under high heat for 8-10 minutes instead; it adds a lovely caramelized edge.
- Garlic option: Use roasted garlic for a sweeter, milder garlic flavor that complements lemon beautifully.
- Make-ahead tip: Prepare the lemon garlic mix up to 24 hours prior for deeper flavor infusion; store sealed in the refrigerator.
- Adjust tang: Add a touch of maple syrup or agave if lemon’s acidity feels too sharp.
- Substitutions: Snap peas or asparagus make excellent alternatives when in season.
Serving Suggestions
This zesty blend shines alongside grilled tofu, quinoa bowls, or your favorite hearty vegan mains.For a festive presentation, plate green beans in an elongated dish and sprinkle with a pinch of smoked paprika and lemon wedges on the side. Add a final drizzle of high-quality olive oil for sheen and richness. Perfect for casual dinners or holiday spreads, these green beans bring both color and bright flavor to the table.

| Nutrient | Per Serving |
|---|---|
| Calories | 95 kcal |
| Protein | 3 g |
| Carbohydrates | 8 g |
| Fat | 7 g |
| Fiber | 3 g |
Green beans are a powerhouse of vitamins A, C, and K, making this vegan and gluten-free recipe not just delicious but nourishing. Learn more about integrating leafy greens into your diet in our vegan veggie side dishes guide. For extensive nutrition details on green beans, visit the USDA FoodData Central.
Q&A
Q&A: Zesty Lemon Garlic Green Beans - A Vegan & Gluten-Free Delight
Q1: What makes these Zesty Lemon Garlic green Beans stand out from the usual vegetable side dishes?
A1: It’s all about the vibrant burst of flavor! The zesty lemon adds a refreshing tang, while the garlic infuses a savory warmth that elevates humble green beans into a star player on your plate. Plus, they’re both vegan and gluten-free, making them a versatile treat for all dietary preferences.
Q2: Are these green beans suitable for someone following a strict vegan diet?
A2: Absolutely! The recipe relies solely on plant-based ingredients-think fresh green beans, ripe lemon juice, fragrant garlic, and quality olive oil. No animal products, no compromise on flavor.
Q3: How can I ensure the green beans retain their vibrant green color and crisp texture?
A3: The secret is in the technique! Blanch the green beans briefly in boiling water, then plunge them into ice water to stop the cooking instantly. This locks in their bright color and satisfying crunch before tossing them with the zesty lemon-garlic dressing.
Q4: Can I customize this recipe to add more depth or variety?
A4: Definitely! Try sprinkling toasted almond slivers or pine nuts for a nutty crunch. A sprinkle of red pepper flakes can introduce a subtle heat, or fresh herbs like parsley or basil can add aromatic layers. The basic zingy foundation is a fantastic canvas for your creativity.
Q5: How does this dish fit into a gluten-free lifestyle?
A5: Since green beans, fresh lemon, garlic, and olive oil are naturally gluten-free, this dish circumvents any gluten concerns. Just ensure any additional seasonings or toppings are labeled gluten-free, and you’re set for a safe, delicious side.
Q6: Is this recipe quick and practical for everyday cooking?
A6: Yes! It’s a breeze to prepare-perfect for busy weeknights or last-minute guests. From blanching to flavoring, it takes less than 20 minutes, delivering a fresh, healthy, and flavorful complement to any meal.
Q7: What dishes pair best with Zesty Lemon Garlic Green Beans?
A7: They’re a harmonious partner for grilled tofu, chickpea salads, quinoa bowls, or even hearty lentil stews. Their bright, tangy character cuts through richer flavors and adds a refreshing crunch to your plate.
Enjoy this vibrant, nutrient-packed delight that proves healthy eating can be bursting with flavor and fun!
Final Thoughts
In the vibrant world of plant-based cooking, these Zesty Lemon Garlic Green Beans stand out as a shining example of how simple ingredients can create unusual flavor. Vegan and gluten-free,they not only cater to diverse dietary needs but also bring a refreshing twist to any meal. Whether you’re seeking a bright, tangy side or a nourishing way to elevate your greens, this recipe proves that healthy eating doesn’t have to be bland or complex. So next time you want to add a little zing to your plate, let these lively green beans inspire your kitchen creativity-and savor the delicious balance of zest, garlic, and wholesome goodness.
Nourish Naturally: Embracing the Power of Whole Foods for Vibrant Health
Nourish Naturally is not just a mantra but a delicious reality with this vibrant Quinoa and Roasted Sweet Potato Buddha Bowl.Inspired by the plant-rich diets of Mediterranean and South American cultures, this recipe is a colorful festivity of whole foods that balance macronutrients while keeping every bite gluten-free and packed with natural energy boosters. The sweet earthiness of roasted sweet potatoes paired with protein-rich quinoa and antioxidant-packed leafy greens creates a wholesome bowl that fuels your body and uplifts your energy naturally.
Prep and Cook Time
Preparation: 15 minutes
Cooking: 30 minutes
Total Time: 45 minutes
Yield
Serves 4 hearty portions
Difficulty Level
Easy - Perfect for weeknight dinners or meal prep
Ingredients
- 1 cup quinoa,rinsed and drained
- 2 medium sweet potatoes,peeled and cubed (about 3 cups)
- 2 tablespoons olive oil,divided
- 1 teaspoon smoked paprika
- 1 teaspoon ground cumin
- 1/2 teaspoon sea salt
- 4 cups mixed baby kale and spinach
- 1 cup cooked chickpeas (canned,rinsed and drained)
- 1/2 cup pomegranate seeds for a burst of color and antioxidants
- 1/4 cup toasted pumpkin seeds for added crunch and zinc
- 1 ripe avocado,sliced
- Juice of 1 lemon
- 2 tablespoons tahini
- 2 cloves garlic,minced
- Fresh parsley or cilantro for garnish
- fresh black pepper,to taste
Instructions
- Preheat your oven to 425°F (220°C). toss the cubed sweet potatoes with 1 tablespoon olive oil,smoked paprika,cumin,and sea salt. Spread evenly on a baking sheet. Roast for 25-30 minutes, turning halfway, until tender and caramelized at the edges.
- While the sweet potatoes roast, cook the quinoa: combine rinsed quinoa with 2 cups water in a medium saucepan. Bring to a boil, then reduce heat to low, cover, and simmer for 15 minutes. Remove from heat, fluff with a fork, and set aside.
- In a small bowl, whisk together tahini, lemon juice, minced garlic, remaining 1 tablespoon olive oil, and a splash of water to reach a creamy drizzle consistency. Season with a pinch of salt.
- In a large mixing bowl, combine the baby kale and spinach with chickpeas. Toss lightly to mix. Distribute the greens evenly over four serving bowls.
- Add the warm roasted sweet potatoes and fluffy quinoa over the greens. Top each bowl with sliced avocado, pomegranate seeds, and toasted pumpkin seeds for texture contrast.
- Drizzle the tahini-lemon dressing generously across each bowl. Finish with fresh parsley or cilantro and freshly cracked black pepper.
Tips for Success
- For a nutty flavor, toast your quinoa for 2-3 minutes in a dry skillet before cooking.
- Swap sweet potatoes with butternut squash or beets for fun seasonal variations.
- Meal prep advantage: keep components separate and assemble just before serving to preserve freshness and texture.
- Ensure chickpeas are well rinsed and drained to reduce any canned saltiness.
- If tahini is too thick, add warm water a teaspoon at a time to loosen it and intensify flavor.
Serving Suggestions
Serve this nourishing bowl with a side of gluten-free flatbread or crisp apple slices for a balanced, energizing meal. Garnish with a wedge of lemon to brighten flavors at the table.Ideal as a vibrant lunch or a light yet satisfying dinner, this bowl pairs beautifully with a chilled herbal iced tea or sparkling water infused with fresh mint.

| Nutrient | Per Serving |
|---|---|
| Calories | 420 |
| Protein | 12g |
| Carbohydrates | 58g |
| Fat | 14g |
| Fiber | 10g |
Explore more gluten-free meal plans to keep your plant-based lifestyle vibrant and flavorful.
For nutritional guidance on whole foods, visit the Academy of Nutrition and Dietetics.
Q&A
Q&A: Nourish Naturally – Your Guide to Healthy Plant-Based Gluten-Free Living
Q1: What does “plant-based gluten-free living” really mean?
A1: Plant-based gluten-free living is a lifestyle choice that focuses on consuming foods derived entirely from plants-fruits, vegetables, legumes, nuts, seeds-while also eliminating gluten, a protein found in wheat, barley, and rye. It’s a nourishing approach that embraces vibrant, whole foods and caters especially to those with gluten sensitivities or celiac disease, without sacrificing flavor or variety.
Q2: Why choose a plant-based gluten-free diet?
A2: This diet offers a powerhouse of health benefits! By combining the nutrient density of plants with the gluten-free commitment, you reduce exposure to inflammatory gluten, increase fiber intake, and flood your body with antioxidants and essential vitamins. Plus, it supports digestion, heart health, and lasting eating habits-kind of a win-win-win!
Q3: Isn’t gluten-free plant-based eating limiting? How do I get variety?
A3: Far from limiting-it’s a playground of colorful, wholesome ingredients! Think quinoa, chickpeas, lentils, sweet potatoes, kale, and a rainbow of fruits.You can experiment with exotic grains like amaranth or teff, whip up creamy nut-based sauces, or bake with almond and coconut flours. Variety isn’t just possible; it’s a delicious adventure.Q4: How can I ensure I’m getting enough protein on this diet?
A4: Protein is plentiful in plant-based foods! Lentils, chickpeas, black beans, tofu, tempeh, quinoa, nuts, and seeds all pack a protein punch. Combining different plant proteins throughout the day ensures you get a complete amino acid profile.Think of your meals as a colorful mosaic-each tile contributes to the whole picture of nourishment.
Q5: What about gluten cross-contamination? How do I stay safe?
A5: vigilance is key. Always read labels carefully and choose certified gluten-free products when possible. In your kitchen, use separate utensils, toasters, and cutting boards if gluten-containing foods are present. Restaurants? don’t hesitate to ask questions about food prep or request gluten-free options. Knowledge is your best tool here.
Q6: Can this lifestyle support weight loss or fitness goals?
A6: Absolutely! A plant-based gluten-free diet is naturally rich in fiber and low in processed sugars and unhealthy fats, which can boost metabolism, promote satiety, and enhance energy levels.Coupled with an active lifestyle, it can definitely help you reach and maintain your health and fitness objectives.
Q7: Any tips for beginners looking to transition smoothly?
A7: Start small and savor the journey.Begin by swapping one meal a day with a plant-based gluten-free option. Explore new recipes, experiment with herbs and spices, and prioritize whole foods over processed substitutes. Meal prepping and batch cooking can keep things stress-free. And remember-curiosity and creativity are your best friends!
Q8: Where can I find inspiration and reliable resources?
A8: Connect with communities online, follow plant-based chefs who emphasize gluten-free cuisine, and dive into cookbooks dedicated to this lifestyle. Websites, blogs, and social media channels can spark culinary creativity, while nutritionists knowledgeable in both plant-based and gluten-free diets can provide personalized guidance.
Nourish Naturally isn’t just a diet-it’s a vibrant way to honor your body, delight your taste buds, and embrace wellness one gluten-free, plant-powered bite at a time.
To Conclude
As you embark on your journey toward vibrant health with plant-based, gluten-free living, remember that nourishment is more than just a diet-it’s a celebration of nature’s bounty and your body’s incredible potential to thrive. By embracing whole foods, colorful ingredients, and mindful choices, you’re not only supporting your well-being but also honoring a lifestyle rooted in compassion and sustainability. Let “Nourish Naturally” be your steadfast companion,guiding you through delicious discoveries and empowering habits that make every meal a step closer to your healthiest,happiest self. Here’s to flourishing with every bite-naturally, fully, and joyfully.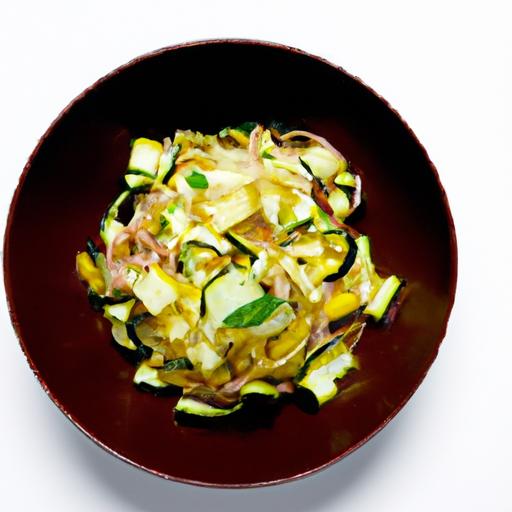
Delicious Gluten-Free Vegan Stir Fry Sauce: flavor Made Easy
Delicious gluten-free vegan stir fry sauce transforms everyday vegetables and proteins into a vibrant, mouthwatering dish that bursts with harmony. Inspired by the rich traditions of Asian cooking, this sauce embodies the perfect balance of sweet and savory, crafted simply to elevate any stir fry experience. whether you’re a seasoned cook or just beginning your vegan journey, this easy-to-make sauce promises layers of flavor with every bite.
Prep and Cook Time
- Prep Time: 10 minutes
- Cook Time: 5 minutes
- Total Time: 15 minutes
Yield
- Serves 4 generously
Difficulty Level
- Easy
Ingredients
- 1/3 cup tamari (gluten-free soy sauce) - for that umami richness
- 2 tablespoons maple syrup – to add natural sweetness and depth
- 1 tablespoon rice vinegar – brightens and balances the sauce
- 1 teaspoon toasted sesame oil – infuses a fragrant nuttiness
- 2 cloves garlic, minced – fresh pungency
- 1 teaspoon fresh ginger, grated – warming and slightly spicy undertone
- 1/2 teaspoon chili flakes (optional) – for a subtle kick
- 1/4 cup vegetable broth – keeps the sauce smooth and light
- 1 teaspoon cornstarch mixed with 1 tablespoon cold water – for thickening (ensure gluten-free label)
Instructions
- Mix the base: in a small bowl, whisk together tamari, maple syrup, rice vinegar, and vegetable broth.This combination lays the foundation of sweet and savory balance.
- Sauté aromatics: Heat a tablespoon of neutral oil in a skillet over medium heat. Add minced garlic and grated ginger, stirring frequently until fragrant-about 1 to 2 minutes. Be careful not to burn the garlic.
- Add heat (optional): Sprinkle in chili flakes for a gentle warmth,stirring to combine.
- Pour in the sauce: Pour the tamari mixture into the skillet, stirring continuously.
- Thicken the sauce: Stir in the cornstarch slurry slowly, mixing well. cook, stirring constantly, until the sauce thickens-about 2 to 3 minutes.
- Finish with sesame oil: Turn off the heat and drizzle the toasted sesame oil to enhance aroma and round out the flavor.
- Toss and coat: Add your cooked vegetables and proteins directly into the skillet.Toss gently to ensure every piece is bathed in the sauce’s luscious glaze.
Chef’s Notes: Tips for Success
- Maple syrup: Can be substituted with date syrup or coconut sugar for varied sweetness profiles.
- Tamari: Opt for a low-sodium version to control saltiness.
- Thickening: If you prefer a thinner sauce, reduce or omit the cornstarch.
- Make ahead: This sauce keeps well in the fridge for up to 4 days-just give it a rapid stir before reheating.
- Flavor layering: For extra dimension, add a splash of freshly squeezed lime juice or a pinch of black pepper at the end.
Pairing Your Sauce with Vegetables and Proteins for Maximum Taste Impact
Pairing this delicious gluten-free vegan stir fry sauce with colorful, crisp vegetables enhances both texture and flavor. Think crunchy bell peppers, tender snap peas, and earthy mushrooms. For protein, firm tofu, tempeh, or seitan alternatives complement the sauce’s umami notes and soak up its richness beautifully. Sear proteins first for a caramelized surface, then stir in the sauce for maximum absorption. the result is a stunning, well-rounded plate bursting with vibrancy and taste.
Serving Suggestions
- Serve hot over steamed jasmine or brown rice for a comforting meal.
- Garnish with freshly chopped scallions, toasted sesame seeds, and a sprinkle of crushed peanuts to add crunch and freshness.
- Accompany with a side of steamed edamame or light miso soup for a complete dining experience.
| Nutrient | Per Serving |
|---|---|
| Calories | 110 kcal |
| Protein | 2 g |
| Carbohydrates | 16 g |
| Fat | 3 g |

For more inspiration on vegan sauces, check out our complete guide to vegan sauces, and explore the health benefits of tamari here.
Q&A
Q&A: Delicious Gluten-Free Vegan Stir Fry Sauce – Flavor Made Easy
Q1: What makes this stir fry sauce both gluten-free and vegan?
A: This sauce avoids common allergens like soy sauce that frequently enough contain gluten, using tamari or coconut aminos rather, which are naturally gluten-free. Plus, it skips any animal-derived ingredients like fish sauce or honey, relying on plant-based staples such as maple syrup and fresh ginger-making it perfectly vegan and bursting with flavor.
Q2: Can I really get bold, savory flavors without traditional soy sauce or animal products?
A: Absolutely! The key lies in balancing salty, sweet, tangy, and umami elements.Ingredients like tamari, rice vinegar, garlic, fresh ginger, and a splash of toasted sesame oil create layers of complex flavor. nutritional yeast or mushroom powder can add that savory depth without any animal products or gluten.
Q3: How simple is the recipe-do I need fancy, hard-to-find ingredients?
A: Not at all! Most ingredients are pantry staples or easily found in any grocery store’s health food aisle. The magic comes from combining them thoughtfully. Think simple, quick, and wholesome-you can whip it up in under five minutes, no culinary degree required.
Q4: Is this sauce versatile enough for other dishes aside from stir fry?
A: Definitely! Use it as a marinade for tofu or veggies, drizzle it over grain bowls, or even toss it with noodles. Its sweet-savory zing lifts up a variety of dishes, turning everyday meals into vibrant feasts.
Q5: How do I store and reuse the sauce?
A: Store leftover sauce in an airtight container in the fridge for up to a week. Shake or stir before using as the ingredients might separate. It’s a perfect flavor boost ready to go whenever you want to jazz up a quick meal.
Q6: Any tips for customizing the sauce to my taste?
A: Yes! Crank up the heat with chili flakes or fresh chopped chili, add a squeeze of fresh lime for brightness, or a spoonful of nut butter for creaminess. The beauty of this sauce is its versatility-adjust it to match your mood and pantry perfectly.
Q7: Will this sauce work well with all kinds of vegetables and proteins?
A: You bet! Whether you’re stir frying broccoli, bell peppers, snap peas, or tofu, tempeh, or seitan, this sauce harmonizes beautifully. Its balanced flavor profile enhances, not overwhelms, letting your ingredients shine.
Use this easy, luscious gluten-free vegan stir fry sauce as your secret weapon for quick, flavorful, and joyful cooking. Say goodbye to bland meals and hello to vibrant nutrition made simple!
The Conclusion
Bringing together the vibrant flavors of a perfectly balanced stir fry sauce doesn’t have to be complicated-especially when it’s gluten-free and vegan.This delicious sauce proves that clean, wholesome ingredients can create bold, satisfying tastes that elevate any vegetable or protein. Whether you’re a seasoned plant-based chef or just beginning your culinary adventure, this easy-to-make sauce invites you to savor every bite without compromise. So next time you stir up a quick meal, let this flavorful, allergen-friendly sauce be your secret ingredient to effortless, mouthwatering magic. Happy cooking!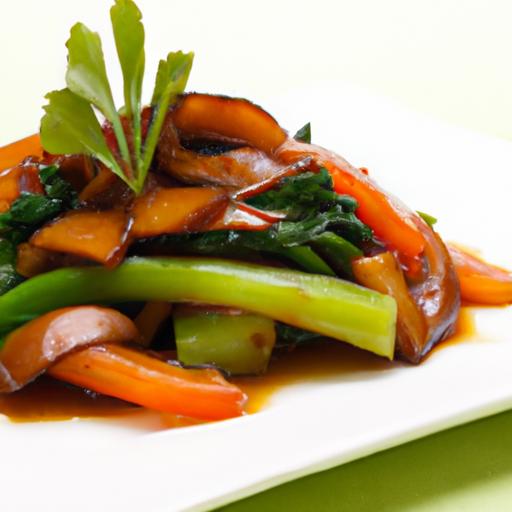
Maebells’ Crispy Brussels Sprout Fried Rice masterfully marries texture and vibrant flavors, crafting a unique gluten-free experience that elevates everyday ingredients into a culinary revelation.This dish began as an inspired solution to bring crispy,wholesome greens into the comforting embrace of fried rice,without sacrificing that essential satisfying crunch and bold umami pop. Every bite reveals layers of nuttiness from toasted sprouts, the subtle sweetness of caramelized onions, and the fragrant depth of tamari, creating a delightful symphony of taste and texture.
Prep and Cook Time
- planning: 15 minutes
- Cooking: 20 minutes
- Total: 35 minutes
Yield
Serves 4 generous portions
Difficulty Level
Easy to Medium – perfect for home cooks looking to elevate their plant-based repertoire with a gluten-free twist.
Ingredients
- 2 cups cooked jasmine rice, chilled (preferably day-old)
- 3 cups Brussels sprouts, thinly sliced
- 2 tbsp gluten-free tamari sauce
- 1 medium yellow onion, diced
- 3 cloves garlic, minced
- 1 tbsp fresh ginger, grated
- 2 large eggs, lightly beaten (optional for vegan option)
- 3 tbsp avocado oil or other neutral oil
- 1/4 cup green onions, chopped
- 1 tsp toasted sesame oil
- 1/4 cup chopped roasted cashews or almonds (optional for crunch)
- fresh lime wedges for serving
- Salt and freshly ground black pepper to taste
Instructions
- Prepare your ingredients: Thinly slice Brussels sprouts to ensure they crisp up beautifully during cooking. Use chilled, day-old rice to prevent clumping and achieve that classic fried rice texture.
- Heat 2 tablespoons avocado oil in a large non-stick skillet or wok over medium-high heat. Once shimmering,add the Brussels sprouts in a single layer.Sauté, stirring occasionally, until golden and crisp, about 7 minutes. Remove and set aside.
- In the same pan, add the remaining 1 tablespoon oil. Toss in the diced onion, garlic, and grated ginger. Sauté until fragrant and slightly caramelized, about 4 minutes. Stir frequently to prevent burning.
- Push the aromatics to one side of the pan and pour in the beaten eggs, if using. Scramble gently until just cooked, then stir to combine with onions and ginger.
- Add the chilled rice to the skillet, breaking up any clumps with your spatula.Stir-fry for 3-4 minutes, allowing the rice to heat through and start to achieve a light toasted texture.
- Return the crispy Brussels sprouts to the pan. Drizzle tamari and toasted sesame oil evenly over the rice mixture. Stir continuously to coat every grain and sprout in these savory flavors.
- Season with salt and black pepper to taste, and toss in chopped green onions and toasted nuts for added crunch and dimension. Cook for a final 1-2 minutes until everything is warmed through.
- plate your dish and serve immediately with fresh lime wedges on the side to squeeze over for a shining,tangy finish.
Tips for Success
- Use chilled, leftover rice: Freshly cooked rice tends to be too soft and moist, but refrigerated rice separates easily, giving a dryer, more desirable texture.
- Thinly slice Brussels sprouts: This increases surface area for maximum crispiness and prevents sogginess.
- High heat is key: Ensure your pan is hot before adding ingredients to create beautiful caramelization without steaming.
- To make it vegan: Omit the eggs and add extra diced tofu or mushrooms for depth and protein.
- Make-ahead option: Cook Brussels sprouts and prep rice mixture a day early-reheat quickly on high heat for best results.
Serving Suggestions
This crispy, gluten-free creation shines served with a simple garnish of toasted sesame seeds or fresh cilantro leaves. Complement the bold flavors with a light cucumber salad or pickled carrots for a refreshing contrast. Add a side of steamed edamame or a citrusy avocado salad to balance the meal while enhancing its nutritional profile. To deepen the experience, a fresh squeeze of lime brightens every bite.
| Nutrient | Per Serving |
|---|---|
| Calories | 320 kcal |
| Protein | 10 g |
| Carbohydrates | 42 g |
| Fat | 11 g |
| fiber | 5 g |

For more on gluten-free cooking and insanely tasty vegetable-centric dishes, check out our gluten-free vegetable recipe collection. To deepen your knowledge of Brussels sprouts’ nutritional powerhouse benefits, visit the Healthline’s detailed guide.
Q&A
Q&A: Maebells’ Crispy Brussels Sprout Fried Rice – A Gluten-Free delight
Q1: What makes Maebells’ Crispy Brussels Sprout Fried Rice stand out from traditional fried rice dishes?
A1: Unlike the usual fried rice that banks on soy sauce and generic vegetables, Maebells’ version stars crispy Brussels sprouts, giving the dish a uniquely crunchy texture and a slightly nutty, caramelized flavor. It’s a creative twist that elevates a familiar comfort food into something vibrant and exciting.
Q2: Is this dish truly gluten-free? How dose Maebells ensure that?
A2: Absolutely! Maebells uses tamari or other certified gluten-free sauces instead of regular soy sauce, which typically contains wheat. Plus, all ingredients are carefully selected and prepared in gluten-free environments to ensure safety without compromising on taste.
Q3: Can someone new to Brussels sprouts enjoy this dish?
A3: Definitely! The roasting and frying process transforms Brussels sprouts from their usual bitter reputation into crispy, caramelized morsels that blend beautifully with the fried rice. It’s an excellent gateway dish for those curious but hesitant about Brussels sprouts.
Q4: What are the key ingredients that make this fried rice both tasty and nutritious?
A4: Apart from Brussels sprouts and gluten-free rice, the dish features fresh garlic, scallions, ginger, and a splash of gluten-free tamari. optional add-ins include eggs or tofu for protein, making it not just flavorful but well-rounded and nourishing.
Q5: Is Maebells’ Crispy Brussels Sprout Fried Rice suitable for other dietary restrictions?
A5: Yes! It’s naturally dairy-free and can easily be made vegan by skipping eggs or substituting them with plant-based alternatives. Its gluten-free nature makes it accessible to those with celiac disease or gluten sensitivity.Q6: How can home cooks replicate the crispy texture of the Brussels sprouts at Maebells’ kitchen?
A6: The secret lies in roasting the Brussels sprouts until golden and slightly charred before tossing them into the fried rice. This double-cooking method ensures maximum crispiness and enhances their flavor profile.Q7: What makes this dish a perfect weeknight meal?
A7: It’s quick to prepare, uses simple pantry staples, and delivers bold flavors and satisfying textures in one bowl. Plus, the leftovers hold up well for next-day lunches, making it both convenient and wholesome.
Q8: Where can fans find Maebells’ Crispy Brussels Sprout Fried Rice?
A8: You can enjoy this gluten-free delight at Maebells’ flagship locations or through their delivery service. Additionally, the official Maebells website offers a detailed recipe for home chefs eager to whip up this crunchy delight themselves.
The Way Forward
In the vibrant world of gluten-free cuisine, Maebells’ Crispy Brussels Sprout Fried Rice stands out as a crunchy, flavorful revelation. This dish not only redefines how we think about Brussels sprouts but also proves that gluten-free meals can be both satisfying and exciting. Whether you’re a devoted foodie or simply exploring new tastes, this recipe invites you to experience a delightful crunch wrapped in wholesome goodness. So next time you crave something crispy, colorful, and completely gluten-free, let Maebells’ creation inspire your kitchen adventures and elevate your plate to new, tasty heights.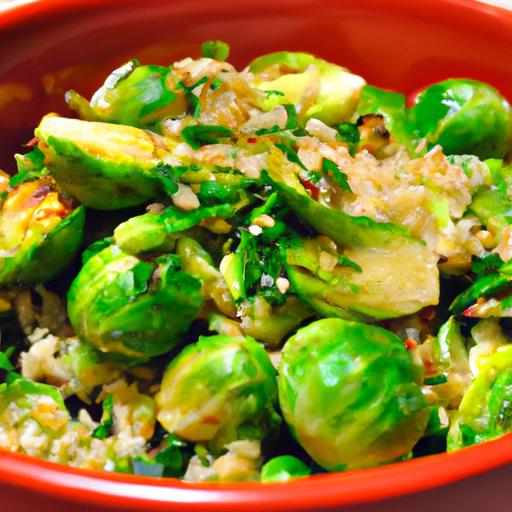
Zesty Lemon Blueberry Vegan Gluten-Free Cheesecake Delight offers an irresistible harmony of bright citrus zing and sweet, juicy bursts of fresh blueberries-making each bite a celebration of flavor and texture. Inspired by sunny summer afternoons and mindful eating, this cheesecake combines wholesome, nutritious ingredients to create a creamy, dreamy vegan dessert that’s gluten-free and bursting with natural goodness.
Prep and Cook Time
Planning: 25 minutes
Chilling: 6 hours (or overnight)
Total Time: 6 hours 25 minutes
Yield
Serves 10 generous slices
Difficulty Level
Medium – Perfect for home bakers looking to impress with an elegant vegan dessert.
Ingredients
- For the Gluten-Free Crust:
- 1 ½ cups almond flour, finely ground
- ¼ cup coconut sugar
- 3 tbsp refined coconut oil, melted
- 1 tsp vanilla extract
- Pinch of sea salt
- For the Creamy vegan Cheesecake Base:
- 2 cups raw cashews, soaked overnight and drained
- ½ cup full-fat coconut cream
- ⅓ cup fresh lemon juice (about 2 lemons), zest reserved
- ⅔ cup maple syrup or agave nectar
- 2 tsp pure vanilla extract
- 1 tbsp melted coconut oil
- For the Blueberry Swirl:
- 1 cup fresh or frozen blueberries
- 2 tsp lemon juice
- 1 tbsp maple syrup
Instructions
- Prepare the crust: In a medium bowl, combine almond flour, coconut sugar, and salt. Pour in the melted coconut oil and vanilla extract,stirring until the mixture is crumbly but holds together when pressed. Press firmly into a 9-inch springform pan, covering bottom and sides evenly for a sturdy base.
- Bake the crust (optional): For a slightly toasted flavor, bake at 350°F (175°C) for 10 minutes, than let cool completely.
- Make the blueberry swirl: In a small saucepan, combine blueberries, lemon juice, and maple syrup. Simmer over low heat, mashing occasionally until the blueberries release juice and the mixture thickens into a vibrant sauce, about 8 minutes. Set aside to cool.
- Blend the cheesecake base: In a high-speed blender or food processor, combine soaked cashews, coconut cream, lemon juice, maple syrup, vanilla extract, lemon zest, and melted coconut oil. Blend on high for 2-3 minutes until ultra-smooth and creamy, scraping down sides as needed to avoid lumps.
- Assemble the cheesecake: Pour half the cashew lemon mixture over the crust, then add dollops of the cooled blueberry sauce. Swirl gently with a butter knife or skewer to create a marbled effect. Pour remaining cheesecake mixture on top, smoothing the surface with a spatula. Add a few more blueberry dollops on top, swirling lightly for a decorative finish.
- Chill and set: Cover the springform pan with plastic wrap or foil and refrigerate for at least 6 hours-ideally overnight-until firm enough to slice cleanly.
- Serve: Carefully run a warm knife along the sides before releasing the springform clasp. Transfer slices to plates and garnish with fresh blueberries,lemon zest curls,and a sprig of fresh mint for a vibrant presentation.
Tips for Success
- Soaking cashews: Don’t skip soaking your cashews overnight.This step is crucial for achieving that ultra-smooth, creamy texture characteristic of a luscious vegan cheesecake base.
- Lemon adjustments: For a zestier punch, add an extra teaspoon of lemon zest or juice, but balance sweetness accordingly to keep flavors harmonious.
- Crust alternatives: Use gluten-free oat flour or a mix of ground pecans and walnuts for added crunch and complexity. Just adjust the binding coconut oil accordingly.
- Blueberry swirl: For added depth, try roasting the blueberries with a pinch of cinnamon before simmering to introduce subtle warmth and color contrast.
- Make-ahead: Prepare the crust and filling separately, then assemble and chill the following day for hassle-free entertaining.
- Storage: Keep refrigerated for up to 4 days or freeze in slices for up to 2 months. Thaw in the fridge overnight before serving.
Serving Suggestions
Serve your Zesty Lemon Blueberry Vegan Gluten-Free cheesecake Delight chilled with a light drizzle of blueberry sauce or coconut whipped cream. For an elegant touch, scatter fresh edible flowers or finely sliced lemon peel curls on the top. Pair with a refreshing iced chamomile tea or sparkling elderflower water to complement the bright and creamy flavors. Individual mini cheesecakes in mason jars make a stunning party presentation and keep portions controlled.
| Nutrient | Per Serving |
|---|---|
| Calories | 320 kcal |
| Protein | 6 g |
| Carbohydrates | 28 g |
| fat | 22 g |

Looking to explore more plant-based delights? Check out our Vegan Dessert Recipes for a broader collection of wholesome treats.For detailed nutritional benefits of cashews and coconut cream, visit Healthline’s extensive guide.
Q&A
Q&A: All About the zesty Lemon Blueberry Vegan Gluten-Free Cheesecake Delight
Q1: What exactly is a Zesty Lemon Blueberry Vegan Gluten-Free Cheesecake Delight?
A1: Imagine a luscious cheesecake that bursts with tangy lemon zest and sweet blueberry flavor, yet contains no dairy, eggs, or gluten. This dessert is a vibrant, plant-based twist on the classic cheesecake, crafted with wholesome ingredients to delight your taste buds while catering to vegan and gluten-free diets.It’s creamy, zesty, fruity, and utterly satisfying!
Q2: How does this cheesecake achieve its creamy texture without cream cheese or dairy?
A2: the magic lies in using soaked cashews blended into a silky smooth base, frequently enough combined with coconut cream or plant-based yogurt for extra richness. These ingredients mimic the luxurious mouthfeel of conventional cheesecake while keeping it vegan and dairy-free. A touch of coconut oil or melted vegan butter helps it set perfectly.Q3: What makes the cheesecake “gluten-free” without compromising flavor or texture?
A3: Rather of a conventional graham cracker crust, gluten-free alternatives like almond flour, ground oats (certified gluten-free), or a mix of nuts and dates create a nutty, crumbly foundation. This gives a satisfying crunch and subtle sweetness, harmonizing beautifully with the zesty and fruity layers.
Q4: What role do lemon and blueberry play in this cheesecake?
A4: Lemon zest and juice infuse the cheesecake with a bright, refreshing tang that cuts through the richness, while juicy blueberries add natural sweetness and a pop of color. Together, they create a balanced flavor profile that’s as eye-catching as it is palate-pleasing.
Q5: Is this cheesecake challenging to make at home?
A5: Surprisingly, it’s quite approachable! Most recipes require simple steps: soaking cashews overnight, blending the filling, layering the crust, and letting it set in the freezer or fridge. No baking is needed, making it ideal for kitchen novices or anyone craving a fuss-free, healthy dessert.
Q6: Can the cheesecake be customized with other fruits or flavors?
A6: Absolutely! This cheesecake is a versatile canvas. Swap blueberries for raspberries, strawberries, or mango for a different fruity twist. Add fresh herbs like mint or basil for a unique flair, or infuse the crust with cinnamon or vanilla to enhance the aroma.Creativity is encouraged!
Q7: How shoudl I serve and store this delightful dessert?
A7: Serve chilled,garnished with fresh blueberries and lemon zest for a stunning presentation. Store leftovers in an airtight container in the refrigerator for up to 4-5 days, or freeze individual slices to enjoy later. Just let frozen slices thaw slightly before indulging.
Q8: Who can benefit most from enjoying this cheesecake?
A8: Anyone looking for a delicious, guilt-free dessert that accommodates dietary restrictions will love this treat. It’s perfect for vegans, those with gluten intolerance, or anyone wanting to explore plant-based and wholesome sweets without sacrificing flavor or decadence.
Q9: Where can I find inspiration or recipes for this cheesecake?
A9: Many plant-based food bloggers and vegan dessert specialists showcase creative versions online. Cookbooks focused on vegan or gluten-free baking also provide excellent recipes and tips. Experimenting with ingredients at home encourages discovering your own perfect version of this zesty lemon blueberry delight.
Q10: Why is this cheesecake delight deserving of a place at my dessert table?
A10: Because it effortlessly combines health-conscious ingredients with indulgent flavor, making every bite a celebration of freshness, creaminess, and vibrant fruitiness. It’s a crowd-pleaser that respects your diet and your cravings – truly a cheesecake revolution on your plate!
Future Outlook
In the world of desserts, the Zesty Lemon Blueberry Vegan Gluten-Free cheesecake Delight stands as a vibrant testament to how flavor, health, and dietary inclusivity can harmonize beautifully on a single plate. Whether you’re navigating dietary restrictions or simply seeking a refreshing twist on a classic favorite, this cheesecake offers a luscious, tangy experience without compromise. So next time you crave somthing sweet yet wholesome, let this bright, berry-kissed creation inspire your kitchen adventures-and savor every guilt-free bite of pure, zesty delight.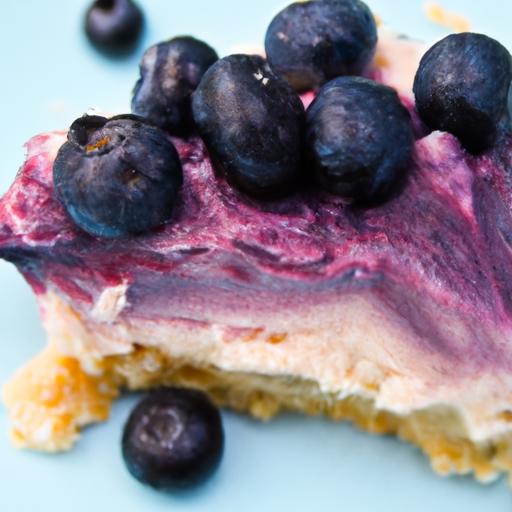
Fluffy plant-based pancakes are more than just a morning treat-they’re a party of vibrant flavors and mindful ingredients coming together in a gluten-free, allergy-amiable batter that delights with every bite. Having experimented with countless mixes, the secret lies not only in the clever blend of flours but also in mastering the perfect texture through thoughtful hydration and gentle folding. Whether you’re prepping breakfast for a crowd or craving a cozy weekend stack,the magic of these pancakes transforms simple ingredients into a cloud-like,tender masterpiece.
Prep and Cook Time
- Prep time: 10 minutes
- Cook Time: 15 minutes
- Total Time: 25 minutes
Yield
Makes approximately 12 medium pancakes (serves 3-4)
Difficulty Level
Easy – perfect for beginner to intermediate cooks
Ingredients
- 1 cup gluten-free oat flour (lightly packed)
- ½ cup chickpea flour (for structure and subtle nuttiness)
- 2 tbsp tapioca starch (ensures chewiness and spring)
- 1 tbsp baking powder (gluten-free, aluminum-free)
- 1 tbsp organic coconut sugar or date sugar (for slight sweetness)
- ¼ tsp salt
- 1 cup unsweetened plant-based milk (almond, oat, or soy works great)
- 2 tbsp aquafaba (chickpea liquid, acts as an egg replacer)
- 1 tsp pure vanilla extract
- 2 tbsp melted coconut oil or avocado oil (plus more for the pan)
Instructions
- Whisk together the dry ingredients: In a large bowl, sift and combine gluten-free oat flour, chickpea flour, tapioca starch, baking powder, coconut sugar, and salt. This foundation balances fluffiness with structure.
- Mix the wet ingredients: In a separate smaller bowl, whisk the plant-based milk, aquafaba, vanilla extract, and melted coconut oil until fully emulsified.
- Combine gently: Pour the wet mixture into the dry ingredients and stir with a spatula just until combined. Avoid over-mixing to prevent toughness-some small lumps are perfect.
- Preheat your pan: Heat a non-stick skillet or griddle over medium heat, lightly greased with coconut or avocado oil.
- Scoop and cook: For each pancake, ladle about ¼ cup batter onto the skillet. Cook until you see bubbles forming on the surface and edges look set, about 3-4 minutes.
- Flip and finish: Carefully flip and cook the other side until golden brown and cooked through, about 2-3 more minutes.
- Keep warm: Transfer cooked pancakes to a warm oven (around 200°F/90°C) to stay ready while you finish the batch.
Tips for Success
- For extra fluffiness, let your batter rest 5 minutes before cooking. This allows the flours to hydrate fully.
- If batter becomes too thick, adjust consistency with a splash more plant milk-aim for a pourable but slightly thick batter.
- Aquafaba is the secret binder that simulates egg whites’ lift; don’t skip it or replace with equal mashed banana for a denser option.
- To keep pancakes uniform, use a measuring cup to portion batter consistently.
- Try a non-stick ceramic skillet for even browning with less oil.
- Make-ahead: mix the dry ingredients and store in an airtight container. Add wet ingredients fresh to keep pancakes light.
Creative Toppings and Additions to Elevate Your Pancake Experience
These pancakes are a blank canvas-let your creativity shine with fresh berries, sliced bananas, or toasted nuts for crunch. Luxuriate with a dollop of coconut yogurt and a drizzle of date syrup or pure maple. For an indulgent lift, sprinkle dark cacao nibs or vegan chocolate chips into the batter before cooking, or jazz up the plate with a dusting of powdered cinnamon and toasted coconut flakes. Citrus zest, like orange or lemon, adds a surprising brightness that elevates simple sweetness.
Serving Suggestions
- Stack tall with alternating layers of warm berry compote and vegan whipped cream.
- Arrange with tropical fruits like mango and pineapple,plus a drizzle of passion fruit syrup.
- Sprinkle with toasted hemp seeds or chia to boost texture and nutrition.
- Serve alongside a warm cup of chai or freshly brewed herbal tea for a cozy vibe.
How to Store and Use Your Pancake Mix for Maximum Freshness and Flavor
For lasting magic, store your prepared dry pancake mix in an airtight container in a cool, dark place for up to 3 weeks.For longer storage, keeping it in the refrigerator preserves nutty flour freshness and prevents clumping.When ready to cook, add your wet ingredients fresh to maintain fluffiness. You can also freeze cooked pancakes in layers separated by parchment paper,storing them in freezer bags for up to 2 months. Reheat gently in a toaster or skillet to revive thier soft texture and inviting aroma.
| Nutrient | Per Pancake |
|---|---|
| Calories | 95 kcal |
| Protein | 3.2 g |
| Carbohydrates | 15 g |
| Fat | 3.8 g |
Discover more plant-based mornings and learn the secrets behind other gluten-free delights. For a deep dive into the science of gluten-free baking, visit King Arthur Baking’s expert guide.

Q&A
Q&A: Fluffy & Free – Unlocking the Magic of Plant-Based Gluten-Free Pancake Mix
Q1: What makes “Fluffy & Free” pancake mix stand out from other gluten-free options?
Fluffy & free isn’t just gluten-free; it’s a carefully crafted blend that delivers that coveted pancake fluffiness without compromising taste or texture. Unlike many gluten-free mixes that can feel grainy or dense, this mix uses a secret synergy of plant-based ingredients to create light, airy, and naturally delicious pancakes every time.
Q2: How does the plant-based aspect influence the pancake mix?
By focusing on plant-based ingredients, Fluffy & Free ensures that the pancakes are not only free from gluten but also dairy and eggs. This means the mix is vegan-friendly,reducing allergens and making it accessible for a broader range of dietary preferences. The plant proteins and fibers within contribute to moisture retention and a tender crumb, creating pancakes that satisfy without heaviness.
Q3: Is the pancake mix easy to use for novice cooks?
Absolutely! One of the magical qualities of Fluffy & Free is its simplicity. It requires minimal ingredients-often just water or a plant-based milk substitute-and comes with clear instructions that guarantee perfect results even for those new to gluten-free or vegan baking. Its consistency is forgiving, making it harder to mess up and easier to enjoy.
Q4: Can I customize Fluffy & Free pancakes with additional flavors or toppings?
Definitely! The neutral yet subtly nutty flavor profile of the mix acts as a canvas for creativity. Add blueberries, banana slices, cinnamon, or chocolate chips straight into the batter, or top your stack with maple syrup, nut butters, or fresh fruit. Each variation keeps the pancakes fluffy and moist, making breakfast an exciting adventure.
Q5: How does Fluffy & Free support a healthy lifestyle?
This pancake mix incorporates nutrient-dense plant-based flours and fibers,which provide sustained energy and gut-friendly benefits. Without gluten and animal products, it’s easier on digestion and aligns with many plant-powered wellness goals. Plus, starting your day with such a wholesome base encourages mindful eating without sacrificing indulgence.
Q6: Where can I find Fluffy & Free pancake mix?
Fluffy & Free is available at select health food stores, specialty markets, and online retailers. Its rising popularity comes from glowing reviews and word-of-mouth buzz, making it well worth seeking out for anyone craving pancakes that are as kind to the body as they are to the palate.
Embrace the magic of Fluffy & Free and discover how plant-based, gluten-free pancakes can be irresistibly fluffy, delightfully tasty, and wonderfully freeing!
Key Takeaways
Whether you’re a seasoned plant-based pro or just begining to explore gluten-free delights, Fluffy & Free pancake mix invites you to experience breakfast in a whole new light.with every bite, you savor not just a stack of pancakes-but a mindful choice that’s kind to your body and the planet. So next time morning calls, whip up a batch of this magic mix and let your taste buds dance in fluffiness and freedom. Because delicious, wholesome mornings shouldn’t be intricate-they should be Fluffy & Free.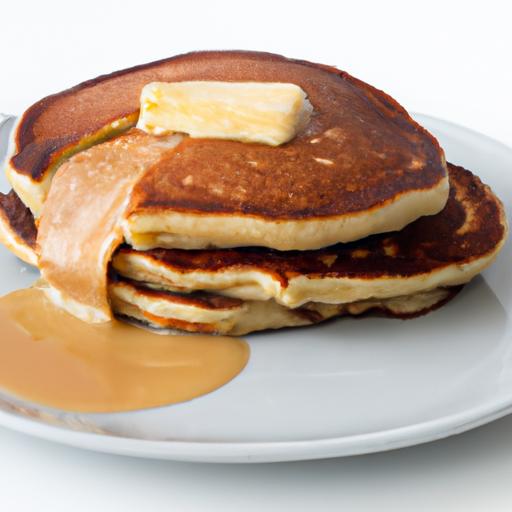
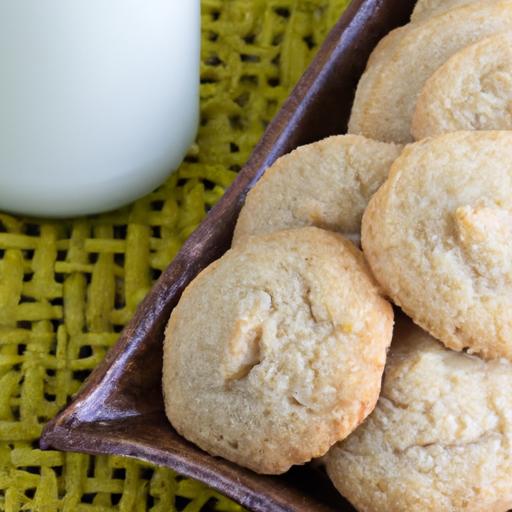
delicious vegan gluten-free coconut cookies captivate with their delightful interplay of flavor and texture, combining the subtle sweetness of coconut with a satisfyingly chewy bite. These cookies transcend typical baking constraints, proving that indulgent treats can happily coexist with dietary needs.Inspired by tropical islands where fresh coconut reigns supreme, this recipe transforms simple, wholesome ingredients into irresistible bites that charm friends and family alike. Whether you’re new to vegan gluten-free baking or a seasoned pro, these cookies will fill your kitchen with the warm aroma of toasted coconut and crisp vanilla sugar.
Prep and Cook Time
- Preparation Time: 15 minutes
- Cooking Time: 12-15 minutes
- Total Time: 30 minutes
Yield
Approximately 18 medium-sized cookies
Difficulty Level
Easy – perfect for beginner bakers and experienced cooks looking for a swift, satisfying project
Ingredients
- 1 ½ cups gluten-free oat flour (finely ground)
- 1 cup unsweetened shredded coconut (toasted)
- ½ cup coconut sugar
- ¼ cup refined coconut oil, melted
- ⅓ cup unsweetened almond milk (or any plant-based milk)
- 2 tbsp ground flaxseed mixed with 6 tbsp water (flax egg, let sit for 5 mins)
- 1 tsp baking powder (gluten-free)
- 1 tsp pure vanilla extract
- ½ tsp fine sea salt
- Optional: ¼ cup vegan chocolate chips or chopped toasted nuts for extra texture
Step by Step Guide to Baking Moist and Chewy Coconut Cookies
- Preheat your oven to 350°F (175°C). Line a baking sheet with parchment paper or a silicone baking mat for effortless cookie removal and cleanup.
- Prepare the flax egg: Combine ground flaxseed with water in a small bowl. Stir and let thicken while you gather other ingredients.
- Toast the shredded coconut: Spread the shredded coconut evenly on a dry skillet over medium heat. Stir constantly for about 4-5 minutes until golden brown and fragrant. Remove immediately to prevent burning.
- In a large mixing bowl, combine the gluten-free oat flour, toasted coconut, coconut sugar, baking powder, and sea salt. Whisk gently to ensure even distribution of dry ingredients.
- Add the wet ingredients: Pour in the coconut oil, almond milk, flax egg, and vanilla extract. mix thoroughly until a thick, cohesive dough forms. If the dough feels too loose, sprinkle in a little more oat flour, a tablespoon at a time.
- If using, gently fold in the vegan chocolate chips or chopped nuts for added bursts of flavor and texture.
- Scoop dough onto the prepared baking sheet, using a tablespoon or cookie scoop, spacing cookies about 2 inches apart. Flatten each cookie slightly with the back of a spoon for even cooking.
- bake for 12-15 minutes, or until the edges turn golden while the centers remain tender. Avoid overbaking to maintain chewiness.
- Cool the cookies on the baking sheet for 5 minutes before transferring them to a wire rack to cool wholly. This resting period helps the cookies set beautifully.
Top Tips and Variations to Customize Your Vegan Gluten-Free Coconut Treats
- Ingredient Quality Matters: Use freshly toasted coconut for deeper flavor and a natural crunch. Avoid sweetened shredded coconut to maintain balanced sweetness.
- Flax Egg Choice: if you prefer, substitute the flax egg with ¼ cup mashed banana or unsweetened applesauce; both add moisture and subtle sweetness.
- Sweetener swaps: Coconut sugar offers a caramel nuance, but date sugar or maple syrup can be used with minor adjustments to liquid content.
- Boost the Texture: Stir in a handful of chopped dried pineapple or crystallized ginger for surprising bursts of tropical zest.
- Storage: Store in an airtight container at room temperature up to 3 days, or freeze for up to a month. Thaw gently before serving.
- Make Ahead: Prepare the dough ahead and refrigerate for up to 24 hours; this deepens flavor and improves texture.
Serving Suggestions
Present these coconut cookies alongside a frothy latte, iced herbal tea, or chilled coconut milk for an exotic snack experience. Garnish with a light dusting of powdered coconut sugar or a sprinkle of toasted coconut flakes to elevate visual appeal.For a festive twist,sandwich two cookies together with a vegan vanilla or chocolate cream filling,perfect for sharing or gifting.

| Nutrient | Per Cookie |
|---|---|
| Calories | 110 |
| Protein | 2g |
| Carbohydrates | 14g |
| Fat | 6g |
For more gluten-free baking inspiration, check out our Gluten-Free Desserts Collection. To better understand how coconut ingredients provide essential nutrients, explore Healthline’s guide on coconut nutrition.
Q&A
Q&A: Delicious Vegan Gluten-Free Coconut cookies You’ll Love
Q1: What makes these coconut cookies both vegan and gluten-free?
A1: These cookies are crafted without any animal products or gluten-containing ingredients. Instead of eggs and butter, we use plant-based alternatives like flaxseed meal and coconut oil. Gluten-free flours such as almond or rice flour replace traditional wheat flour, ensuring a safe treat for those with dietary restrictions.
Q2: How do these cookies achieve a perfect chewy yet crispy texture?
A2: The magic lies in the balance of moist and dry ingredients. Coconut oil lends richness and crisp edges, while shredded coconut and gluten-free flours add chewiness. A touch of natural syrup or maple syrup keeps the cookies soft inside, making every bite delightfully textured.Q3: Can I customize the flavor of these cookies?
A3: Absolutely! These cookies are a versatile base. Try adding vanilla or almond extract for warmth, a sprinkle of cinnamon or cardamom for spice, or even a handful of dairy-free chocolate chips or chopped nuts for extra indulgence. The coconut flavor pairs beautifully with many complementary tastes.
Q4: Are these cookies suitable for people with other allergies?
A4: Since the recipe avoids dairy, eggs, and gluten, it’s great for vegan and gluten-free diets. However, if you use almond or other nut-based flour, it may not be suitable for nut allergies. Opting for oat or rice flour can be a safer alternative for nut-sensitive individuals.
Q5: How long do these cookies stay fresh, and how should I store them?
A5: Stored in an airtight container at room temperature, these coconut cookies stay fresh for up to 5 days. For longer storage, freeze them for up to 2 months. Thaw at room temperature and enjoy their irresistible flavor anytime you crave a wholesome treat.
Q6: What occasions are perfect for serving these cookies?
A6: Whether it’s a casual afternoon tea, a holiday gathering, or a thoughtful gift for a friend with dietary needs, these cookies shine in every setting. Their tropical coconut goodness and pleasant ingredient list make them a crowd-pleaser for everyone.
Q7: Where can I find the best ingredients to make these cookies?
A7: Health food stores and well-stocked supermarkets often carry organic coconut flakes, gluten-free flour blends, and plant-based sweeteners. For the purists, online specialty stores provide a wide range of vegan and gluten-free baking essentials, ensuring your cookies are top-notch.
Enjoy baking and sharing these delicious, compassionate coconut cookies that prove dietary restrictions never mean sacrificing flavor!
In Summary
In the world of sweet treats, finding a cookie that’s both vegan and gluten-free can feel like searching for a delicious unicorn. But these coconut cookies prove it’s not only possible-it’s downright delightful. With their naturally rich flavors and satisfying crunch,they’re a perfect little bite of paradise for anyone craving something wholesome yet indulgent. Whether you’re catering to dietary needs or simply exploring new tastes, these cookies invite you to enjoy the best of both worlds: health-conscious ingredients wrapped in irresistible flavor. So go ahead, treat yourself to these coconut gems-you might just find your new favorite cookie that loves you back.