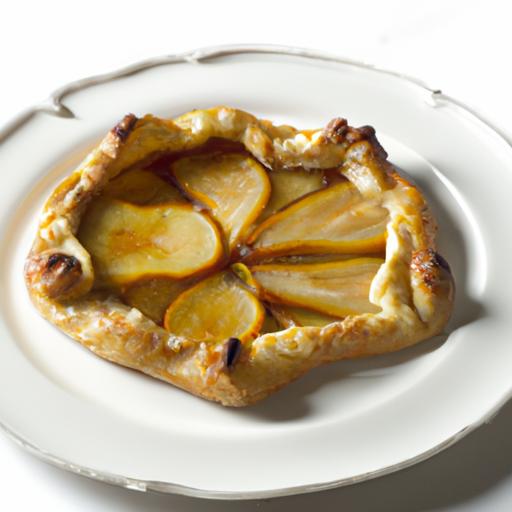
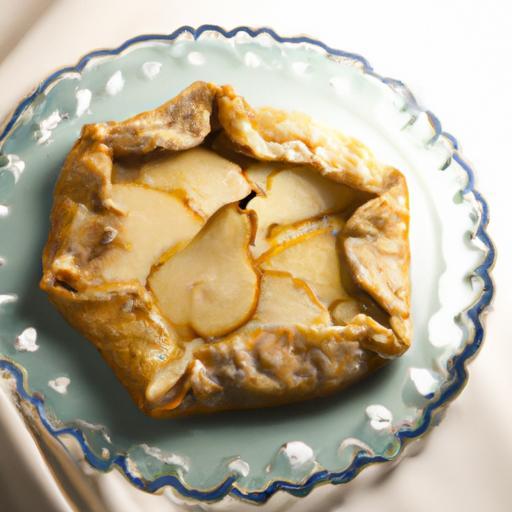
There’s something undeniably enchanting about rustic desserts that celebrate simple, natural ingredients-warm, comforting, and effortlessly beautiful. Enter the honey pear galette: a golden, flaky pastry cradling tender slices of ripe pears, kissed with the delicate sweetness of honey and a hint of spice. this humble yet elegant dessert captures the essence of autumn’s harvest and the art of artisanal baking, all wrapped up in a free-form crust that’s as charming as it is tasty. In this article, we’ll guide you through the steps to create your own sweet and rustic honey pear galette, turning everyday ingredients into a centerpiece worthy of any table. Whether you’re a seasoned baker or a curious beginner, prepare to delight your senses and savor a slice of seasonal bliss.
Honey Pear Galette Delight is an invitation to savor simplicity and rustic charm in every flaky bite. This timeless dessert, rooted deeply in French provincial kitchens, marries the luscious sweetness of ripe pears with the floral warmth of pure honey, encased in a golden, buttery crust that crunches delightfully with each forkful. As a Culinary Content Creator and Food stylist, I’ve found that this humble galette becomes a centerpiece not only for its flavor harmony but also for the captivating textures and inviting aromas that fill your kitchen.
Prep and Cook Time
- Planning: 30 minutes
- Cooking: 40 minutes
- Total Time: 1 hour 10 minutes
Yield
Serves 6 generous slices
Difficulty Level
Medium – perfect for home bakers seeking a balance of rustic technique and elegant flavor
Ingredients
- For the crust:
- 1 ½ cups all-purpose flour, sifted
- ¼ teaspoon fine sea salt
- 10 tablespoons unsalted butter, chilled and cubed
- 3 tablespoons ice-cold water (plus extra if needed)
- 1 tablespoon granulated sugar (optional, for subtle sweetness)
- For the filling:
- 3 large ripe pears (Bosc or Anjou work beautifully), peeled, cored, and thinly sliced
- 2 tablespoons pure honey, plus extra for drizzling
- 1 teaspoon fresh lemon juice
- 1 teaspoon ground cinnamon
- 1 tablespoon all-purpose flour (to absorb pear juices)
- ¼ teaspoon freshly grated nutmeg
- 1 egg yolk (for egg wash)
- 1 tablespoon turbinado sugar (for sprinkling)
Instructions
- Make the crust: Combine the sifted flour, salt, and sugar in a large bowl. Add the chilled butter cubes and, using a pastry cutter or your fingertips, gently toss to coat the pieces in flour. Work quickly to pinch the butter and flour together until the mixture resembles coarse crumbs with some pea-sized bits remaining.
- Add ice water: Drizzle in the 3 tablespoons of ice-cold water one tablespoon at a time, gently mixing with a fork until the dough just holds together. Avoid overworking to maintain a tender, flaky texture.
- Shape and chill dough: Gather the dough into a disk, wrap it tightly in plastic wrap, and refrigerate for at least 30 minutes to rest and chill the butter-this is crucial for flakiness.
- Prepare pear filling: In a bowl, toss the sliced pears gently with lemon juice, honey, cinnamon, nutmeg, and flour. This blend balances sweetness and aroma while absorbing excess juices during baking,keeping the filling juicy yet cohesive.
- Roll out the dough: On a floured surface, roll chilled dough into a roughly 12-inch circle, about ⅛-inch thick. Transfer to a parchment-lined baking sheet.
- Assemble the galette: Pile pear slices in the centre of the dough,leaving a 2-inch border. Fold the edges over the fruit, creating folds to form a rustic crust that hugs the filling.
- Apply egg wash and sugar: Beat the egg yolk with 1 teaspoon water and brush it lightly over the crust edges for a golden finish. Sprinkle turbinado sugar on top for a sparkling,caramelized crust.
- Bake: Preheat oven to 400°F (200°C). Bake galette for 35-40 minutes until the crust is deeply golden and crisp, and the pear filling bubbles enticingly. Rotate halfway for even baking.
- Cool and serve: Allow the galette to cool on the baking sheet for at least 15 minutes. Drizzle additional honey atop just before serving to enhance the floral notes.
Tips for Success with Your Honey Pear Galette
- Chilling the dough: Never skip the refrigeration-cold butter leads to the flaky, layered crust everyone loves.
- Choosing pears: Opt for pears that hold their shape when baked, such as Bosc or Anjou, to avoid a mushy texture.
- Honey varieties: Use a mild, high-quality honey (like wildflower or clover) to complement, not overpower the pears.
- Make ahead: Assemble the galette up to step 7, then refrigerate uncovered for up to 4 hours before baking-this step enhances the melding of flavors.
- Variations: Add a handful of chopped toasted pecans or a sprinkle of crumbled blue cheese beneath the pears for extra depth.
- Troubleshooting: If the bottom crust seems soggy, slide the galette onto a preheated baking stone or tray in the oven’s lower rack for extra crispness.
Serving suggestions
This honey pear galette shines when served warm,accompanied by a scoop of vanilla bean ice cream or a dollop of freshly whipped cream. Garnish with a sprig of fresh thyme or a light dusting of powdered sugar for a visually striking, aromatic finish. Pair with a cup of rich Earl Gray tea or a glass of chilled Riesling to elevate the sweet and rustic experience.
| Nutrient | Per Serving |
|---|---|
| Calories | 320 |
| Protein | 3g |
| Carbohydrates | 45g |
| Fat | 13g |

Explore more rustic dessert ideas in our rustic Fruit Dessert Collection and learn why local honey is prized in baking at National Honey Board.
Q&A
Q&A: Sweet & Rustic – How to Make a Honey Pear Galette Delight
Q1: What exactly is a honey pear galette?
A1: Imagine the charm of a flaky, buttery crust wrapped around tender slices of ripe pears kissed with golden honey-this is a honey pear galette. It’s a rustic, open-faced tart that’s as simple to make as it is indeed stunning to serve, offering a perfect balance between sweet and earthy flavors.Q2: Why choose a galette over a customary pie?
A2: Galettes embrace imperfection beautifully. Unlike pies, they require no pie plates or intricate crimping. The dough is rolled out, fruit arranged in the center, and the edges folded up casually. This creates a homely, artisanal look that’s both inviting and effortlessly elegant-perfect for a cozy gathering or a spontaneous treat.
Q3: What kind of pears work best in this galette?
A3: Opt for firmer pears like bosc or anjou, which hold their shape well during baking. These varieties offer a subtle sweetness and a smooth texture that pairs wonderfully with the honey’s floral notes, creating a delightful contrast in every bite.
Q4: How does honey enhance the flavor of the pears?
A4: Honey doesn’t just sweeten-it adds layers of complexity. Depending on the variety, honey can introduce hints of lavender, wildflowers, or caramel, enriching the pears’ natural juiciness with a warm, aromatic depth that elevates the galette from simple dessert to a flavor experience.
Q5: Can I add other ingredients to customize my galette?
A5: Absolutely! A sprinkle of cinnamon or nutmeg brings cozy warmth, while a handful of chopped nuts adds crunch.For a savory twist, a touch of fresh thyme or rosemary complements the pear’s sweetness brilliantly. Don’t be afraid to experiment and make the galette your own rustic masterpiece.
Q6: What’s the secret to a perfectly flaky crust?
A6: Cold ingredients and minimal handling are key. Use chilled butter cut into small pieces, cold water to bind the dough, and resist the urge to overwork it. This gentle approach creates layers that puff and flake beautifully in the oven, forming the croissant-like texture that makes every bite pure bliss.
Q7: How long should I bake the galette?
A7: Typically, 35 to 40 minutes at 375°F (190°C) until the crust is golden and the pears are tender. Keep an eye on it-the edges should be crisp and inviting, while the fruit filling should bubble lightly, signaling that it’s time to savor the sweet aroma and delectable taste.
Q8: What’s the best way to serve a honey pear galette?
A8: Serve warm, straight from the oven, with a generous scoop of vanilla ice cream or a dollop of whipped cream to mellow the honeyed sweetness. A dusting of powdered sugar or a drizzle of extra honey can add a final touch of rustic elegance.Q9: Is this recipe suitable for beginners?
A9: Definitely! The galette’s forgiving nature makes it a fantastic project for novice bakers. The open-faced design means minor imperfections only add to its charm. Plus, the few simple steps and flexible ingredients invite creativity without stress.
Q10: Any tips for storing leftovers?
A10: If you’re lucky enough to have leftovers, store the galette covered at room temperature for up to two days, or in the fridge for about three.To revive the crust’s crispness,pop it briefly into a warm oven before serving again.
Embark on your baking adventure with this honey pear galette and taste the sweet simplicity of rustic elegance!
The Conclusion
As the golden crust crisps and the honey-kissed pears glisten on your plate, your homemade galette becomes more than just a dessert-it’s a party of simple, rustic elegance. Whether savored warm with a scoop of vanilla ice cream or enjoyed at room temperature alongside a cup of tea,this honey pear galette offers a sweet embrace that’s both comforting and refined. So next time you’re craving a treat that’s effortlessly charming yet richly satisfying, remember that the heart of rustic baking lies in moments like these-where humble ingredients come together to create something truly delightful.