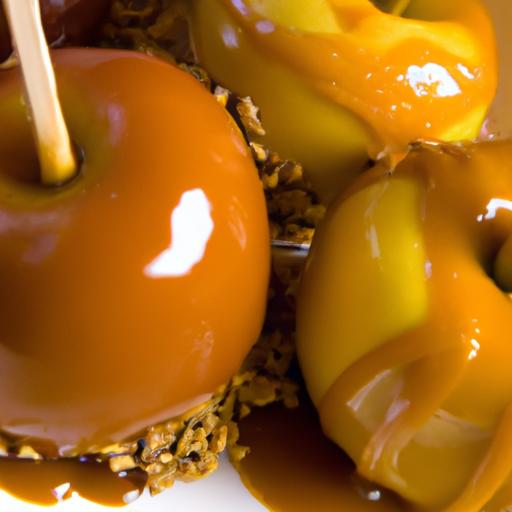
When autumn leaves begin to fall and the air turns crisp, nothing captures the spirit of the season quite like the irresistible charm of caramel apples. Sweet, sticky, and decadently delightful, these autumnal treats have a way of sparking nostalgia while satisfying even the most indulgent cravings. in this article,we dive into the art and science of creating the ultimate homemade caramel apples-where tender,crisp fruit meets rich,buttery caramel in a perfect,mouthwatering embrace. Whether you’re a seasoned candy maker or a curious kitchen adventurer, get ready to transform simple ingredients into a festive masterpiece that will enchant family and friends alike.
Sweet & Sticky: The Ultimate Homemade Caramel Apples Recipe begins with careful fruit selection and finishes with artful presentation-transforming simple apples into an indulgent treat perfect for any occasion. Whether it’s a crisp fall afternoon or a cozy night in, these caramel apples promise a blissful balance of juicy fruit and luscious caramel that melts on yoru tongue.
Choosing the Perfect Apples for Crisp and Juicy Bites
The foundation of your caramel apple delight starts with picking the right apples.For that ideal combination of crunch and juiciness, opt for firm, tart apples that offer a pleasant contrast to the buttery sweetness of caramel. Varieties like Granny Smith, Honeycrisp, and Pink Lady provide vibrant texture and flavor. Avoid apples that are soft or overly sweet, which can diminish the crispness and overwhelm the balance.
look for apples that are evenly colored, free of bruises, and have firm flesh when pressed gently. Thoroughly wash and dry the apples to ensure the caramel adheres perfectly-moisture is a caramel’s worst enemy!
Mastering the Creamy Caramel: Tips for a Smooth and Velvety Texture
Creating silky caramel that beautifully coats your apples requires mastering temperature control and ingredient balance. Use a candy thermometer to reach the perfect soft-ball stage (about 245°F / 118°C), ensuring the caramel sets with just the right chew without being sticky or grainy.
Start by gently melting unsalted butter with brown sugar and sweetened condensed milk. Stir consistently over medium heat to prevent scorching. Infuse layers of flavor by adding a pinch of sea salt and a splash of vanilla extract at the end of cooking.
For luxuriously smooth caramel,avoid stirring too vigorously during the boiling stage-gently swiping the sides of the pan with a wet pastry brush will stop crystallization and guarantee velvet texture.
Creative Toppings to Elevate Your Caramel Apples Experience
Once your apples gleam with a golden caramel coat, unleash your creativity with toppings that add crunch, color, and irresistible flair.Consider rolling your caramel apples in any of these dazzling options:
- Chopped toasted pecans or walnuts for nutty warmth
- Rainbow sprinkles to add a pop of fun and color
- Mini chocolate chips or drizzle for a rich contrast
- Crushed pretzels to introduce a salty crunch
- Shredded coconut for tropical flair
- Sea salt flakes sprinkled lightly to enhance flavors
Mix and match or layer toppings while the caramel is still tacky to ensure thay stick perfectly and create visual appeal that delights as much as the taste.
Step by Step Guide to Assembling and Storing Your Sweet Treats
- Prepare your apples: Insert sturdy wooden sticks into the stem end of each apple,giving you a firm grip. Chill apples for about 30 minutes before dipping to help the caramel cling.
- Make the caramel: Follow the creamy caramel recipe with precision, using a candy thermometer to avoid overcooking. Remove from heat and stir in vanilla extract.
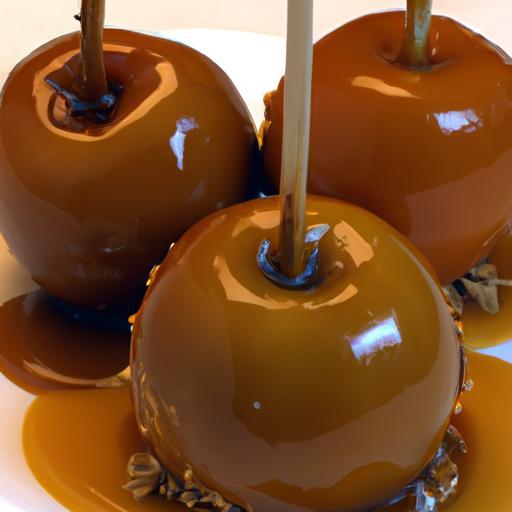
- Dip the apples: Holding the stick, dip each apple into the warm caramel, turning to coat evenly.Allow excess caramel to drip off before transferring to a parchment-lined baking sheet.
- Add toppings: Immediately sprinkle or roll the coated apples into your chosen toppings before the caramel sets.
- Cool and set: Let apples rest at room temperature until caramel firms (about 1 hour). For faster setting, place in the refrigerator but avoid prolonged chilling as it may cause the caramel to crack.
- Storage: Store caramel apples individually wrapped in wax paper or plastic wrap at room temperature for up to 48 hours. If refrigerated, allow them to come to room temperature before serving for best texture.
Prep and Cook time
- Prep Time: 20 minutes
- Cook Time: 15 minutes
- Cooling Time: 1 hour
Yield
Makes 8 caramel apples-perfect for sharing or gifting!
Difficulty Level
Medium – Requires some attention to temperature and timing but approachable for adventurous home cooks.
Ingredients
- 8 medium-sized apples, firm and tart varieties
- 8 wooden sticks, sturdy length
- 1 cup unsalted butter (2 sticks)
- 2 cups packed brown sugar
- 1 (14 oz) can sweetened condensed milk
- 1/2 cup light corn syrup
- 1 teaspoon vanilla extract
- Pinch of sea salt
- Toppings: toasted nuts, sprinkles, mini chocolate chips, crushed pretzels, shredded coconut, sea salt flakes
Instructions
- Wash and thoroughly dry the apples. Remove the stems and insert wooden sticks into the tops. Chill apples for 30 minutes to prepare for dipping.
- In a deep, heavy-bottomed saucepan, combine butter, brown sugar, sweetened condensed milk, and corn syrup. Cook over medium heat, stirring constantly, until the mixture reaches 245°F on a candy thermometer (soft-ball stage).
- Remove from heat and stir in vanilla extract and a pinch of sea salt. Be careful as the mixture will bubble vigorously.
- Working quickly, dip each chilled apple into the caramel, turning to coat all sides evenly.Let excess caramel drip back into the pan.
- Roll or sprinkle your desired toppings onto the still-warm caramel. Place coated apples on a parchment-lined baking sheet to set.
- Let stand at room temperature for at least 1 hour until caramel is firm and set. If short on time, chill briefly in the fridge-but avoid extended refrigerating.
- Wrap each apple in wax paper or plastic wrap for storage. Consume within 48 hours for peak freshness.
Tips for Success
- Use a candy thermometer: Accurate temperature is crucial to perfect caramel texture.
- Dry apples wholly: Any moisture prevents caramel from sticking properly.
- Work swiftly: Caramel hardens as it cools; toppings must be applied immediately.
- Variations: Experiment with adding cinnamon or espresso powder to the caramel for unique flavor profiles.
- Make-ahead: Caramel can be prepared a day in advance and reheated gently over low heat before dipping.
Serving Suggestions
Present your caramel apples on a rustic wooden board or festive tray lined with parchment paper. Garnish with additional sprinkles of chopped nuts or a delicate drizzle of melted chocolate. Pair with a hot cup of spiced cider or a glass of creamy milk for a comforting treat that’s as visually stunning as it is appetizing.
| nutrient | Per Apple |
|---|---|
| Calories | 320 kcal |
| Protein | 1.2 g |
| Carbohydrates | 55 g |
| Fat | 9 g |
Explore more seasonal dessert ideas | Candy Thermometer Guide

Q&A
Q&A: Sweet & Sticky – The Ultimate Homemade Caramel Apples Recipe
Q1: What makes a caramel apple truly “ultimate”?
A1: The ultimate caramel apple is a perfect harmony of crisp, juicy apple and rich, buttery caramel that’s neither too runny nor too hard. It’s about balance-sweet meets tart with a luscious coating that sticks just right, offering a delightful crunch followed by a gooey, melt-in-your-mouth experience.Texture,flavor,and presentation all play their starring roles!
Q2: Which apples work best for homemade caramel apples?
A2: Tart and firm apples like Granny Smith are the reigning champions for caramel apples. Their natural tang cuts through the sweetness of the caramel, while their firmness provides the perfect bite. however, sweet varieties like fuji or Honeycrisp can also shine if you prefer a sweeter combo with a juicy crunch.
Q3: Can I make the caramel from scratch,or should I buy pre-made caramel?
A3: While store-bought caramel can be a handy shortcut,homemade caramel elevates the experience with fresh,buttery richness and customizable sweetness.Making it from scratch may sound intimidating, but with simple ingredients-sugar, butter, cream, and a pinch of salt-and some careful stirring, you’ll achieve a glossy, perfect coating that’s both rewarding and delicious.
Q4: How do I get that lovely, even coating on my apple without the caramel sliding off?
A4: patience is key! First, chill your apples thoroughly after washing and drying them. A cold apple helps the caramel stick better. When dipping, soften the caramel slightly but avoid overheating-it should be thick enough to cling yet fluid enough to coat. After dipping, hold the apple above the pot a moment to let excess caramel drip off, then place it on a parchment-lined tray to set.
Q5: What’s the secret to preventing the caramel from crystallizing?
A5: A sprinkle of corn syrup or a bit of cream in your caramel mixture helps inhibit crystallization, keeping the caramel smooth and glossy. Additionally,stir gently to avoid incorporating sugar crystals from the sides of the pan,and use a candy thermometer to reach the ideal temperature without burning.
Q6: Can I add toppings, and if so, which ones pair best with caramel apples?
A6: Absolutely! Classic toppings like crushed nuts (pecans, peanuts), mini chocolate chips, sprinkles, or sea salt add texture and flavor contrast. For a twist, try crushed pretzels for salty crunch, shredded coconut for tropical flair, or drizzle melted chocolate and white chocolate for a decadent finish.
Q7: How long will homemade caramel apples keep?
A7: Homemade caramel apples are best enjoyed fresh-ideally within 24 to 48 hours. Store them in a cool, dry place, not in the fridge (which can cause the caramel to harden excessively). if you must refrigerate, allow them to return to room temperature before eating for optimal texture.
Q8: Any creative serving ideas for caramel apples?
A8: Absolutely! Slice them into wedges for an easy-to-eat fall treat, or serve whole with a drizzle of sea salt and a sprinkle of chopped nuts. They also make charming gifts-wrap each apple in cellophane tied with a festive ribbon for a sweet homemade surprise anyone woudl love!
With this Q&A, you’re all set to dive into the sweet, sticky world of homemade caramel apples. Enjoy each luscious bite, and may your kitchen be filled with buttery caramel magic!
The Conclusion
As the warm, golden caramel clings lovingly to each crisp apple, you’ve crafted more than just a treat-you’ve created a moment of pure autumnal magic. Whether enjoyed fresh from your fingertips or wrapped as a thoughtful gift, these homemade caramel apples bring together the perfect harmony of sweet, sticky, and delightfully satisfying. So next time the crisp air beckons you outside, remember: the ultimate caramel apple experience is just a simple recipe and a touch of patience away. Happy dipping!