Mini pizza bites are undeniably the perfect crowd-pleasers - bite-sized parcels bursting with rich, savory flavors that ignite the senses from the very first nibble. Rooted in the timeless Italian tradition of pizza-making, these delightful morsels marry the art of crafting tender dough with vibrant sauces and imaginative toppings. Whether served as party snacks or a cozy family treat, mastering their components ensures every mini pizza bite delivers a symphony of textures and tastes that captivate and comfort.
Prep and Cook Time
- Preparation: 20 minutes
- Rising: 1 hour
- Cooking: 12-15 minutes
- Total Time: Approximately 1 hour 35 minutes
Yield
Makes about 24 mini pizza bites, perfect for a small gathering or family snack time.
Difficulty Level
Easy to Medium – ideal for home cooks with some basic dough experience but entirely approachable for adventurous beginners.
Ingredients
- For the dough:
- 2 ½ cups all-purpose flour, sifted
- 1 teaspoon active dry yeast
- 1 teaspoon sugar
- ¾ cup warm water (about 110°F or 43°C)
- 2 tablespoons olive oil, extra virgin
- 1 teaspoon salt
- For the sauce:
- 1 cup crushed tomatoes (preferably san Marzano for authentic taste)
- 2 cloves garlic, minced
- 1 teaspoon dried oregano
- 1 teaspoon olive oil
- Salt and freshly ground black pepper, to taste
- Pinch of red chili flakes (optional, for a subtle kick)
- Toppings: (choose your favorites!)
- ½ cup shredded mozzarella cheese
- ¼ cup mini pepperoni slices
- ¼ cup sliced black olives
- ½ cup fresh basil leaves, chopped
- ¼ cup sun-dried tomatoes, finely chopped
- Optional: roasted bell peppers, caramelized onions, or crumbled feta
Instructions
- Activate the yeast: in a small bowl, combine warm water, sugar, and yeast. stir gently and let it sit for 5-7 minutes until frothy and bubbly - a sign your yeast is alive and ready to work.
- Prepare the dough: In a large mixing bowl, combine sifted all-purpose flour and salt. Create a small well in the center and pour in the yeast mixture along with olive oil. Mix with a wooden spoon until it starts to come together, then knead on a floured surface for 8-10 minutes until smooth and elastic.The dough should be slightly tacky but not sticky.
- Let it rise: Place the dough in a clean, lightly oiled bowl, cover with a damp towel or plastic wrap. Allow it to rise in a warm spot for about 1 hour,or until it doubles in size.
- Prepare the sauce: while the dough rises, heat olive oil in a small saucepan over medium heat. Add minced garlic and sauté until fragrant but not browned, about 1 minute. Stir in crushed tomatoes,oregano,salt,pepper,and optional chili flakes. let the sauce simmer gently for 10-12 minutes, stirring occasionally until thickened. Remove from heat and set aside.
- Preheat your oven: Set your oven to 425°F (220°C). Line a baking sheet with parchment paper or a silicone mat to prevent sticking and ensure even baking.
- Form the mini pizza bites: Punch down the risen dough and divide it into 24 equal portions. Roll each piece into a small ball and flatten slightly.Arrange on the prepared baking sheet about 1 inch apart.
- Assemble: Spoon a teaspoon of the tomato sauce onto each dough round, spreading slightly but leaving the edges visible. Top with shredded mozzarella and your chosen toppings - a pepperoni slice, olive, or a sprinkle of basil really elevate both flavor and appearance.
- Bake: Place the baking sheet in the preheated oven and bake for 12-15 minutes, or until the edges are golden brown and cheese is melted and bubbly. For an extra-crispy bottom, swap the parchment for a pizza stone preheated in the oven.
- Cool and garnish: Remove from oven and let cool 3-5 minutes before transferring to a serving plate.Garnish with fresh basil or a light drizzle of good-quality olive oil for a finishing touch.
Tips for Success
- Dough variations: For a gluten-free option,substitute 2 cups gluten-free flour blend with ½ cup almond flour; adjust liquid slightly.
- Make-ahead magic: Dough can be prepared a day in advance and refrigerated.Bring to room temperature and punch down before shaping.
- Sauce shortcuts: Use a quality store-bought marinara if pressed for time, adding fresh garlic and oregano to ramp up flavor.
- Even baking: Rotate the baking sheet halfway through to ensure consistent browning and crispiness.
- Prevent sogginess: Avoid overloading each bite with sauce or wet toppings. A teaspoon-sized amount maintains balance.
Serving Suggestions
Perfectly warm and crisp, serve these mini pizza bites nestled on a rustic wooden board lined with parchment. Accompany with a tangy marinara dipping sauce or a garlic-infused ranch for added indulgence. Fresh basil, a sprinkle of chili flakes, or grated Parmesan elevate presentation and flavor. Pair with a chilled glass of sparkling water or your favorite craft soda to make snack time feel like a festivity.

| Nutritional Info (per 4 bites) | Amount |
|---|---|
| Calories | 210 kcal |
| Protein | 9 g |
| Carbohydrates | 25 g |
| Fat | 7 g |
For those eager to explore more dough innovations, check out our Perfect Pizza Dough Basics guide. Additionally, dive into the rich history and science behind yeast and baking on King Arthur Baking’s Yeast Guide.
Q&A
Q&A: Mini Pizza Bites – A Simple, Tasty Homemade Recipe Guide
Q1: What exactly are mini pizza bites?
A1: Mini pizza bites are delightful, bite-sized versions of classic pizza-think of them as tiny flavor-packed parcels bursting with gooey cheese, savory sauce, and your favorite toppings. perfect for snacking, parties, or a fun appetizer!
Q2: Why make mini pizza bites at home instead of buying frozen ones?
A2: Homemade mini pizza bites offer unbeatable freshness and customization. You control the ingredients, tailor the flavors to your liking, and avoid preservatives or unwanted additives. plus,the joy of baking from scratch is a rewarding kitchen adventure!
Q3: What basic ingredients do I need for this recipe?
A3: The essentials are simple: pizza dough (store-bought or homemade),pizza sauce,shredded mozzarella cheese,and your favorite toppings-think pepperoni,mushrooms,olives,or fresh basil. Don’t forget a dash of olive oil and some Italian seasoning for that authentic flair.Q4: How do I make the dough if I don’t want to buy it?
A4: A basic pizza dough recipe combines flour, yeast, warm water, olive oil, salt, and a pinch of sugar. Mix, knead until smooth, and let it rise for about an hour. This fresh dough forms the perfect chewy and crisp base for your mini bites.
Q5: How should I shape and assemble the pizza bites?
A5: Roll out the dough thinly, cut into small circles or squares (about 2 inches). Spoon a little pizza sauce onto each piece, sprinkle with cheese, add toppings, then fold or cover with another dough piece to form mini pockets. Seal the edges well!
Q6: What’s the best baking method and temperature?
A6: Preheat your oven to 400°F (200°C).Place the pizza bites on a parchment-lined baking sheet, brush with olive oil for a golden finish, and bake for 12-15 minutes until they’re puffed up and golden brown.
Q7: Can I freeze mini pizza bites to save for later?
A7: Absolutely! Freeze them before baking by placing on a tray, freeze until firm, then transfer to a freezer bag.Bake from frozen,adding a few extra minutes. This way, you’ll always have a quick, scrumptious snack on hand.
Q8: Any tips to jazz up the flavor?
A8: Experiment with different cheeses like sharp cheddar or spicy pepper jack. Add herbs like oregano or red pepper flakes to the sauce. A garlic butter brush before baking adds a savory, aromatic touch that’s hard to resist.
Q9: Are mini pizza bites kid-amiable?
A9: Totally! Their small size and customizable nature make them perfect for picky eaters. Let kids choose their own toppings-it’s a fun way to get them involved in cooking and excited about mealtime.Q10: What dipping sauces pair well with mini pizza bites?
A10: Classic marinara or ranch dressing work beautifully. For a twist, try garlic aioli, spicy sriracha mayo, or a creamy pesto dip. the right sauce elevates your mini bites from tasty treats to irresistible morsels.
Q11: How can I make this recipe gluten-free or vegan?
A11: Use gluten-free pizza dough or a cauliflower crust for a gluten-free option.For vegan bites,swap the cheese for plant-based alternatives and ensure your sauce contains no animal products. The result? Appetizing inclusivity that everyone can enjoy!
Q12: What occasions are mini pizza bites perfect for?
A12: From casual movie nights and game days to birthday parties and potlucks, mini pizza bites bring a crowd-pleasing charm.Their portability and mess-free nature make them a standout finger food for any gathering.
With these mini pizza bites at your fingertips, you’re set to impress guests or satisfy your snack cravings with a simple, tasty homemade delight. Ready, set, bake!
to Conclude
Whether you’re whipping these mini pizza bites up for a quick snack, a party appetizer, or a fun family activity, this simple recipe proves that deliciousness doesn’t have to be complicated. With just a handful of ingredients and a sprinkle of creativity, you can craft bite-sized wonders that satisfy any craving. So next time hunger strikes or guests arrive, remember: these tiny pizzas pack big flavor, and making them at home is easier (and more rewarding) than you think. Happy baking-and even happier tasting!
Heavenly Delights: the Secrets Behind angel Food Cake begin wiht mastering the delicate balance of airy sweetness and featherlight texture that only a perfectly whipped egg white foam can deliver. This ethereal cake, a marvel of simplicity and precision, owes its signature cloud-like rise to an expertly handled meringue and the choice of the finest flour to elevate the crumb to its ultimate fluffiness.
Prep and Cook Time
Readiness: 20 minutes | Cooking: 35 minutes | Cooling: 1 hour
Yield
Serves 8 to 10 slices
Difficulty level
Intermediate: Requires careful technique but rewarding for any adventurous baker
Ingredients
- 1 cup (120g) cake flour,sifted
- 1 ½ cups (300g) granulated sugar,divided
- 12 large egg whites,room temperature
- 1 ½ tsp cream of tartar
- ¼ tsp salt
- 1 ½ tsp pure vanilla extract
- ½ tsp almond extract (optional)
Instructions
- Preheat yoru oven to 350°F (175°C). Ensure your angel food cake pan is clean and ungreased for optimal rise.
- Sift the cake flour with ¾ cup (150g) of the granulated sugar twice to aerate and remove lumps. Set aside.
- in a large mixing bowl, using a stand mixer fitted with the whisk attachment, beat the egg whites on medium speed until foamy.
- Add cream of tartar and salt. Increase speed to high and gradually add the remaining ¾ cup (150g) sugar, about one tablespoon at a time, allowing it to dissolve wholly between additions. beat until stiff, glossy peaks form. Proper stiffness is key; the mixture should hold firm peaks without collapsing.
- Gently fold the sifted flour and sugar mixture into the meringue in three additions. Use a rubber spatula and a gentle folding motion to preserve air bubbles.Avoid overmixing to keep the batter airy and light.
- Stir in vanilla and optional almond extracts, folding carefully to integrate flavor without deflating the foam.
- Pour the batter into the tube pan, smoothing the top lightly with the spatula. Do not grease the pan – the batter needs to cling to the sides to rise properly.
- Bake for 35 to 40 minutes, or until the cake is golden and springs back when lightly pressed. A toothpick inserted in the center should come out clean.
- Immediately invert the pan onto a cooling rack or bottle neck. Cooling upside down prevents collapse and maintains volume.
- Once completely cool (about an hour),run a thin knife around the edges and the center tube to release the cake. Carefully remove from pan.
Tips for Success
- Egg whites: Always use fresh, room temperature eggs to achieve maximum volume and stability in your meringue.
- Flour: Cake flour is essential for tenderness and fluffiness. Avoid all-purpose flour as it is too heavy.
- Whisking: Be patient when adding sugar to the egg whites. Slow incorporation allows for smoother, more stable foam.
- Folding: Use gentle strokes to preserve the delicate air pockets; overmixing will deflate the batter.
- Storage: Wrap the cake in plastic wrap once cooled and store at room temperature up to 2 days or freeze tightly for up to 1 month.
- Make-Ahead: The cake can be prepared a day ahead and kept fresh by storing in an airtight container or lightly wrapped.
serving Suggestions
Slice this delicate angel food cake with a serrated knife for clean edges, serving it plain or topped with a dollop of freshly whipped cream and a scatter of fresh berries. A light dusting of powdered sugar adds a snowy finish, enhancing its dreamlike appearance.for a luscious twist, drizzle with raspberry coulis or a drizzle of honey-lavender syrup, pairing beautifully with chamomile tea or chilled Prosecco.

Nutritional Facts (per slice)
| Calories | Protein | Carbs | Fat |
|---|---|---|---|
| 140 kcal | 4g | 33g | 0.2g |
For more baking secrets on how to perfect meringues and flour choices, check out our Complete Meringue Masterclass. Dive deeper into the science of egg white foam on Serious Eats.
Q&A
Q&A: Heavenly Delights – The Secrets Behind Angel Food Cake
Q1: What makes Angel Food Cake so uniquely “heavenly”?
A1: Angel food Cake earns its celestial nickname thanks to its ethereal lightness and cloud-like texture. Unlike dense, butter-rich cakes, this treat is made primarily from egg whites, sugar, and a hint of flour, whipped to airy perfection.The result? A cake that seems to float on your tongue, as if angels themselves crafted it.
Q2: How does Angel Food cake achieve its signature fluffy texture?
A2: The magic lies in technique. Egg whites are whipped into a stiff, glossy meringue, trapping countless microscopic air bubbles. These bubbles expand during baking, giving the cake its lofty rise. The absence of fat-no egg yolks or butter-allows the structure to remain light rather than heavy.
Q3: Why is Angel Food Cake baked in a tube pan?
A3: The classic tube pan is no accident. Its central tube encourages even heat distribution, helping the delicate batter rise evenly. Additionally, the pan’s tall sides provide support, preventing the cake from collapsing as it cools. Many bakers invert the pan post-baking to maintain its lofty height and prevent shrinking.
Q4: Can Angel Food Cake be flavored, or is it always plain?
A4: While traditionally vanilla is the go-to, Angel Food Cake is a blank canvas. Zests of citrus-lemon or orange-can add a bright twist, while extracts like almond or coconut introduce subtle undertones. Just remember: additions should be light so as not to weigh down the batter.
Q5: What are common pitfalls when baking Angel Food Cake?
A5: Overbeating or underbeating the egg whites can sabotage the cake’s delicate structure. overbeaten whites become dry and clumpy, while underbeaten whites won’t hold enough air. Also, any grease or yolk contamination can prevent egg whites from whipping properly. opening the oven door too soon may cause the cake to deflate prematurely.
Q6: How did Angel Food Cake get its name?
A6: This ethereal dessert was christened “Angel Food Cake” in the 19th century, inspired by its lightness-fit for the heavens. Its delicate nature and pure white color seemed to embody the image of angelic food, a divine sweet treat in a world of rich confections.
Q7: What are some delightful ways to enjoy Angel Food Cake?
A7: Served simply with fresh berries and a dusting of powdered sugar, Angel Food Cake sings. Pair it with whipped cream or a tangy fruit compote for added decadence without heaviness.Its subtle sweetness also makes it a versatile base for layered desserts or trifle.
Q8: Is Angel Food Cake suitable for special diets?
A8: Yes! Since it contains no egg yolks or butter,it’s naturally low in fat and cholesterol.plus, it can be a light option for those watching their calorie intake. Just check the sugar content if you’re managing sugar levels, and know that it’s gluten-containing unless you use a special flour substitute.
Unlock the secrets of Angel Food Cake and bring a little slice of heaven to your kitchen!
The Way Forward
As we close the chapter on the ethereal world of angel food cake, it’s clear that this light, airy dessert is much more than just a sweet treat-it’s a testament to the delicate balance of science and artistry. Behind its cloud-like texture and subtle sweetness lies a symphony of carefully whipped egg whites, precise folding techniques, and a touch of magic that transforms simple ingredients into something heavenly. Whether you savor it plain or adorned with fresh berries and whipped cream, angel food cake invites us all to experience a slice of culinary bliss that’s as timeless as it is enchanting. So next time you indulge in its tender crumb and lofty rise, remember the secrets that make this cake truly divine-and delight in every bite from the first to the last.
Mastering Börek begins with selecting the perfect filling-one that bursts with authentic flavors while honoring the rich culinary tradition of this beloved savory pastry. Whether you lean towards succulent meats, fresh herbs, creamy cheeses, or hearty vegetables, the right filling transforms each delicate, flaky layer into a memorable experience. Let’s dive into creating that harmony of flavors and textures, starting with how to choose fillings that elevate your börek from simple to sensational.
Choosing the Perfect Filling for Authentic Flavors
To truly master börek, aim for fillings that balance moisture and seasoning to complement the pastry’s crisp, buttery layers. Customary options include:
- Ground lamb or beef sautéed with onions, garlic, and aromatic spices like cumin and cinnamon;
- Feta cheese combined with fresh parsley or dill for a tangy, herbaceous bite;
- Spinach and leeks cooked down with a hint of nutmeg;
- Potato puree seasoned with paprika and caramelized onions for a comforting vegetarian choice.
Fresh herbs are a must-thyme, mint, or chives can infuse your filling with vibrant notes. Keep fillings slightly firm and not too wet to prevent soggy layers, ensuring that each bite stays crisp and inviting.
Crafting the Ideal Dough Texture for Flaky Perfection
Your dough is the foundation of every great börek. A masterful dough strikes the perfect balance of elasticity and tenderness, enabling you to roll it paper-thin without tearing. Use all-purpose flour combined with a dash of oil and warm water for pliability.Resting the dough for at least 30 minutes under a damp cloth relaxes the gluten and simplifies rolling.
Pro tip: If you want extra flaky layers, consider layering your sheet with melted butter or olive oil as you assemble the börek. This technique creates irresistible golden crispiness once baked.
expert techniques for Rolling and Shaping Börek
Once rested, divide the dough into small balls. Using a lightly floured surface, roll each ball into an ultra-thin circle-almost translucent.The key here is patience, gentle pressure, and a careful swirl of your wrist, which helps elongate the dough evenly.
For shaping, try classic forms such as:
- Triangles: Place a spoonful of filling near the edge, fold into a neat triangle, sealing edges firmly.
- Spirals: Spread filling on a thin sheet, then roll tightly before coiling it into a spiral.
- Rectangular layers: Stack multiple thin sheets brushed with butter, layering filling intermittently for a luxurious multi-layered börek.
ensure edges are well sealed with a touch of water or beaten egg to avoid filling leakage during baking.
Baking Tips and Presentation Ideas to Impress Your Guests
Before baking, brush your börek generously with egg wash or melted butter to achieve that coveted golden sheen. Place on a parchment-lined tray and bake in a preheated oven at 375°F (190°C) for 25-30 minutes until crisp and bubbly.
For a stunning presentation, serve börek warm on a rustic wooden board, garnished with fresh herbs like parsley or mint and accompanied by a bowl of creamy yogurt or tzatziki. Add a wedge of lemon to brighten each bite and elevate the flavor profile.
Prep and Cook Time
- Readiness: 40 minutes (includes dough resting)
- Cooking: 30 minutes
- Total: 1 hour 10 minutes
Yield
Serves 6-8 people,perfect for sharing at brunch or dinner parties.
Difficulty Level
Medium - requires some dough handling skills and attention to rolling techniques, but easily achievable with practice.
Ingredients
- For the Dough:
- 3 cups all-purpose flour, sifted
- 1 cup warm water
- 2 tbsp olive oil
- 1 tsp salt
- For the Filling (Classic Spinach and Feta):
- 400g fresh spinach, washed and roughly chopped
- 200g feta cheese, crumbled
- 1 medium onion, finely diced
- 2 tbsp olive oil
- 1/4 tsp freshly ground black pepper
- 1/2 tsp nutmeg
- 1/4 cup fresh dill, chopped
- For Assembly:
- 1 egg, beaten (for egg wash)
- 3 tbsp melted butter or olive oil (for layering)
Instructions
- Make the dough: In a large bowl, mix sifted flour and salt. Gradually add warm water and olive oil, stirring until dough forms. Knead on floured surface for 8-10 minutes until smooth and elastic. Cover and let rest for 30 minutes.
- Prepare filling: Heat olive oil in skillet over medium heat. Sauté onions until translucent,about 5 minutes,stirring occasionally. Add spinach and cook until wilted, about 4 minutes. Remove from heat; stir in crumbled feta, dill, nutmeg, and black pepper. Let cool.
- Divide dough: Cut rested dough into 8 equal balls. Lightly flour surface and roll each ball into thin, nearly translucent circles.
- assemble börek: Brush dough with melted butter. Spoon filling along one side, then fold dough into desired shape (triangle, spiral, or rectangle). Seal edges gently with water or beaten egg.
- Layer (optional): For multi-layer börek, stack sheets alternately spreading melted butter and filling layers.
- Preheat oven: Set to 375°F (190°C). Line baking tray with parchment paper.
- Brush börek: Generously apply egg wash to each shaped pastry.
- Bake: Place börek on tray and bake for 25-30 minutes until golden and crisp.
- Serve: Let cool 5 minutes before serving warm with fresh herbs and yogurt dips.
Tips for Success
- use warm water for dough to help activate gluten and ease rolling.
- Resting dough is essential – don’t skip it to avoid shrinkage during rolling.
- Keep your work surface lightly floured to prevent sticking, but avoid excess flour that toughens dough.
- If dough tears,repair by gently pressing the edges or patching with a little extra flour and water mixture.
- for a vegan version, substitute feta with seasoned tofu and use olive oil instead of egg wash.
- Make ahead: Börek can be formed and refrigerated for up to 6 hours before baking-ideal for meal prep or entertaining.
Serving Suggestions
Present börek stacked or spiraled on a large platter, garnished with freshly chopped parsley or mint for a splash of color. Pair with a side of cooling garlic yogurt sauce or a crisp salad made from cucumbers, tomatoes, and red onions tossed in a lemon vinaigrette. Add lemon wedges alongside to enhance the flaky pastry’s savory depth.
| Nutritional Info (per serving) | Calories | Protein | Carbohydrates | Fat |
|---|---|---|---|---|
| Spinach & Feta Börek | 320 kcal | 14g | 28g | 18g |

For further inspiration, explore our Turkish pastry and baklava recipes. To deepen your understanding of traditional Turkish spices and herbs, visit Britannica’s guide on Turkish cuisine.
Q&A
Q&A: Mastering Börek – A Delicious Step-by-Step Recipe Guide
Q1: What exactly is Börek?
A1: Börek is a savory pastry originating from the Ottoman Empire, beloved throughout Turkey and the Balkans. It features thin layers of dough-frequently enough phyllo or yufka-wrapped or layered with fillings ranging from cheese and spinach to minced meat, then baked to golden, flaky perfection. Think of it as the crispy, indulgent cousin of your favorite stuffed pie.
Q2: Why is mastering Börek worth the effort?
A2: Becuase Börek isn’t just food; it’s an experience-a delightful dance between crisp layers and rich fillings. With patience and technique, you’ll unlock textures and flavors that wow the senses. Plus, once mastered, Börek becomes your signature dish for gatherings or a comforting weeknight treat.
Q3: Which ingredients are essential for a traditional Börek?
A3: At the heart of Börek is the dough-typically phyllo or handmade yufka-which provides the signature crispness. Common fillings include salty feta or Turkish white cheese,spinach or fresh herbs,onions,and sometimes ground lamb or beef for meat lovers. Olive oil or melted butter is key for brushing the dough layers to achieve that irresistible golden crunch.Q4: Can I make the dough from scratch?
A4: Absolutely! Making yufka dough by hand is a rewarding part of the Börek art. It requires flour, water, a pinch of salt, and lots of stretching to create impossibly thin sheets. For beginners, supermarket phyllo dough offers a convenient shortcut without compromising taste.
Q5: What’s the secret to perfectly crispy Börek?
A5: The magic lies in layering and moisture control. Brush every layer generously with butter or oil, but avoid overly wet fillings that can sog the dough. Bake at a high enough temperature-usually around 375°F (190°C)-until the top is beautifully golden and crisp.
Q6: How versatile is Börek? Can I customize the fillings?
A6: Börek invites creativity! Traditional fillings abound, but you can get playful with mushrooms, pumpkin, or even sweet versions with nuts and honey. The key is balancing moisture and flavor to preserve that flaky texture.
Q7: What’s the best way to serve Börek?
A7: Serve Börek warm, straight from the oven, accompanied by a dollop of tangy yogurt or a fresh salad. The contrast between the crispy pastry and cooling sides creates an unforgettable bite.
Q8: Any tips for beginner Börek makers?
A8: Yes! Take your time with layering-thinner layers mean crispier Börek. If using phyllo, keep the sheets covered with a damp towel to prevent drying out. Practice makes perfect: your hands will become more confident,and you’ll soon master folding or rolling techniques.
Q9: Can Börek be frozen?
A9: Indeed! Börek freezes beautifully before baking. Assemble your Börek, wrap it tightly, and freeze. When ready, bake it straight from frozen, adding a few extra minutes to the baking time, and enjoy fresh, flaky goodness whenever you please.
Q10: Where can I learn more about Börek’s cultural roots?
A10: Dive into Turkish and Balkan culinary blogs, cookbooks, or documentaries exploring Ottoman-era kitchens. Börek is more than a dish-it’s a story of tradition,family,and shared tables that have spanned centuries.
Embark on your Börek journey with patience and passion, and you’ll soon be slicing into layers of golden, crispy delight that tell a delicious story with every bite!
Closing Remarks
Mastering börek is more than just following a recipe-it’s an invitation to embark on a culinary journey filled with flaky layers, rich fillings, and the warm embrace of tradition. With each fold and brush of butter, you craft not only a dish but a story that bridges cultures and generations. Whether you’re a seasoned cook or a curious beginner, this step-by-step guide equips you with the tools and confidence to bring the magic of börek into your kitchen. So roll up your sleeves, embrace the dough’s delicate texture, and let your taste buds savor the triumph of homemade börek-as great cooking, much like life, is best enjoyed one delicious layer at a time.
Hearty Stuffed Bell Pepper Casserole transforms the humble bell pepper into a vibrant celebration of rich textures and comforting flavors. This dish showcases tender peppers filled with a savory medley of meat, rice, and aromatic herbs, baked together in a luscious tomato sauce that brings each bite to life. Rooted in classic home cooking,it’s the ultimate satisfying meal that’s as visually stunning as it is delicious-perfect for family dinners or meal-prep lunches.
Prep and Cook Time
- Readiness: 20 minutes
- Cooking: 45 minutes
- Total Time: 1 hour 5 minutes
Yield
Serves 6 hearty portions
Difficulty Level
Medium – perfect for home cooks ready to master layering flavors and textures
ingredients That Elevate Yoru Stuffed Bell Pepper Casserole to the Next Level
- 6 large bell peppers (choose a mix of red, yellow, and orange for a colorful presentation)
- 1 lb lean ground beef or ground turkey for a lighter alternative
- 1 cup long-grain white rice, rinsed
- 1 medium yellow onion, finely chopped
- 3 cloves garlic, minced
- 1 can (14 oz) crushed tomatoes
- 1/2 cup tomato sauce-adds depth and moisture to the casserole
- 1 tsp smoked paprika-for a subtle smoky undertone
- 1 tsp dried oregano or fresh if available
- 2 tbsp fresh parsley, chopped, for brightness
- 1 cup shredded sharp cheddar cheese, divided
- 1/2 cup beef broth or vegetable broth to keep peppers juicy
- salt and freshly cracked black pepper to taste
- 2 tbsp olive oil for sautéing
- Optional kick: pinch of crushed red pepper flakes or 1 tsp chipotle powder
Mastering Flavor Balance Through Seasoning and Sauces
Building depth starts with perfect seasoning. Saute the onions and garlic in olive oil until soft and fragrant, this releases their natural sweetness that balances the tangy crushed tomatoes. The smoked paprika adds warmth without overpowering, while oregano offers herbaceous notes that complement the richness of the meat. A touch of broth poured around the peppers before baking ensures the casserole stays moist and tender, preventing dryness. Finish with shredded cheddar-it melts into gooey pockets of comfort, tying each bite together harmoniously.
step by Step Guide to Achieving the Perfectly Tender and Juicy Peppers
- Prepare the peppers: Slice the tops off each bell pepper and remove seeds and membranes, keeping the peppers whole.Lightly blanch them in boiling water for 3 minutes to soften, then drain and set aside.
- Sauté the filling: Heat olive oil in a large skillet over medium heat. Add the chopped onions and garlic, cooking until translucent (about 5 minutes).
- Brown the meat: add ground beef to the skillet, breaking it apart as it cooks. season with salt, pepper, smoked paprika, and oregano.Once browned, stir in rinsed rice and cook for 2 minutes to toast slightly.
- Add tomatoes and broth: Stir in the crushed tomatoes, tomato sauce, and beef broth. Let simmer for 10 minutes to meld flavors and partially cook the rice.
- Fill the peppers: Spoon the rich meat and rice mixture into each bell pepper, packing it firmly but gently. place peppers upright in a baking dish.
- Top and bake: Pour a little broth into the baking dish around the peppers. Sprinkle shredded cheddar over the tops. Cover with foil and bake at 375°F (190°C) for 30 minutes.
- Finish uncovered: Remove the foil and bake for an additional 10-15 minutes until the cheese is golden and bubbly,and the peppers are tender but still hold their shape.
Pro Tips for Customizing Your Casserole with Fresh and Hearty Additions
Boost texture and nutrition by mixing in finely chopped mushrooms or diced zucchini with your filling. For a vegetarian twist, swap the ground beef for lentils or quinoa, and use vegetable broth. Adding fresh herbs like basil or cilantro just before serving adds aromatic freshness. If you prefer some heat, stir in diced jalapeños or a drizzle of your favorite hot sauce. Leftovers reheat beautifully, making this casserole a perfect make-ahead dish that deepens in flavor overnight.
Chef’s Notes
- Rice substitution: For a gluten-free option, swap white rice for quinoa or cauliflower rice, adjusting cooking times accordingly.
- Cheese variations: Monterey jack, mozzarella, or a sprinkle of parmesan add different layers of gooeyness and tang.
- Making ahead: Assemble the casserole fully,then refrigerate for up to 24 hours before baking to enhance the melding of flavors.
- Troubleshooting: If your peppers are not tender enough after baking, cover with foil and bake an extra 10 minutes with a splash of broth.
Serving Suggestions
Present your casserole with a fresh green salad tossed in a zesty vinaigrette or steamed seasonal vegetables like green beans or asparagus to balance the rich filling. Garnish with additional freshly chopped parsley or a sprinkle of paprika for color contrast. A dollop of sour cream or tangy Greek yogurt on the side provides creamy contrast and an indulgent touch.Crusty garlic bread elevates the meal into a truly comforting feast.

| Nutrient | Per serving |
|---|---|
| Calories | 420 kcal |
| Protein | 32 g |
| Carbohydrates | 28 g |
| Fat | 18 g |
For more comforting casserole ideas, check out our guide on Ultimate Chicken and Rice Casserole. For nutritional advice on balanced meals, visit EatRight.org.
Q&A
Q&A: Hearty Stuffed bell Pepper Casserole – A Comforting Classic
Q1: What makes stuffed bell peppers such a timeless comfort food?
A1: Stuffed bell peppers combine the heartiness of a home-cooked meal with vibrant colors and flavors that evoke nostalgia. The tender, sweet peppers cradle a savory filling-usually ground meat, rice, and spices-creating a perfect bite that’s satisfying and wholesome. This blend of textures and tastes has made them a beloved dish across generations.
Q2: How does a casserole version differ from conventional stuffed bell peppers?
A2: The casserole reinvents the classic by layering all the ingredients together in one dish rather then stuffing individual peppers. This approach is not only simpler and quicker but also allows flavors to meld beautifully as they bake. It’s perfect for feeding a crowd and great for meal prepping, offering the same comforting essence with less fuss.
Q3: Can I customize the filling to suit dietary needs or preferences?
A3: Absolutely! The beauty of a stuffed pepper casserole lies in its versatility. Use ground turkey or plant-based meat substitutes for lighter or vegetarian options. Swap out rice for quinoa or cauliflower rice to keep it low-carb. Incorporate your favorite herbs, veggies, or cheeses to tailor the dish to your taste buds and lifestyle.Q4: What are some tips for achieving the perfect balance of flavors in this casserole?
A4: Start with sautéed onions and garlic to build depth. Season the meat mixture generously with herbs like oregano, thyme, or smoked paprika. A splash of tomato sauce or diced tomatoes adds acidity and moisture, balancing the sweetness of the bell peppers. don’t forget a good melting cheese on top for that golden, bubbly finish.
Q5: How do I serve and store leftover hearty stuffed bell pepper casserole?
A5: Serve the casserole straight from the oven with a side salad or crusty bread for a comforting meal. Leftovers keep well-store them in an airtight container in the fridge for up to 4 days. Reheat gently in the oven or microwave.It also freezes beautifully, making it a perfect make-ahead dinner for busy weeks.
Q6: Why does this dish bring such warmth beyond its flavors?
A6: Beyond the taste, hearty stuffed bell pepper casserole is a symbol of home and family. It’s a dish that invites sharing, sparks memories of gatherings, and fills the kitchen with cozy aromas. It’s comfort food in its truest form-nourishing body and soul with every savory bite.
To Conclude
Whether you’re craving a cozy weeknight meal or looking to impress family and friends with a dish that feels like a warm hug, this Hearty Stuffed Bell Pepper Casserole delivers on all fronts. Its vibrant colors, rich flavors, and satisfying textures come together to create a comforting classic that’s as nourishing as it is indeed delicious. So next time you want to fill your kitchen with inviting aromas and your table with smiles,remember this casserole – a timeless recipe that turns simple ingredients into lasting memories.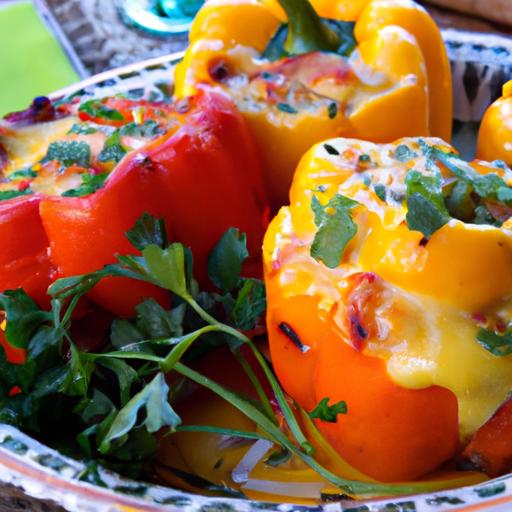
Sizzling Tofu Broccoli Stir Fry combines simplicity with vibrant nutrition, making it a go-to dish for anyone seeking a quick yet deeply satisfying meal. This stir fry celebrates the wholesome pairing of protein-packed tofu and fiber-rich broccoli,creating a harmonious balance that nourishes the body and delights the palate.Rooted in Asian culinary traditions, this dish has become a modern staple-perfect for weeknight dinners or meal prep.
Prep and Cook Time
Planning: 15 minutes
cooking: 12 minutes
Total Time: 27 minutes
Yield
Serves 4 generous portions
Difficulty Level
Easy - perfect for beginners and seasoned cooks alike
Ingredients
- 14 oz (400g) firm tofu, pressed and cut into 1-inch cubes
- 3 cups broccoli florets, fresh or lightly steamed
- 2 tbsp vegetable oil (canola or peanut oil preferred for high heat)
- 3 cloves garlic, minced
- 1-inch piece fresh ginger, grated
- 1 small red chili, thinly sliced (optional, for heat)
- 3 tbsp soy sauce (or tamari for gluten-free)
- 1 tbsp hoisin sauce
- 1 tbsp rice vinegar
- 1 tbsp maple syrup or honey
- 1 tsp toasted sesame oil
- 2 tbsp water (to loosen the sauce)
- 1 tsp cornstarch, mixed with 2 tbsp cold water
- Sesame seeds for garnish
- Chopped scallions for finishing touch
Instructions
- Prepare the tofu: Wrap the tofu in a clean kitchen towel and press gently to remove excess moisture. Cube the tofu evenly to ensure consistent browning.
- Heat the wok or large skillet over medium-high heat: Add the vegetable oil and swirl to coat. Carefully add the tofu cubes in a single layer. Let them cook undisturbed for 3-4 minutes until the bottoms turn a golden crust.
- Flip and continue cooking: Gently turn the tofu cubes to brown all sides, about 4 minutes more. Remove tofu and set aside on a paper towel-lined plate to absorb any extra oil.
- Sauté aromatics: Add a touch more oil if needed, than toss in garlic, ginger, and sliced chili. Stir vigorously for 30 seconds until fragrant yet not burnt.
- Add broccoli florets: Toss them into the wok and cook for 4-5 minutes, stirring frequently.The broccoli should turn luminous green and become tender-crisp.
- Whisk together the sauce: In a small bowl, combine soy sauce, hoisin, rice vinegar, maple syrup, toasted sesame oil, and water. Pour this mixture over the broccoli and stir well.
- return tofu to the wok: Gently fold the tofu into the vegetables and sauce. Give the cornstarch slurry a quick stir, then pour into the pan.cook, stirring continuously, until the sauce thickens and glazes the tofu and broccoli evenly (about 2 minutes).
- Final touches: Taste and adjust seasoning if needed. Remove from heat and sprinkle with sesame seeds and chopped scallions.
- Serve immediately: plate your sizzling tofu broccoli stir fry over steamed jasmine rice or your favorite noodles for a complete meal.
Tips for Success
- Pressing tofu: Ensures a crispier texture by removing moisture-aim for at least 20 minutes of pressing time using a tofu press or heavy books.
- High heat stir-frying: Use a wok or large skillet and keep ingredients moving to avoid sticking and promote even cooking.
- Vegetable variations: Add snap peas, bell peppers, or baby corn for extra color and crunch.
- Make ahead: Prep tofu and sauce in advance; store separately to maintain freshness. Stir fry quickly just before serving.
- For gluten-free option: Use tamari instead of soy sauce and ensure your hoisin sauce is gluten-free.
- Customize heat level: Omit chili for mild flavors or add chili flakes for a fiery kick.
Serving Suggestions
Enhance your sizzling tofu broccoli stir fry with a side of fragrant jasmine rice or steamed brown rice for a wholesome balance. Alternatively, nestle it atop a bed of soba noodles or serve alongside quinoa for a protein boost. Garnish with a fresh wedge of lime to add a citrusy brightness or sprinkle roasted peanuts for added texture. This dish pairs beautifully with a cucumber salad or miso soup for a vibrant, well-rounded meal.

| nutrient | Per Serving |
|---|---|
| Calories | 280 |
| Protein | 18g |
| Carbohydrates | 14g |
| Fat | 16g |
For related recipes on healthy plant-based dinners, check out our Vegan Stir Fry recipes Collection. For a deeper dive into the health benefits of tofu and broccoli, visit Healthline’s detailed guide.
Q&A
Q&A: Sizzling Tofu Broccoli Stir Fry – A Healthy flavor Boost
Q1: What makes the Sizzling Tofu Broccoli Stir Fry a “healthy flavor boost”?
A1: This dish is a vibrant party of nutrients and taste! Packed with protein-rich tofu and fiber-loaded broccoli, it delivers a powerhouse of vitamins and minerals. the sizzling stir fry method locks in flavor without drowning ingredients in oil, creating a light yet intensely savory meal. It’s a perfect way to nourish your body while tantalizing your taste buds.Q2: Why choose tofu and broccoli as the star ingredients?
A2: Tofu is a versatile plant-based protein that soaks up flavors beautifully and offers a silky texture. Broccoli brings a satisfying crunch and a bounty of antioxidants, vitamins C and K, and fiber. Together, they form a dynamic duo that supports muscle health, digestion, and immune function – all wrapped up in a deliciously balanced bite.
Q3: How can I make the stir fry sizzle with flavor without excessive oil or sodium?
A3: Use high-quality, aromatic ingredients like fresh ginger, garlic, and a splash of low-sodium soy sauce or tamari. Adding a squeeze of citrus or a dash of chili flakes can brighten and deepen the profile without extra salt or fat. Toasting sesame seeds or incorporating a hint of toasted sesame oil at the end adds a nutty whisper of indulgence-without going overboard.
Q4: Is this recipe adaptable for different dietary preferences?
A4: Absolutely! The Sizzling Tofu Broccoli Stir Fry is naturally vegan and gluten-free if you choose tamari over soy sauce. for a nut-free version, skip added nuts or seeds.If you want more protein, toss in edamame or cashews; if you crave extra veggies, mushrooms, bell peppers, or snap peas fit perfectly. This dish is a blank canvas ready for your creativity.Q5: What’s the secret to achieving that perfect “sizzle” in the stir fry?
A5: High heat and a preheated pan are your best friends. Ensure your tofu cubes are patted dry to prevent steaming. stir frequently but don’t overcrowd the pan-this helps vegetables stay crisp and tofu develop a golden crust. The sizzling sound is the hallmark of flavors caramelizing and mingling, signaling a mouthwatering result.
Q6: How quickly can I prepare this dish on a busy weeknight?
A6: Thanks to its simplicity, this stir fry can be ready in under 20 minutes! While the pan heats, chop your broccoli and press your tofu. The quick cooking time means veggies remain fresh and vibrant. Pair it with steamed rice or noodles, and you’ve got a wholesome, speedy meal that doesn’t compromise on flavor or nutrition.
Q7: Can this stir fry be made ahead or stored as leftovers?
A7: Yes! Prepare and cool the stir fry quickly, then refrigerate in an airtight container for up to 3 days. When reheating, do so in a hot skillet or microwave, adding a splash of water or broth if it truly seems dry. For best texture,consider adding fresh stir-fried broccoli or a crisp salad alongside leftovers.
With its bold flavors,healthful ingredients,and quick cooking time,the Sizzling Tofu Broccoli stir Fry is a delicious way to add color,crunch,and vitality to your dinner table every day!
Closing Remarks
As the final sizzle fades and the aroma of sautéed tofu and vibrant broccoli lingers,this stir fry stands as a testament to how healthy eating can be both simple and sensational. Whether you’re seeking a quick weeknight dinner or a nutrient-packed meal that excites your taste buds,this dish delivers a perfect balance of protein,greens,and bold flavors. So next time you crave a wholesome boost without sacrificing zest, remember that a sizzling tofu broccoli stir fry isn’t just a meal-it’s a vibrant invitation to nourish your body and delight your palate in every bite.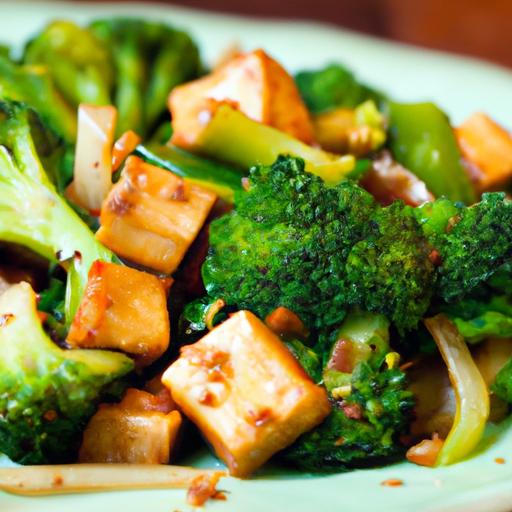
Decadent chocolate dessert recipes to satisfy your cravings invite us on a journey where timeless favorites meet contemporary flair, transforming every bite into an experience of velvety indulgence.From my earliest memories of savoring rich chocolate in my grandmother’s kitchen to experimenting with unexpected yet harmonious ingredients like espresso powder and smoked sea salt, these reinvented classics bring a new depth of flavor and texture that will captivate both chocolate purists and adventurous palates alike.
Prep and Cook Time
- Preparation: 20 minutes
- Cook Time: 30 minutes
- Total Time: 50 minutes
Yield
- 8 generous servings
Difficulty Level
- Medium – perfect for home bakers ready to elevate their chocolate game
Ingredients
- 1 cup unsweetened cocoa powder, sifted
- 1 ½ cups all-purpose flour, sifted
- 1 tsp baking powder
- ½ tsp fine sea salt
- 1 cup unsalted butter, melted and cooled
- 1 ¼ cups granulated sugar
- 3 large free-range eggs, room temperature
- 2 tsp pure vanilla extract
- ½ cup strong brewed espresso, cooled
- ½ cup dark chocolate chunks (70% cacao or higher)
- 1 tbsp smoked sea salt flakes (optional, for finishing)
Instructions
- Preheat your oven to 350°F (175°C).Grease and line an 8-inch square baking pan with parchment paper.
- In a medium bowl, whisk together the sifted cocoa powder, sifted flour, baking powder, and fine sea salt until evenly combined.
- In a large mixing bowl, combine the melted butter and granulated sugar. Use a hand mixer on medium speed to beat until smooth and glossy, about 2 minutes.
- Add the eggs, one at a time, mixing thoroughly after each addition, then stir in the vanilla extract.
- Slowly fold in the espresso, wich intensifies the chocolate without overpowering the profile.
- Gradually incorporate the dry ingredients into the wet mixture, folding gently to maintain the batter’s airy texture.
- Fold in the dark chocolate chunks, ensuring even distribution for pockets of melty goodness.
- Pour the batter into the prepared pan, smoothing the top with a spatula. Bake for 28-30 minutes, or until a toothpick inserted near the center comes out with moist crumbs.
- Remove from oven and let cool fully in the pan on a wire rack.
- Sprinkle the surface with smoked sea salt flakes just before serving to highlight the complex flavors.
Tips for Success
- For extra moistness, substitute half the butter with refined coconut oil, which enhances richness without altering the chocolate’s purity.
- Ensure eggs are at room temperature to help create a smooth, even batter.
- If your cocoa powder is especially bitter, balance the flavor by adding a tablespoon of honey or maple syrup into the wet ingredients.
- Make these decadent chocolate dessert recipes to satisfy your cravings even easier by prepping the batter a day ahead and refrigerating it overnight. Allow it to come to room temperature before baking.
- to add a nutty crunch, sprinkle chopped toasted pecans or hazelnuts on top before baking.
Serving Suggestions
Serve warm squares of these luscious brownies alongside a scoop of vanilla bean ice cream, drizzled with salted caramel sauce for a decadent contrast. Garnish with fresh raspberries or edible gold leaf for that extra wow factor.For an elevated presentation, plate with a dusting of cocoa powder or a swirl of homemade chocolate ganache infused with a hint of chili for subtle kick.

| Nutrient | Per Serving (1 piece) |
|---|---|
| Calories | 320 kcal |
| Protein | 5 g |
| Carbohydrates | 38 g |
| Fat | 18 g |
For more inspiration on chocolate-centric creations, check our Ultimate Chocolate Mousse Guide. Also, learn about the science of chocolate flavor at Cocoa & Chocolate Science.
Q&A
Q&A: decadent Chocolate Dessert Recipes to Satisfy Your Cravings
Q1: What makes a chocolate dessert truly decadent?
A: Decadence in chocolate desserts is all about richness and indulgence. It means using high-quality chocolate with a deep, intense flavor, combining creamy textures with the perfect balance of sweetness, and often adding luxurious elements like ganache, espresso, or a hint of sea salt. The result is a dessert that feels like a sumptuous treat every bite.
Q2: Can you recommend a simple yet decadent chocolate dessert recipe for beginners?
A: Absolutely! A classic molten lava cake is both notable and surprisingly easy. With just a few ingredients-dark chocolate, butter, sugar, eggs, and flour-you can create a gooey-centered cake that oozes rich chocolate as soon as you cut in. Serve warm with vanilla ice cream for instant magic.Q3: How can I elevate everyday brownies into a decadent dessert?
A: Elevate brownies by incorporating mix-ins like chunks of dark chocolate or toasted nuts, swirling in salted caramel, or topping with a glossy ganache finish. for a gourmet touch, sprinkle with flaky sea salt or pair with a dollop of whipped cream infused with a hint of coffee or liqueur.
Q4: Are there any no-bake chocolate desserts that still feel indulgent?
A: Yes! Chocolate mousse is the quintessential no-bake luxury dessert. Whipping up heavy cream and folding it into melted dark chocolate creates an airy yet rich experience. You can also try chocolate truffles rolled in cocoa powder or crushed nuts-simple to make but incredibly indulgent.Q5: How do I ensure my chocolate desserts aren’t overly sweet?
A: Balance is key.Use bittersweet or dark chocolate with at least 60-70% cocoa content to avoid excessive sweetness. Incorporate natural bitterness by adding espresso powder or a pinch of sea salt. Fresh fruits like raspberries or a tart berry coulis can also offset sweetness with their luminous acidity.
Q6: What are some unique flavor pairings to enhance chocolate desserts?
A: Chocolate pairs beautifully with unexpected flavors like chili for a spicy kick, orange zest for brightness, or lavender for floral notes. Nuts like hazelnuts and pistachios offer texture and nuttiness, while ingredients like caramel, coffee, or even a splash of bourbon deepen the complexity of the dessert.
Q7: Any tips for presenting chocolate desserts in a way that wows guests?
A: Presentation is part of the decadence! Use elegant plating techniques: drizzle sauces artistically, garnish with fresh mint, edible gold leaf, or berries, and serve desserts in clear glass jars or sleek ramekins. Don’t forget texture-adding a sprinkle of crushed nuts or a dusting of cocoa powder can heighten the sensory experience.
Q8: How can I customize chocolate desserts for dietary restrictions without losing the decadence?
A: Great question! Use dairy-free chocolate and coconut cream to create luscious vegan mousses or cakes. For gluten-free, almond flour or oat flour are excellent substitutes in brownies or tarts. Natural sweeteners like maple syrup or coconut sugar can replace refined sugar while keeping the flavor rich and satisfying.
Q9: What’s the secret to perfect chocolate ganache?
A: It’s all about ratios and temperature! typically, equal parts by weight chocolate and heavy cream create a versatile ganache with a silky texture. Heat the cream just until steaming, pour over chopped chocolate, let it sit for a minute, then gently stir until smooth. avoid overheating to prevent graininess.
Q10: Where can I find inspiration for creating my own decadent chocolate dessert recipes?
A: Inspiration is everywhere-from classic French patisserie to modern artisan chocolatiers. Food blogs, cooking shows, and dessert books offer endless ideas.Experiment with seasonal ingredients, cultural twists, and unexpected textures to put your unique spin on chocolate indulgence.
Indulging in decadent chocolate desserts doesn’t mean complexity-sometimes the richest joy comes from the simplest combinations of high-quality ingredients and a little creative flair. Ready to satisfy your cravings? Let your sweet adventure begin!
In Conclusion
Whether you’re a seasoned chocolatier or a curious beginner, these decadent chocolate dessert recipes are your passport to a world of rich flavors and irresistible textures. From velvety mousses to fudgy brownies and beyond, each creation promises to satisfy your deepest cravings and elevate your dessert game.So next time the chocolate urge strikes, remember these luscious recipes are just a whisk away-ready to transform ordinary moments into remarkable indulgences. Your sweet adventure awaits!
essential Ingredients for Flavorful Pasta on a Budget
Delicious & Affordable Pasta Recipes are a gateway to creating comforting,satisfying meals without straining your wallet. Pasta’s humble roots in Italy remind us that simplicity paired with quality ingredients yields unforgettable flavors. Starting with foundational pantry staples,you can build on classic dishes and infuse them with creative twists that elevate both taste and presentation.
Prep and cook Time
- Planning: 10 minutes
- Cooking: 15 minutes
- Total Time: 25 minutes
Yield
Serves 4 generous portions-perfect for family dinners or meal prepping for the week.
Difficulty Level
Easy – Ideal for beginner cooks and anyone looking for fast, economical meals.
Ingredients
- 12 oz dried spaghetti or any budget-friendly pasta
- 3 tbsp olive oil (extra virgin for best flavor)
- 4 cloves garlic, thinly sliced
- 1/2 tsp red pepper flakes (adjust to taste)
- 1 cup canned diced tomatoes (drained)
- 1/4 cup grated Parmesan cheese (optional but adds umami)
- 1 tbsp dried Italian herbs or a mix of dried oregano and basil
- Salt and freshly ground black pepper, to taste
- Fresh parsley (optional, roughly chopped for garnish)
- 1 cup frozen peas or any affordable seasonal vegetable (optional)
Instructions
- Bring a large pot of salted water to a rolling boil. Add the pasta and cook according to package instructions untill al dente,usually about 8-10 minutes. Drain, reserving 1/2 cup of pasta water.
- meanwhile, heat olive oil in a large skillet over medium heat. Add the sliced garlic and red pepper flakes. Sauté until fragrant and the garlic is golden brown, about 2-3 minutes-be careful not to burn the garlic.
- Stir in the canned diced tomatoes and dried Italian herbs. Allow the mixture to simmer for 5-7 minutes, letting the flavors meld and the sauce thicken slightly. If using frozen peas or veggies, add them now and cook until heated through.
- Toss the drained pasta into the skillet with the tomato sauce. Add reserved pasta water a little at a time to loosen the sauce and help it coat each strand beautifully.
- Season with salt and freshly ground black pepper to taste. Stir in the grated Parmesan cheese until melted and mixed well.
- Remove from heat and garnish with chopped fresh parsley just before serving for a pop of color and freshness.
Tips for Success
- Use good quality dried pasta-the inexpensive tubular or long pasta shapes perform wonderfully in budget recipes.
- Replace fresh garlic with garlic powder if needed; it still imparts that punch of flavor.
- Stirring frequently during sauce simmering prevents scorching and helps concentrate the flavors evenly.
- if you want to boost protein without adding meat, toss in a can of drained chickpeas or white beans during step 3.
- make extra sauce and store in the fridge for up to 3 days-it makes a quick reheat meal even simpler!
Serving Suggestions
For a beautifully plated dish, twirl the pasta onto warmed plates and drizzle a little extra virgin olive oil on top. Garnish with freshly ground black pepper, a sprinkle of Parmesan, and a few basil leaves or parsley sprigs for color. Serve with crusty bread or a simple green salad to round out the meal.
| Nutrient | per Serving |
|---|---|
| Calories | 350 kcal |
| Protein | 12 g |
| Carbohydrates | 58 g |
| Fat | 8 g |

Smart Shopping Tips to Maximize Your pasta Budget
Stock your pantry with staples like dried pasta, canned tomatoes, and dried herbs-thay form the backbone of countless Delicious & Affordable Pasta Recipes. buying store-brand or bulk items can slash costs while maintaining quality. Stay seasonal by incorporating fresh vegetables available at local markets or frozen varieties on sale-both add color and nutrients without inflating the price.
Additionally, keep an eye out for discounted cheese pieces or bulk garlic bulbs, which last well and pack big flavor. Planning meals around sales and mixing in affordable protein sources such as beans or eggs transforms your pasta repertoire into a versatile and wallet-friendly solution. for inspiration on budget-friendly meal planning, check out this Smart Meal Planning Guide and for nutritional insights visit EatRight.org.
Q&A
Q&A: Delicious & Affordable Pasta Recipes – Budget-Friendly Meals
Q1: Why is pasta such a great choice for budget-friendly meals?
A1: Pasta is a pantry superhero! Its inexpensive, shelf-stable for months, and extremely versatile.whether it’s spaghetti, penne, or fusilli, pasta acts as a blank canvas, ready to soak up affordable, flavorful ingredients.With just a few pantry staples, you can whip up hearty meals that satisfy both your taste buds and your wallet.
Q2: What are some key tips for making pasta dishes more affordable without sacrificing flavor?
A2: Start by focusing on simple ingredients like garlic, canned tomatoes, onions, and herbs, which are cheap yet pack a punch of flavor. Use seasonal or frozen veggies instead of fresh to cut costs. Don’t shy away from pantry proteins like beans or lentils-they stretch meals further and add nutritional value. Lastly, make your own sauces from scratch instead of buying pre-made ones to control both cost and quality.
Q3: How can I make a classic pasta dish that feels indulgent but stays budget-friendly?
A3: Take spaghetti aglio e olio, a traditional Italian staple: just garlic, olive oil, chili flakes, and parsley.It’s quick, elegant, and uses only a handful of affordable ingredients. Add a sprinkle of grated Parmesan or nutritional yeast for extra umami. This minimalist dish proves that luxury doesn’t have to come with a hefty price tag.
Q4: What are some creative ways to use leftovers in pasta recipes?
A4: Leftover roasted veggies, cooked chicken, or even stale bread (turned into breadcrumbs) can be stars in a pasta meal. Toss veggies with pasta and a generous drizzle of olive oil; mix chicken chunks into a tomato sauce; sprinkle toasted breadcrumbs on top for crunch. Leftover cheese bits or herbs can refresh and elevate any dish. Think of your fridge as a flavor treasure chest!
Q5: Are there budget-friendly pasta recipes suitable for picky eaters or kids?
A5: Absolutely! Simple pasta with butter and Parmesan is a classic that pleases many palates. You can sneak in finely grated veggies like carrots or zucchini into the sauce for added nutrition without altering the familiar taste. Meatballs made from affordable ground turkey or beans are another hit, combined with a basic tomato sauce. Keep it fun and customizable with mix-ins like olives, corn, or cheese cubes to engage little eaters.
Q6: How can I make these affordable pasta meals healthier without increasing costs too much?
A6: Incorporating plant-based proteins like chickpeas or lentils boosts fiber and keeps expenses low. Bulk up your pasta with chopped seasonal greens or frozen spinach for vitamins and minerals. Use whole wheat or legume-based pasta when possible for extra nutrients. Balancing simple sauces with fresh herbs and citrus zest adds brightness without extra cost or calories.
Q7: Can pasta recipes be made in large batches to save time and money?
A7: Definitely! Pasta dishes like baked ziti, pasta salads, or one-pot meals scale up wonderfully. Cooking in bulk saves energy and time, plus you’ll have ready-to-eat meals for busy days. Just be mindful to store sauces and pasta separately if you want leftovers to maintain their texture. Repurposing leftovers creatively into new dishes can also reduce waste and stretch your grocery budget further.
Embracing pasta as a budget-friendly staple doesn’t mean you have to sacrifice taste or creativity. With a splash of imagination and a handful of affordable ingredients,every meal can be a festivity of flavor and nourishment-without breaking the bank!
Future Outlook
Whether you’re a seasoned chef or a kitchen novice,these delicious and affordable pasta recipes prove that eating well doesn’t have to break the bank. With a little creativity and simple ingredients, you can whip up satisfying meals that delight the senses and stretch your budget. So next time hunger strikes, remember: great taste and savings go hand in hand-one tasty twirl at a time. ready, set, pasta!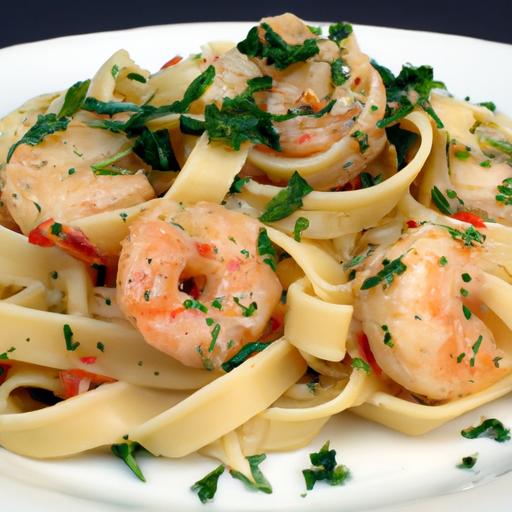
Choosing Nutritious Ingredients for maximum Flavor and Health
Wholesome & fast: Your Guide to Quick Healthy Meals invites you into the vibrant world of nutrient-packed ingredients that bring life and flavor to your kitchen creations. Selecting fresh, colorful produce and high-quality proteins ensures every bite bursts with taste and delivers essential vitamins and minerals. I still remember the first time I discovered the magic of toasted quinoa paired with bright, crunchy vegetables-it transformed a quick lunch into an unforgettable experience. Incorporating nutrient-dense ingredients like leafy greens, seasonal fruits, and heart-healthy fats elevates any recipe, making your meals both satisfying and nourishing.
Prep and Cook Time
- Planning: 10 minutes
- Cooking: 15 minutes
- Total Time: 25 minutes
Yield
serves 4
Difficulty Level
Easy
Ingredients
- 1 cup quinoa,rinsed and drained
- 2 cups vegetable broth (low sodium)
- 1 tbsp extra virgin olive oil
- 1 red bell pepper,diced
- 1 medium zucchini,diced
- 1 cup cherry tomatoes,halved
- 2 cups fresh baby spinach,roughly chopped
- 1/4 cup red onion,finely chopped
- 2 cloves garlic,minced
- 1/4 cup fresh parsley,chopped
- Juice of 1 lemon
- Salt and black pepper,to taste
- Optional: 1/3 cup crumbled feta cheese
instructions
- Toast the quinoa: In a medium saucepan over medium heat,warm 1 tbsp of olive oil. Add the rinsed quinoa and toast for about 3 minutes, stirring frequently enough to prevent burning. This step enhances the nutty flavor and aroma.
- Add broth and cook quinoa: Pour in the vegetable broth, bring to a boil, then reduce heat to low and cover. Simmer until the quinoa is tender and liquid is absorbed, about 15 minutes.
- Prepare the vegetables: While the quinoa cooks, heat a non-stick pan over medium heat. Add a splash of olive oil,then sauté the garlic and red onion until fragrant and translucent,about 2 minutes.
- Add bell pepper and zucchini: Sauté for 5 minutes, stirring occasionally until vegetables are crisp-tender and slightly caramelized.
- Combine ingredients: In a large bowl,fluff the cooked quinoa with a fork. Gently fold in the sautéed vegetables, cherry tomatoes, baby spinach, and chopped parsley. The residual heat will lightly wilt the spinach.
- Season and garnish: Squeeze fresh lemon juice over the mixture,season with salt and black pepper to taste. Add crumbled feta cheese if desired for creamy tanginess.
- Serve warm or chilled: This dish works beautifully as a hearty side or a light main course, perfect for any busy weekday or relaxed weekend meal.
tips for success
- for added protein and texture, toss in roasted chickpeas or grilled chicken slices.
- Substitute quinoa with couscous or bulgur wheat for a different grain profile without sacrificing speed.
- Make-ahead pleasant: Prepare the quinoa and vegetables separately then combine just before serving to preserve freshness and texture.
- Use fresh lemon juice at the end to brighten flavors without overpowering the dish.
- Keep raw cherry tomatoes handy for extra juicy bursts that bring natural sweetness.
Serving Suggestions
Serve this vibrant quinoa salad atop a bed of baby arugula or alongside grilled fish for a balanced meal. Garnish with extra parsley leaves and a drizzle of high-quality olive oil for a glossy finish. Pair with crusty whole grain bread or warm pita for a comforting contrast. This recipe also shines when packed as a colorful lunchbox meal or chilled for summer picnics.

| Nutrient | Per Serving |
|---|---|
| Calories | 320 kcal |
| Protein | 9 g |
| Carbohydrates | 45 g |
| Fat | 8 g |
Time-Saving Cooking techniques That Preserve Nutrients
Steaming vegetables or using a quick sauté with minimal oil are excellent ways to retain natural vitamins and textures without sacrificing speed. Toasting quinoa before cooking not only boosts flavor but also shortens cooking time by releasing natural oils. When possible, prepare ingredients in batches during weekends or evenings to streamline weekday meals. Using airtight containers keeps prepped components fresh and ready to combine,letting you whip up wholesome dishes with ease.
Flavorful Meal Prep Ideas for Busy Weekdays
Batch-cooked grains like quinoa, brown rice, or farro form the perfect base for meal-prep bowls packed with roasted veggies, lean proteins, and tangy dressings. Layer flavors by marinating tofu or chicken in zesty citrus and herb blends overnight. Assemble colorful salads with a mix of raw and cooked components to maintain texture and nutritional balance. Having flavorful dressings on hand-such as tahini lemon or balsamic vinaigrette-makes transforming basic ingredients into satisfying meals effortless and exciting.
Quick and Healthy Recipes You Can Make in Under 30 Minutes
This wholesome quinoa vegetable salad exemplifies “Wholesome & Fast: Your Guide to Quick Healthy Meals” principles with fresh ingredients, simple prep, and vibrant flavors, all ready in under 30 minutes. Whether you’re craving a warm, comforting bowl or a refreshing salad, quick recipes based on fresh produce and whole grains lend themselves to endless customization. Keep nutrient-rich staples stocked and embrace quick-cooking methods for flavorful dinners or energizing lunches that nurture your body and satisfy your palate.
For more inspiration on quick and nourishing meals, explore our Quick Healthy Dinners collection and discover additional fast recipes designed for busy lifestyles.
Learn more about the nutritional benefits of quinoa and its role in a balanced diet at Healthline’s comprehensive guide.
Q&A
Q&A: Wholesome & Fast – your Guide to Quick healthy Meals
Q1: Can healthy meals really be quick to make?
Absolutely! Wholesome doesn’t have to mean complicated.With a little planning and the right ingredients, you can whip up nutritious dishes in 20 minutes or less. Think vibrant salads, one-pan sautés, or nutrient-packed grain bowls-simple, speedy, and satisfying.
Q2: What are some pantry staples that help keep meals fast and healthy?
Keep your kitchen stocked with versatile ingredients like canned beans, quinoa, brown rice, frozen veggies, nuts, and seeds.These items store well, cook quickly, and add fiber, protein, and flavor with minimal effort.
Q3: How can I save time without compromising nutrition?
Batch prepping is your best friend. Chop veggies, cook grains, and portion proteins ahead of time. When hunger strikes, just assemble or reheat! Also, embrace one-pot or sheet-pan recipes-less cleanup, more time saved.
Q4: Are there quick meal ideas that work for picky eaters or kids?
Yes! sneak in veggies by adding finely grated carrots or spinach to pasta sauces, smoothies, or homemade muffins. Customize build-your-own tacos or wraps with colorful, fresh toppings, letting everyone pick what they like.
Q5: What’s a simple, go-to recipe for busy weeknights?
Try a Mediterranean chickpea bowl: toss canned chickpeas with cherry tomatoes, cucumber, olives, feta, lemon juice, and olive oil. Serve over mixed greens or quick-cooked couscous for a balance of protein, fiber, and flavor-all in under 15 minutes.
Q6: How do I keep motivation high for cooking healthy meals fast?
Remember, quick and wholesome meals nourish both body and soul. Celebrate small wins,experiment with colorful spices and herbs,and view cooking as a creative break rather than a chore.When food feels good, it’s easier to stick with.
Q7: Can smoothies be a healthy quick meal?
Definitely! Blend leafy greens, a frozen fruit medley, a scoop of protein powder or yogurt, and some nut butter for a balanced, portable meal. Smoothies are perfect when time’s tight but nutrition can’t be sacrificed.
Q8: Any tips for eating healthy on the go?
Prepare grab-and-go snacks like energy balls, roasted chickpeas, or veggie sticks with hummus. Portable containers with layered salads or mason jar meals also make nutritious meals accessible outside your kitchen.
Eating wholesome food fast is all about smart choices, simple ingredients, and a splash of creativity. With these insights,you’re ready to fuel your day without missing a beat!
Closing Remarks
With these quick and wholesome meal ideas in your culinary toolkit,healthy eating no longer has to be a slow,complicated affair. Whipping up nourishing dishes that fuel your body and delight your taste buds can be both effortless and enjoyable-proof that speed and wellness truly can go hand in hand. So next time time is tight but your appetite for goodness is strong, remember: a nutritious, satisfying meal is just minutes away. here’s to savoring every bite of health, without missing a beat.
Spinach juice is a true nutritional powerhouse, packed with vitamins and minerals that energize your body and invigorate your senses. This vibrant green elixir, celebrated globally for its health benefits, transforms ordinary leafy greens into a refreshing drink that feels as good as it tastes. Drawing from my years as a Culinary Content Creator and Food Stylist, I’m excited to guide you through creative flavor blends and foolproof methods that bring out the best in every drop of this green goodness.
Prep and Cook Time
Prep Time: 10 minutes
Cook Time: 0 minutes (no cooking required)
Yield
Serves 2 (approximately 16 oz total)
Difficulty Level
Easy – beginner-friendly and fast to prepare
Ingredients
- 3 cups packed fresh spinach leaves, washed and roughly chopped
- 1 medium cucumber, peeled and sliced
- 1 green apple, cored and quartered
- 1/2 lemon, juiced
- 1-inch piece fresh ginger, peeled
- 1 cup cold filtered water
- 1 tbsp honey or pure maple syrup (optional, for natural sweetness)
- Ice cubes as needed
Instructions
- Prepare your ingredients: Start by thoroughly washing your spinach to remove any dirt or grit. Chop loosely for easier blending.
- Add ingredients to your blender: Combine the spinach, cucumber, green apple, fresh ginger, lemon juice, and cold water. The cucumber and apple add a naturally sweet, hydrating base that balances the earthiness of spinach.
- Blend until smooth: Pulse on high for about 1 minute, then blend continuously for 30 seconds or until perfectly smooth. If your blender struggles,add a splash more water.
- Strain your juice: For a silky finish, pour the mixture through a fine mesh sieve or nut milk bag into a bowl or large glass. Use a spatula to gently press out every last drop of vibrant liquid.
- Sweeten and chill: Stir in honey or maple syrup if desired,then fill glasses with ice cubes. Pour the juice over the ice for an instantly refreshing drink.
- Serve immediately: Spinach juice tastes best fresh but can be stored covered in the fridge for up to 24 hours.
Chef’s Tips for Elevating Your Spinach Juice
- Amplify nutrition: Add a tablespoon of chia seeds or flaxseeds post-blend for extra omega-3s and fiber, stirring well.
- Flavor twists: Try swapping lemon for lime or adding fresh mint leaves to brighten the profile.
- Texture variations: Blend in half an avocado for creamy richness – perfect for a morning boost.
- Keep it cold: Chilling your ingredients beforehand preserves vibrant color and fresh taste.
- Make it a smoothie: Add a scoop of plant-based protein powder for an energizing meal replacement.
- Quick storage: Use an airtight glass jar for storing your juice, which helps preserve nutrients longer.
Serving Suggestions
Present your spinach juice in tall, clear glasses to showcase its vibrant emerald hue. Garnish with a thin slice of cucumber on the rim or a sprig of fresh mint for a visually enticing touch. Pair it with light breakfast options like avocado toast or a toasted nut granola bowl to balance refreshments with substance. For an on-the-go refresh, pour into a reusable bottle, keeping it chilled until the perfect moment to sip.
| Nutrient | Amount per Serving |
|---|---|
| Calories | 85 kcal |
| Protein | 3 g |
| Carbohydrates | 18 g |
| Fat | 0.5 g |
| Vitamin A | 140% DV |
| Vitamin C | 45% DV |
| Iron | 15% DV |

Discover more refreshing juices like this in our Detox Juice Recipes collection, or learn about the science behind the benefits offered by spinach at Healthline.
Q&A
Q&A: Green Goodness – 7 Delicious Spinach Juice Recipes to Try
Q1: Why is spinach juice considered a “green goodness”?
A: Spinach juice is a powerhouse of nutrients, packed with vitamins A, C, K, iron, and antioxidants. Drinking it fresh helps your body absorb these nutrients quickly, boosting energy, improving digestion, and promoting glowing skin. It’s nature’s vibrant green elixir that fuels your day!
Q2: How can I make the perfect spinach juice at home?
A: Start with fresh, organic spinach to get the most nutrients. Wash the leaves thoroughly, then combine them with fruits and veggies like apples, cucumbers, or celery for a balanced flavor. Use a juicer or a high-speed blender (strain if desired) and serve immediately to enjoy maximum freshness.
Q3: What are some creative flavor pairings for spinach juice?
A: Spinach’s mild, slightly earthy taste blends beautifully with tart ingredients like lemon or grapefruit, sweet fruits like pineapple or mango, and cooling veggies such as cucumber or mint.Adding a hint of ginger or turmeric can give your juice a spicy, health-boosting kick!
Q4: Can spinach juice help with weight loss or detox?
A: Absolutely! Spinach juice is low in calories but high in fiber and antioxidants, making it an excellent choice for detoxifying your body and aiding weight loss. It supports digestion, reduces inflammation, and keeps you full longer without excess calories.
Q5: What’s a quick and tasty spinach juice recipe for beginners?
A: Try this simple combo: 2 cups fresh spinach, 1 green apple, 1/2 cucumber, a squeeze of lemon, and a small piece of ginger.Juice or blend, then enjoy a refreshing, nutrient-rich drink that’s packed with flavor and vitality.
Q6: How can I store spinach juice without losing its freshness?
A: Due to its delicate nutrients, spinach juice is best enjoyed fresh. If you must store it, keep it in an airtight container in the fridge for up to 24 hours. Adding a splash of lemon juice can help preserve its vibrant color and nutrients.
Q7: Are there any precautions when drinking spinach juice regularly?
A: While spinach juice is healthy, it contains oxalates which in large amounts might affect kidney health for some people. Moderation is key-enjoy your green goodness a few times a week and balance with other juices and balanced meals to keep things nutritious and safe.
Unlock the magic of greens with these spinach juice recipes-it’s not just a drink, it’s a celebration of health in every sip!
To Wrap It Up
As you embark on your green juice journey, these seven vibrant spinach recipes offer a delicious gateway to nature’s nourishing bounty. Each sip is more than a refreshing treat-it’s a celebration of health, energy, and the simple joy found in leafy goodness. Whether you’re a seasoned juicer or just starting to explore plant-powered drinks,let these blends inspire you to embrace spinach’s verdant vitality and unlock a world of flavors that’s as wholesome as it is indeed delightful. Here’s to your next green adventure-may it be as revitalizing as a garden in full bloom!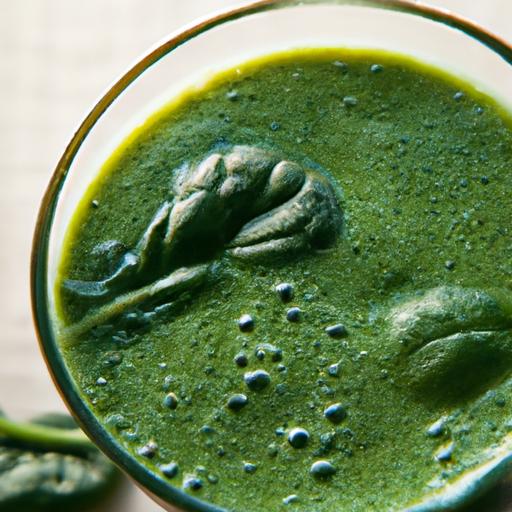
power-Packed Vegan Gluten-Free Protein Recipes to Fuel You bring a fresh wave of vitality, combining nutrient-dense ingredients that transform ordinary meals into sensational, protein-rich experiences. Whether you’re seeking to nourish your body post-workout or craft a balanced meal that keeps you energized throughout the day, these creative ingredient swaps and vibrant dish ideas unlock the true potential of plant-based eating without gluten.
Prep and Cook Time
Planning: 15 minutes | Cooking: 20 minutes | Total: 35 minutes
Yield
Serves 4 generous portions
Difficulty Level
Easy to Medium – Perfect for everyday cooks looking to boost nutrition and flavor with ease
Ingredients
- 1 cup cooked quinoa (rinsed and drained for fluffiness)
- 1 cup canned chickpeas, drained and rinsed
- 2 tbsp nutritional yeast (for a cheesy, umami boost)
- 1/2 cup finely chopped kale (stems removed)
- 1/4 cup chopped red bell pepper (for vibrant color and sweetness)
- 1 tbsp tahini (creamy and rich plant-based fat)
- 2 cloves garlic, minced
- 1 tbsp fresh lemon juice (shining acidity to balance flavors)
- 1/2 tsp smoked paprika
- 1/2 tsp ground cumin
- Salt and freshly cracked black pepper, to taste
- 2 tbsp olive oil or avocado oil for sautéing
- 1/4 cup chopped fresh parsley (for garnish)
Instructions
- Heat the olive oil in a large skillet over medium heat. Add the minced garlic and sauté until fragrant but not browned, about 1 minute.
- Add the chopped kale and red bell pepper to the skillet. Sauté for 5 minutes, stirring frequently, until kale wilts and peppers soften.
- Stir in the cooked quinoa and chickpeas, breaking up any chickpeas gently with the back of your spoon. Cook for another 3 minutes to warm through.
- Sprinkle the nutritional yeast, smoked paprika, and cumin evenly over the mixture. Stir well to combine so every bite is bursting with flavor.
- Remove from heat and mix in the tahini and lemon juice. Stir thoroughly until creamy and well integrated. Season with salt and freshly cracked black pepper to taste.
- Serve promptly, garnished with fresh parsley for a pop of color and freshness.
Tips for success
- Quinoa Tip: Rinse quinoa under cold water before cooking to eliminate bitterness and achieve a fluffy texture.
- Protein Boost: For an extra punch, add roasted hemp seeds or pumpkin seeds just before serving – they add crunch and more plant protein.
- Meal Prep: This dish reheats beautifully and is perfect for packed lunches; store in an airtight container for up to 3 days.
- Flavor Variations: Swap kale for spinach or Swiss chard depending on season availability. Add a pinch of chili flakes for heat!
- Chickpea Substitute: Replace chickpeas with lentils or edamame for a different protein profile without compromising gluten-free status.
Serving Suggestions
Serve this colorful, protein-packed quinoa chickpea sauté in a wide bowl to showcase its vivid hues.Top with a drizzle of extra tahini or your favorite vegan yogurt to create a luscious creaminess. Pair with a side of roasted sweet potatoes or a crunchy cucumber salad with a lemon-tahini dressing for a complete balanced dinner. Garnish with freshly chopped parsley or cilantro and a wedge of lemon to excite the palate.

| Nutrient | Per Serving |
|---|---|
| Calories | 320 kcal |
| Protein | 15g |
| Carbohydrates | 42g |
| Fat | 8g |
Discover more wholesome vegan and gluten-free recipes to enrich your kitchen by visiting our Complete Vegan Gluten-Free Recipe Collection. For an in-depth understanding of plant-based protein benefits,explore this Healthline article on plant-based complete proteins.
Q&A
Q&A: Power-Packed Vegan Gluten-Free protein recipes to Fuel You
Q1: Why is protein notable in a vegan and gluten-free diet?
A1: Protein is essential for building and repairing tissues,supporting immune function,and maintaining muscle mass. For those following a vegan and gluten-free lifestyle, getting enough protein can be challenging because many conventional protein sources like meat, dairy, and gluten-containing grains are off the table. ThatS why incorporating diverse plant-based protein sources is key to staying energized and nourished.
Q2: What are some of the best vegan and gluten-free protein sources?
A2: Think legumes like lentils, chickpeas, and black beans; seeds such as chia, hemp, and pumpkin seeds; nuts; quinoa; tofu and tempeh; and gluten-free grains like amaranth and buckwheat. These ingredients not only pack a protein punch but also provide fiber, vitamins, and minerals.
Q3: Can I get complete protein from plant-based, gluten-free foods?
A3: Absolutely! While many plant proteins lack one or more essential amino acids individually, combining different sources throughout the day ensures you get the full spectrum of amino acids your body needs. For example, pairing quinoa (a complete protein) with beans or enjoying hemp seeds sprinkled over a salad offers balanced nourishment.
Q4: What makes a recipe “power-packed” in this context?
A4: A power-packed recipe is nutrient-dense, rich in quality protein, and easy to digest-fuel that keeps your energy steady and your body strong.In vegan gluten-free recipes, this means combining complementary proteins, including healthy fats, and using natural, whole-food ingredients to maximize health benefits.
Q5: Could you share a simple power-packed vegan gluten-free recipe?
A5: Certainly! Try this quinoa lentil salad: Cook 1 cup of quinoa and 1 cup of green lentils separately. Toss together with diced bell peppers, cherry tomatoes, chopped parsley, pumpkin seeds, and a lemon-tahini dressing. It’s colorful, filling, and delivers ample protein and fiber to power your day.
Q6: How can I make these recipes more flavorful without compromising nutrition?
A6: Herbs, spices, and citrus zest are your best friends! Garlic, cumin, smoked paprika, fresh basil, or ginger add depth and excitement. nutritional yeast can lend a cheesy umami flavor. Using flavorful dressings made from tahini, avocado, or apple cider vinegar can round out dishes beautifully without extra calories or allergens.
Q7: Are there any tips to boost protein absorption from these plant-based meals?
A7: Yes! soaking and sprouting legumes and seeds can reduce anti-nutrients like phytic acid, enhancing mineral absorption. Pairing meals with vitamin C-rich foods (like bell peppers or lemon juice) can increase iron uptake. Also, chewing thoroughly aids digestion and nutrient absorption.
Q8: How do power-packed protein meals impact energy and wellness?
A8: Balanced protein meals stabilize blood sugar, prevent mid-day energy dips, support muscle repair, and promote satiety. For vegans avoiding gluten, this means fewer cravings, sustained focus, and overall vitality-fuel that keeps you thriving no matter your lifestyle.
Embrace the vibrant world of vegan gluten-free cooking with these power-protein recipes, and let every meal be an energizing celebration of health and flavor!
Closing Remarks
As you embark on your journey to nourish your body with clean, plant-powered energy, these vegan gluten-free protein recipes stand ready to fuel your every move. Whether you’re hitting the gym, powering through a busy workday, or simply seeking wholesome meals that satisfy and sustain, these vibrant dishes prove that eating well doesn’t have to be complicated or mundane. Embrace the bounty of nature’s finest ingredients, and let your meals be a celebration of vitality, flavor, and resilience-because fueling your body right is the ultimate form of self-care. Here’s to vibrant health, boundless energy, and a deliciously empowered you!