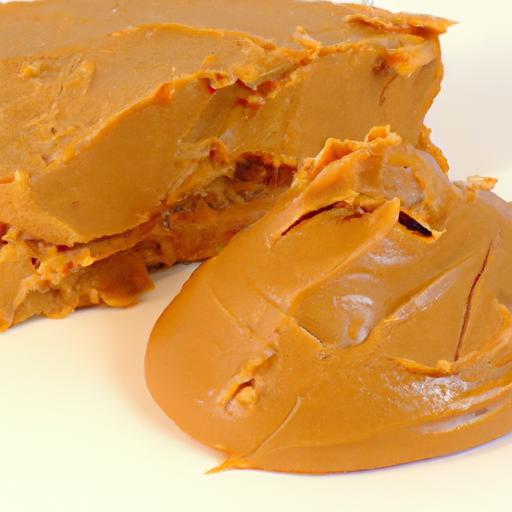
the Irresistible Honey Butter Cake Recipe is a cherished treat treasured for its irresistibly moist crumb and delicately sweet, buttery undertones. Originating from the bustling bakeries of Southeast Asia, this cake has captivated hearts worldwide with its melt-in-the-mouth texture and golden-hued allure. Having perfected this recipe over countless kitchen experiments, I’m excited to share my insider techniques that ensure each bite delivers that signature balance of fluffiness and richness-a true celebration of honey and butter in every slice.
Prep and Cook Time
- Readiness: 20 minutes
- Baking: 40-45 minutes
- Cooling: 30 minutes
- Total Time: Approximately 1 hour 35 minutes
Yield
Serves 8 generous slices, perfect for sharing at dessert tables or cozy tea-time gatherings.
Difficulty Level
Medium – ideal for home bakers with some experience but approachable for enthusiastic beginners eager to learn.
Ingredients
- 1 cup all-purpose flour, sifted
- 1/2 cup cake flour, sifted
- 1 tsp baking powder
- 1/4 tsp baking soda
- 1/4 tsp fine sea salt
- 3/4 cup unsalted butter, softened
- 3/4 cup granulated sugar
- 1/3 cup honey (preferably wildflower or clover)
- 3 large eggs, room temperature
- 1/2 cup whole milk, warmed
- 1 tsp pure vanilla extract
- Optional: toasted sesame seeds or crushed pistachios for garnish
Step-by-Step Baking Techniques for a Moist and Fluffy Cake
- Preheat your oven to 350°F (175°C). Grease and line an 8-inch round cake pan with parchment paper for even baking and effortless removal.
- Combine dry ingredients: In a medium bowl, gently whisk together the all-purpose flour, cake flour, baking powder, baking soda, and salt. Set aside to keep the leavening agents evenly dispersed.
- Cream the butter and sugar: Using a stand mixer fitted with a paddle attachment, beat the softened butter and sugar on medium speed for about 4 minutes until pale, airy, and creamy. This step builds the structure for a light crumb.
- Add honey gently: Slowly stream in the honey while continuing to beat to enhance moisture and add a subtle fragrant sweetness.
- Incorporate eggs: Add the eggs one at a time, beating well after each addition. This ensures the batter emulsifies properly, preventing curdling.
- Mix in vanilla and milk: Combine the warmed milk and vanilla extract in a small jug. Alternate adding the milk mixture and the dry ingredients into the butter mixture in three additions, starting and ending with the dry. Mix on low speed just until combined-overmixing can toughen the cake.
- Transfer batter to pan: Pour the batter into your prepared cake pan. Smooth the top with a spatula for an even surface.
- Bake with care: Place in the oven and bake for 40 to 45 minutes. Check doneness by inserting a skewer into the center-it should come out clean or with a few moist crumbs.
- Cool properly: Allow the cake to cool in the pan for 15 minutes before transferring it carefully to a wire rack. Cooling fully prevents soggy bottoms and enhances the honey butter aroma.
Tips for Success with the Irresistible Honey Butter Cake Recipe
- Ingredient temperature matters: Use room-temperature eggs and softened butter to encourage proper emulsification for a tender crumb.
- Choose quality honey: Select raw, floral honey varieties for nuanced sweetness that shines through the butter richness.
- Don’t skip sifting: This keeps the cake light and prevents dense patches.
- Slow folding method: If mixing by hand, gently fold in dry ingredients to preserve air bubbles and fluffiness.
- Storage: Keep your cake tightly wrapped at room temperature or refrigerate up to 3 days-warm slightly before serving.
- Make-ahead: The cake base freezes beautifully. Thaw overnight in the fridge and lightly warm to revive moistness.
Creative Serving Suggestions to elevate Your Honey Butter Cake Experience
Transform this luscious honey butter cake into an unforgettable centerpiece with simple, elegant touches. Dust a fine sieve of powdered sugar or drizzle a thin stream of additional warmed honey atop each slice. Complement with a dollop of lightly whipped cream infused with a hint of cinnamon or a spoonful of vanilla bean ice cream. For a playful texture contrast,sprinkle toasted sesame seeds or crushed pistachios over the cake,adding visual appeal and nutty crunch.
For special occasions, why not serve alongside fresh seasonal berries such as raspberries or figs? The natural acidity balances the cake’s richness and deepens flavor complexity. Alternatively, pair slices with a fresh herb-infused honey drizzle-think rosemary or thyme warmed with honey-to add an unexpected aromatic layer.
Whether presented as a simple afternoon treat or a refined dessert, this honey butter cake’s buttery sweetness and tender crumb will be the star of any table.

| Nutrient | Per Serving |
|---|---|
| Calories | 320 kcal |
| Protein | 5 g |
| Carbohydrates | 38 g |
| Fat | 16 g |
For more delightful cake recipes and tips, check out our Fluffy Vanilla Sponge Cake Recipe. Discover how ingredient quality and technique come together for perfect baked goods.
Learn more about the amazing benefits of honey from this authoritative study exploring its nutritional properties.
Q&A
Q&A: Irresistible Honey Butter Cake Recipe – A Sweet Delight Guide
Q1: What makes a honey butter cake so irresistible?
A1: The magic lies in the perfect harmony of rich, velvety butter and natural sweetness of honey. This combination creates a moist, tender crumb with a golden crust that’s tender yet slightly crisp – a sensory dance of flavors and textures that’s hard to forget.
Q2: Can I use any type of honey for this recipe?
A2: Absolutely! While wildflower or clover honey are popular choices due to their balanced sweetness, feel free to experiment with lavender, orange blossom, or even chestnut honey. Each will lend its own unique floral or earthy note, adding character to your cake.
Q3: How do you achieve that signature buttery flavor without making the cake greasy?
A3: The secret is in the technique. Creaming softened butter with sugar (and honey) incorporates air, resulting in a light, fluffy texture. Avoid over-melting the butter; use it at room temperature to blend smoothly without excess oiliness. The proportion matters too – just enough butter to enrich, not saturate.
Q4: Is honey butter cake difficult to make for beginners?
A4: Not at all! This recipe is surprisingly approachable. With clear steps – from creaming butter and honey to gently folding in flour – even novice bakers can whip up a stunning cake. The key is patience: don’t rush the mixing, and trust the process.
Q5: How should I serve honey butter cake for the best experience?
A5: Serve warm or at room temperature, ideally with a dollop of whipped cream or a scoop of vanilla ice cream. A light drizzle of honey or a sprinkle of toasted nuts elevates the flavors further. Pair with a cup of tea or coffee for a perfect afternoon indulgence.
Q6: Can I make this cake ahead of time? Does it keep well?
A6: Yes! honey butter cake actually develops a deeper flavor if rested for a day. Store it in an airtight container at room temperature for up to 3 days or refrigerate for a week. Just bring it back to room temp or give it a quick warm-up before serving.
Q7: Any tips for baking the perfect golden crust?
A7: Achieving that alluring crust is about temperature and timing. Bake at a moderate oven setting (around 350°F/175°C) to allow the sugars and butter to caramelize gently. Using a light-colored pan prevents over-browning, and rotating the pan midway ensures even baking.
Q8: Can I customize this recipe for dietary preferences?
A8: Definitely! Substitute butter with vegan margarine and use flaxseed eggs for an egg-free version.For gluten-free baking, replace all-purpose flour with a 1:1 gluten-free blend. Keep in mind, texture may vary slightly, but the honey’s natural sweetness will still shine through.
Q9: What’s the best way to slice honey butter cake without crumbling?
A9: use a sharp serrated knife and wipe it clean between cuts to maintain neat slices.Let the cake cool wholly; slicing too soon can cause crumbling. A gentle sawing motion helps preserve the tender crumb and that dreamy, buttery texture.
Q10: Why is honey butter cake considered a ‘sweet delight’?
A10: It’s simple – this cake is a love letter to pure comfort. Every bite offers a luscious blend of buttery richness and delicate honey sweetness, evoking feelings of warmth, nostalgia, and pure culinary joy. It’s an understated indulgence that satisfies your sweet tooth and soothes the soul.
In Conclusion
as the golden crust gives way to the luscious,buttery crumb,this honey butter cake reveals why it’s a timeless sweet delight worth every bite. Whether you’re savoring it with a quite cup of tea or sharing it at joyful gatherings, this recipe promises to infuse your kitchen with warmth and irresistible aroma. Now that you hold the secret to crafting this heavenly treat, may each slice bring a little more sweetness to your day-and inspire countless moments of delicious happiness. Happy baking!
Why No Bake Peanut Butter Balls Are Perfect for Busy Snack Time
No-bake peanut butter balls capture the essence of convenience and flavor in one bite-sized treat. whether you’re rushing between meetings, managing kids’ schedules, or simply need a quick pick-me-up, these snacks are a lifesaver.Their effortless assembly means you can whip them up in under 10 minutes, no oven required, making them ideal for busy lifestyles. Beyond speed, the creamy richness of peanut butter combined with just the right balance of sweetness and texture makes these balls irresistibly satisfying and energizing-perfectly crafted for an on-the-go snack that keeps you fueled without the fuss.
Prep and Cook Time
- Prep Time: 10 minutes
- No cooking required
- Chilling Time: 30 minutes (optional but recommended)
Yield
- Approximately 20 small peanut butter balls (about 1-inch diameter each)
Difficulty Level
- Easy - perfect for beginners and busy home cooks
ingredients That Make Your Peanut Butter Balls irresistibly Creamy
- 1 cup creamy peanut butter (natural or regular, but room temperature for easy mixing)
- 1 cup rolled oats (for a slightly chewy texture)
- ½ cup honey or maple syrup (for natural sweetness and binding)
- ½ cup powdered sugar (sifted to avoid clumps, balances texture)
- ½ cup finely shredded unsweetened coconut (optional, adds subtle tropical creaminess)
- 1 teaspoon vanilla extract (enhances depth of flavor)
- Pinch of salt (to amplify the peanut butter’s natural flavors)
- 1/3 cup mini chocolate chips (optional, for bursts of melty chocolate)
Step by Step guide to Crafting the Perfect No Bake Peanut Butter Balls
- Mix the base: In a large bowl, combine creamy peanut butter, honey, and vanilla extract. Stir vigorously until smooth and glossy.
- Add dry ingredients: Gradually fold in rolled oats, powdered sugar, salt, and shredded coconut if using. The mixture will thicken and become pliable.
- Choc-chip change-up: Gently stir in mini chocolate chips for added texture and sweetness without overpowering the peanut butter.
- Shape the balls: Using a small cookie scoop or tablespoon, portion out the mixture. Roll each portion firmly between your palms to form smooth, compact balls.
- Chill for best results: Place the peanut butter balls on a parchment-lined tray and refrigerate for at least 30 minutes to firm up and deepen the flavors.
- Ready to serve: Once chilled, transfer to an airtight container. Enjoy immediately or up to one week refrigerated for a quick snack anytime.
Creative Twists and Toppings to Elevate your Snack Bites
Take your snack to the next level with imaginative add-ins and finishes. Here are some ideas to customize your batches:
- Roll in crushed nuts: Almonds, pecans, or even pistachios add an irresistible crunch and nutty contrast.
- Spice it up: Sprinkle cinnamon, cayenne, or pumpkin spice into the mix for surprising warmth.
- Dip in chocolate: For a decadent variation, dip chilled peanut butter balls halfway in melted dark or milk chocolate, then let set.
- Superfood sprinkle: Top with chia seeds, hemp hearts, or a dusting of matcha powder to boost nutrition and color.
- Swap sweeteners: Use agave, brown rice syrup, or coconut nectar for alternate sweetness and flavor profiles.
Tips for Success
- Consistency check: If mixture feels too sticky to roll, chill for 10 minutes or add a bit more powdered sugar or oats to firm up.
- Peanut butter choice: Opt for creamy peanut butter for the smoothest texture; chunky peanut butter will create a coarser ball.
- Make-ahead magic: Prepare the peanut butter balls up to 5 days in advance and store in the fridge for grab-and-go convenience.
- Allergy alternatives: substitute peanut butter with sunflower seed or almond butter for nut-free or gluten-amiable options.
- Freeze for longevity: These balls freeze beautifully for up to 3 months-thaw in the fridge before serving.
Serving Suggestions
Serve these no bake peanut butter balls chilled on a rustic wooden board or in pretty mini cupcake liners to amp up presentation. Garnish with a light dusting of cocoa powder, crushed nuts on top, or a drizzle of dark chocolate for an elegant snack bite. Pair with fresh fruit slices or a glass of cold milk or plant-based option for a perfectly balanced midday boost. They’re also a crowd-pleaser at parties-easy to grab, easy to love.
| Nutrient | Per Serving (1 ball) |
|---|---|
| Calories | 110 kcal |
| Protein | 3.5 g |
| Carbohydrates | 12 g |
| Fat | 6 g |

For more wholesome snack ideas, check out our Healthy Snack Recipes collection. To learn about peanut butter’s nutritional benefits, visit Healthline’s in-depth article.
Q&A
Q&A: No-Bake Peanut Butter Balls - Easy, Delicious Snack Bites
Q1: What exactly are No-Bake peanut Butter Balls?
A: Imagine tiny, flavor-packed spheres of peanut buttery goodness that require zero oven time! No-Bake Peanut Butter balls are simple snack bites made by mixing peanut butter with sweeteners, oats, and sometimes a hint of chocolate or nuts-then chilling until firm. They’re effortless to prepare and perfect for on-the-go munching.
Q2: Why choose no-bake recipes over traditional baked snacks?
A: No-bake recipes save you time and energy-no heat, no waiting, just mixing and chilling. Plus, they often retain more of their wholesome nutrients because there’s no cooking involved. For those hot summer days or last-minute cravings, no-bake treats are a game-changer.Q3: What are the key ingredients in these peanut butter balls?
A: The basics include creamy or crunchy peanut butter, rolled oats for texture and fiber, a touch of honey or maple syrup for natural sweetness, and sometimes mini chocolate chips or shredded coconut for extra flair. you can customize with chia seeds, flax, or even a sprinkle of sea salt.
Q4: are No-Bake Peanut Butter Balls healthy?
A: When made with natural peanut butter and minimal added sugars, these bites are a wholesome snack packed with protein, healthy fats, and fiber. They satisfy sweet cravings without a sugar crash, making them a smart pick-me-up between meals.
Q5: Can you make these snack bites vegan or allergy-friendly?
A: Absolutely! Swap honey for maple syrup or agave to keep it vegan. Use sunflower seed butter or almond butter if peanut allergies are a concern-though check for cross-contamination. These balls are wonderfully adaptable to your dietary needs.
Q6: How long do No-Bake Peanut Butter Balls last, and how should they be stored?
A: Stored in an airtight container in the refrigerator, they stay fresh and delicious for about a week. For longer storage, pop them in the freezer-they thaw quickly and keep their texture perfectly.
Q7: What’s a fun twist to spice up the classic recipe?
A: Try adding a touch of cinnamon or chili powder for unexpected warmth. Or roll them in crushed pretzels, cocoa powder, or shredded coconut for added crunch and flavor. The possibilities are endless for making each batch uniquely yours.
Q8: Who would enjoy making No-Bake Peanut Butter Balls?
A: Everyone! From busy parents needing quick snacks to kids who want a fun kitchen project, to fitness enthusiasts seeking wholesome energy bites. They’re easy, fast, and fun to create with minimal kitchen skills needed.
Whether you’re craving a quick pick-me-up or a homemade treat to share, No-Bake Peanut Butter Balls bring simple ingredients together to create a snack that’s as easy as it is delicious. Ready to roll?
The Way Forward
With their perfect blend of creamy peanut butter,sweet hints of honey,and a touch of chocolatey goodness,these no-bake peanut butter balls redefine the meaning of easy,delicious snacking. Whether you need a quick energy boost, a crowd-pleasing treat, or a simple recipe to satisfy your sweet tooth without turning on the oven, these bite-sized delights have got you covered. So next time cravings strike, remember: sometimes the best snacks are the ones that come together effortlessly, packed with flavor and made with love-no baking required!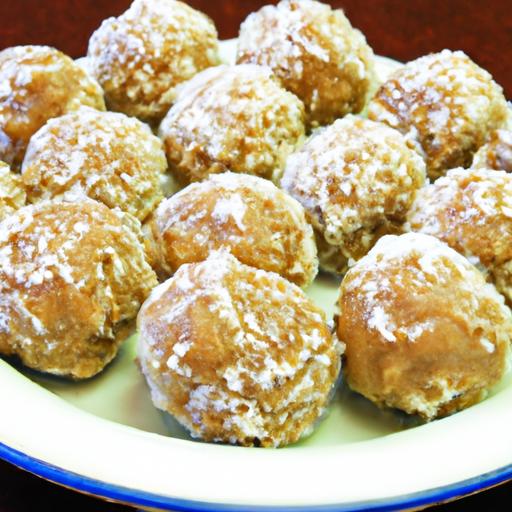
Savory Garlic Butter Chicken Thighs bring a harmonious blend of rich, indulgent flavors perfectly tailored for those embracing a keto lifestyle. This recipe combines succulent,crispy-skinned chicken thighs with an aromatic garlic butter sauce that not only enhances every bite but also keeps your carb count low without sacrificing taste. Drawing from classic French techniques and keto-friendly ingredients, this dish is both approachable and impressive-ideal for weeknight dinners or special occasions.
Prep and Cook Time
- Preparation: 10 minutes
- Cooking: 25 minutes
- Total: 35 minutes
Yield
- Serves: 4 generously
Difficulty Level
- Easy to Medium - Perfect for anyone seeking a flavorful, fuss-free keto meal
Ingredients That Elevate Flavor and Keep It Keto Friendly
- 8 bone-in, skin-on chicken thighs (preferably organic or free-range for best flavor)
- 4 tbsp unsalted butter, divided (for richness and mouthfeel)
- 6 cloves garlic, minced fresh (the aromatic soul of the dish)
- 1 tbsp fresh rosemary, finely chopped (adds woodsy depth)
- 1 tbsp fresh thyme, leaves only (luminous herbal notes)
- 1 tsp smoked paprika (for subtle warmth and colour)
- Salt and freshly ground black pepper to taste
- 2 tbsp olive oil (high-quality, extra virgin for searing)
- Juice of half a lemon (to brighten richness)
- Optional: 1/4 cup chicken bone broth (helps deglaze and intensify flavor)
Mastering the Perfect Sear for Juicy and Crispy Chicken Thighs
- pat the chicken thighs dry thoroughly with paper towels-this is key for a lovely, crispy skin.
- Generously season both sides with salt, pepper, and smoked paprika to build flavor right at the start.
- Heat olive oil in a large, heavy skillet over medium-high heat until shimmering but not smoking.
- Place chicken thighs skin-side down carefully,pressing gently to ensure full contact with the pan.
- Sear without moving for 7-8 minutes until the skin is deep golden-brown and crispy-resist the urge to poke or flip prematurely.
- Flip thighs and cook the meat side 5 additional minutes, allowing even browning.
- Remove the chicken from the pan and set aside on a plate to rest while you prepare the garlic butter sauce.
The Role of Garlic Butter in Enhancing Richness and Aroma
- Reduce heat to medium-low and add unsalted butter to the same skillet,scraping up any browned bits (fond) from the pan’s bottom-these carry immense flavor.
- Add minced garlic, rosemary, and thyme; sauté gently for about 1-2 minutes until fragrant but not burnt.
- If using, pour in chicken bone broth to deglaze, stirring to incorporate a silky base.
- Return chicken thighs to the skillet, spooning the garlic butter sauce over each piece.
- Cook together for an additional 5 minutes, occasionally spooning sauce over the chicken to infuse every bite with buttery herbaceous goodness.
- Off the heat, finish with a squeeze of fresh lemon juice to cut through richness and elevate aromatics.
Serving Suggestions and Keto Sides to Complete Your Meal
Plate your Savory Garlic Butter Chicken Thighs alongside low-carb, nutrient-dense keto vegetable sides to keep the meal balanced and satisfying. Consider creamy cauliflower mash drizzled with leftover garlic butter or roasted Brussels sprouts tossed in olive oil and toasted almonds for added texture and flavor. A fresh green salad with avocado and a zesty vinaigrette creates splendid brightness, rounding out a hearty plate.
For garnish, sprinkle chopped fresh parsley or rosemary over the chicken to add a pop of color and herbal freshness. A wedge of lemon alongside the dish invites an optional extra squeeze, delighting the senses with citrus zing.
Tips for Success
- Ensure dry skin: Moisture is the enemy of crispness-pat the chicken thighs dry before seasoning.
- Gently sauté garlic: avoid high heat when cooking garlic to prevent bitterness and preserve its sweetness and aroma.
- Bone-in, skin-on: This cut locks in juiciness and offers that satisfying crispy skin texture that boneless pieces can’t match.
- Make ahead: You can prep thighs seasoned and refrigerated for up to 24 hours to deepen flavor; bring them to room temperature before cooking.
- Leftovers: Reheat gently in a skillet over medium-low to maintain crispy skin and avoid drying out the meat.
| Nutrient | Per Serving |
|---|---|
| Calories | 420 kcal |
| Protein | 34 g |
| Carbohydrates | 2 g net carbs |
| Fat | 30 g |
For similar inspiration, explore our collection of easy keto dinners to maintain your flavorful low-carb journey. For health benefits of garlic and rosemary, visit Healthline’s guide on garlic.

Q&A
Q&A: Savory Garlic Butter Chicken Thighs - A Keto Delight Recipe
Q1: What makes this Savory Garlic Butter Chicken Thighs recipe perfect for a keto diet?
A1: This recipe is a keto champion because it’s low in carbs but high in fat and protein-key elements for maintaining ketosis. Butter and chicken thighs provide rich, satisfying fats, while garlic adds powerful flavor without a carb overload, keeping your macros in balance.
Q2: Why choose chicken thighs over chicken breasts for this dish?
A2: Chicken thighs are naturally juicier and more flavorful due to thier higher fat content, which complements the butter and garlic beautifully. This fattier meat is ideal for keto eaters craving tender, succulent bites without sacrificing taste or texture.
Q3: How do I get the perfect golden crust on my chicken?
A3: Pat the chicken thighs dry and sear them skin-side down in a hot pan with butter until the skin turns crispy and golden brown. This technique locks in moisture and creates an irresistible texture that contrasts perfectly with the creamy garlic butter sauce.
Q4: Can I customize the garlic butter sauce?
A4: Absolutely! While classic garlic and butter are the stars, feel free to add fresh herbs like thyme or rosemary for an aromatic twist. A splash of lemon juice can brighten the richness, and a pinch of chili flakes can introduce a subtle heat for those who like it spicy.
Q5: What sides pair best with Savory Garlic Butter Chicken Thighs on a keto plate?
A5: To keep it keto-friendly, think leafy greens sautéed in olive oil, creamy cauliflower mash, or roasted Brussels sprouts. These low-carb veggies complement the rich chicken without tipping you out of ketosis.Q6: How long does it take to prepare and cook this dish?
A6: From start to finish, you’re looking at about 30-40 minutes. The prep is simple-seasoning and chopping garlic-while the cooking involves a swift sear followed by simmering in the buttery garlic sauce until tender and flavorful.
Q7: Is this recipe suitable for meal prep?
A7: Definitely! These chicken thighs reheat beautifully and maintain their moisture and flavor.Portion them out with your favorite keto-friendly veggies, and you’ve got a quick, tasty lunch or dinner ready to go throughout the week.
Q8: Can I use other fats rather of butter for this recipe?
A8: You can! Ghee or a quality coconut oil works well as a buttery substitute, maintaining the richness without compromising your keto goals. However, butter offers that classic creamy depth that’s hard to beat.
Q9: How crucial is garlic in this recipe?
A9: Garlic is the flavor hero here-it infuses the butter with a fragrant punch that elevates the chicken from ordinary to unusual. It’s the aromatic backbone that keeps every bite bursting with savory goodness.
Q10: Does this dish freeze well?
A10: Yes! After cooking, allow the chicken to cool before freezing in airtight containers. When reheated gently, it retains its juicy tenderness and flavorful garlic butter sauce, making it a convenient keto meal option anytime.
in Summary
As the irresistible aroma of savory garlic butter chicken thighs lingers in your kitchen, you’re reminded that keto cooking doesn’t have to be a compromise-it can be a festivity of rich flavors and satisfying textures. This recipe not only delivers a tender, juicy centerpiece but also proves that low-carb living can be truly indulgent. Whether you’re a seasoned keto enthusiast or just beginning your journey, these garlic butter chicken thighs invite you to savor every bite guilt-free. So, fire up your skillet, embrace the buttery goodness, and let this dish become a delicious staple in your culinary repertoire.
Why Peanut Butter No Bake cookies Are the Ultimate quick Treat
Peanut Butter No Bake Cookies capture everything you want in a quick treat-rich, indulgent, and unbelievably simple to make.Originating from the mid-20th century, these cookies were born out of the need for a fast, stove-ready sweet that didn’t require an oven.I still remember my first batch, made on a busy weekday evening, filling my kitchen with the cozy aroma of cocoa and peanut butter in under 20 minutes. Perfectly suited for busy bakers and last-minute cravings alike, these cookies bring waves of nostalgia alongside a deliciously chewy texture that delivers satisfaction in every bite.
Prep and Cook time
- Preparation: 5 minutes
- Cook Time: 10 minutes
- Total Time: 15 minutes
Yield
Approximately 20 cookies, depending on size
Difficulty Level
Easy - perfect for beginners and those short on time
Ingredients
- 1/2 cup unsalted butter
- 2 cups granulated sugar
- 1/2 cup whole milk
- 1/4 cup unsweetened cocoa powder, sifted
- 1/2 cup creamy peanut butter
- 2 teaspoons vanilla extract
- 3 cups quick-cooking rolled oats
- 1/4 teaspoon fine sea salt (optional, to balance sweetness)
Instructions
- In a medium saucepan over medium heat, combine butter, sugar, milk, and cocoa powder. Stir consistently until the butter melts and the mixture just begins to boil.
- Allow the mixture to boil for exactly 1 minute, stirring carefully to prevent scorching. This step is key to achieving the right cookie texture.
- Remove the pan from heat and stir in the peanut butter, vanilla extract, and sea salt until smooth and glossy.
- Fold in the quick oats until fully coated, ensuring every oat is infused with the chocolate-peanut butter goodness.
- Using a spoon or cookie scoop, drop dollops onto parchment-lined baking sheets, spreading slightly to create classic cookie shapes.
- Let the cookies cool at room temperature for 30 minutes, or place them in the fridge to set faster (about 15 minutes).
- Once firm, transfer the cookies to an airtight container or enjoy immediately with a cold glass of milk.
Tips for Success
- Prevent Graininess: Sift cocoa powder to avoid lumps and stir gently but constantly as sugar dissolves.
- Choose Wisconsin or Natural Peanut Butter: For authentic richness, creamy peanut butter without added sugars works best.
- Oats Matter: always use quick-cooking oats for the ideal chewy bite. Rolled oats can make cookies dense and dry.
- Make-Ahead: These cookies keep well for up to 5 days in the fridge or can be frozen for 2 months.
- Allergy-friendly Variations: Replace peanut butter with almond or sunflower seed butter to suit dietary needs without losing flavour.
Top Tips for Customizing Your No Bake Cookie Flavor
Adding a personal twist to your Peanut Butter No Bake Cookies can elevate this classic dessert to new heights. Swap vanilla extract for a splash of almond or maple extract to add aromatic flair. Sprinkle in cinnamon or a pinch of cayenne pepper for warmth and subtle heat. For texture, fold in chopped roasted peanuts or toasted coconut flakes. If you crave a richer bite, drizzle melted dark chocolate over your cookies once set. The beauty of these no bake treats is their adaptability-easily catering to your favorite flavors while maintaining speedy prep.
Mastering the Perfect Texture Without the Oven
Achieving that perfect, chewy texture without baking relies on technique and timing. Boiling the sugar mixture for exactly one minute caramelizes the sugar just enough to set firmly but remain tender. Stirring in the oats while the mixture is still hot ensures each flake softens slightly and binds naturally. Avoid extending the boil time to prevent overly hard cookies; instead, trust cooling to set the ideal consistency. A quick chill in the fridge helps lock in shape, while leaving them at room temperature creates a melt-in-your-mouth softness. This delicate balance is what makes these Peanut Butter No Bake Cookies irresistible every time.
How to Store and Serve Your Peanut Butter No Bake Cookies
To maintain freshness and texture, store these cookies in an airtight container at room temperature for up to three days. For longer storage, refrigerate them for up to a week; this will keep the cookies firm but may slightly intensify the peanut butter flavor. When frozen, place cookies between parchment sheets to prevent sticking, then thaw at room temperature before serving.
For the best presentation, arrange on a rustic wooden board with a sprinkle of chopped peanuts or a dusting of powdered sugar for contrast. Pair with a tall glass of cold milk or a creamy hot chocolate for ultimate indulgence. For parties, consider stacking them with parchment paper layers to preserve shape and add a pop of color with fresh berries or edible flowers as garnish.

| nutrient | Per Serving (1 cookie) |
|---|---|
| Calories | 150 kcal |
| Protein | 4 g |
| Carbohydrates | 20 g |
| Fat | 7 g |
Looking for more quick and easy dessert ideas? Check out our collection of no bake dessert recipes for effortless and tasty treats. For further insight into the nutritional benefits of peanut butter, explore this comprehensive guide from Healthline.
Q&A
Q&A: Irresistible Peanut Butter No-bake Cookies – Quick & Easy Recipe
Q1: What makes these peanut butter no-bake cookies so irresistible?
A1: It’s the perfect harmony of creamy peanut butter, rich cocoa, and the satisfying crunch of oats-all coming together without ever turning on the oven. these cookies are wonderfully chewy, decadently chocolaty, and packed with nutty flavor that keeps you reaching for more!
Q2: How quick and easy is this recipe really?
A2: From start to finish, you can whip up a batch in about 15 minutes. No need to preheat the oven or wait for cookies to bake.Just mix, scoop, and chill. it’s the ultimate shortcut for a sweet treat when time is tight but cravings are strong.
Q3: Are there any special ingredients I need?
A3: No fancy ingredients required! You’ll need classic pantry staples like peanut butter, rolled oats, cocoa powder, sugar, butter, and a splash of milk or water. These simple ingredients create a magical flavor that’s hard to beat.
Q4: Can I customize the recipe to suit my taste?
A4: Absolutely! Feel free to toss in extras like chopped nuts, shredded coconut, or even a sprinkle of sea salt on top. You can swap peanut butter for almond or sunflower butter for a nut-free twist. The recipe is flexible, so make it your own.
Q5: How do I store these cookies to keep them fresh?
A5: Keep your cookies in an airtight container in the refrigerator for up to a week. They can also be frozen if you want to enjoy them later-just thaw for a few minutes at room temperature before indulging.
Q6: Are these cookies kid-friendly?
A6: Definitely! Kids love the sweet, chocolatey flavor and the fun of no-bake treats. Plus, it’s a great way to sneak in some wholesome oats. They’re perfect for after-school snacks or a quick homemade dessert.
Q7: Can this recipe be scaled up for a crowd?
A7: Yes! This recipe is incredibly forgiving, so doubling or tripling the batch works like a charm. Just make sure you have a big enough mixing bowl and plenty of cooling space in your fridge.
Q8: Why choose no-bake cookies over traditional baked ones?
A8: No-bake cookies save time and energy by skipping the oven, making them ideal for hot days or quick fixes. they also have a wonderfully soft, fudgy texture that baked cookies sometimes can’t match. Plus, less cleanup is always a bonus!
Whether you’re a peanut butter fanatic or a chocolate lover looking for a fast and flavorful fix, these no-bake cookies are your new best friend. Ready to get mixing?
Final Thoughts
There you have it-a quick and easy recipe for irresistible peanut butter no-bake cookies that proves you don’t need an oven or hours in the kitchen to create a delicious treat. Whether you’re craving a mid-afternoon pick-me-up or need a simple dessert to impress guests, these cookies deliver rich, nutty flavors and a satisfyingly chewy texture with minimal effort. So, next time the sweet tooth strikes, whip up a batch of these no-bake wonders and enjoy a homemade indulgence that’s as effortless as it is delicious. Your taste buds-and your schedule-will thank you!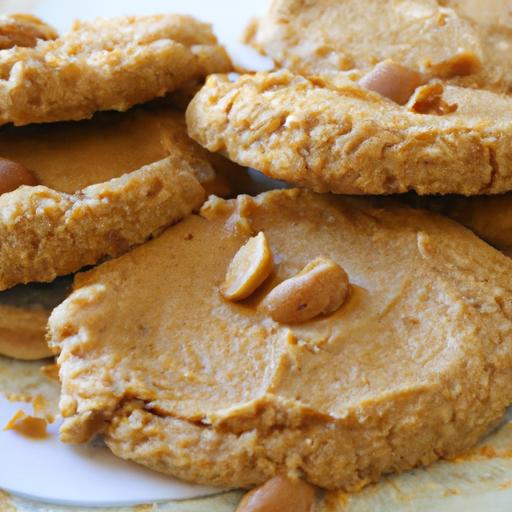
Peanut Butter Balls on a budget are the ideal homemade treat when you crave rich, nutty sweetness without stretching your grocery bill. Rooted in simple pantry staples yet bursting with flavor, these no-bake delights combine creamy peanut butter, a touch of honey, and crunchy add-ins to create a satisfying bite. Weather enjoyed as an afternoon snack or a swift dessert, crafting peanut butter balls at home means you control every ingredient-maximizing taste and minimizing cost.
Prep and Cook Time
Preparation: 15 minutes
Chill Time: 30 minutes
Total Time: 45 minutes
Yield
Makes approximately 20 peanut butter balls
Difficulty Level
Easy – perfect for beginners and experienced cooks alike
Ingredients
- 1 cup creamy peanut butter (natural or classic, no added sugar preferred)
- 2 cups powdered sugar (for a smooth, sweet binding)
- 1 cup crushed graham crackers (or substitute with inexpensive digestive biscuits)
- 2 tbsp honey (adds natural sweetness and moisture)
- ½ tsp vanilla extract
- Optional coatings: ½ cup mini chocolate chips, cocoa powder, or finely chopped nuts
Choosing Budget-friendly Ingredients for Maximum Flavor
Focus on pantry basics that do double duty: peanut butter offers protein and creaminess, while powdered sugar smooths texture and sweetness without needing expensive syrups. By opting for crushed graham crackers or store-brand cookies, you add crunch and bulk at a minimal cost. Honey may seem like a splurge but it’s used sparingly, bringing a subtle, deep flavor that elevates the treat.keep vanilla extract simple – even a small bottle goes a long way. This combination balances richness and affordability, so you enjoy full flavor without the premium price tag.
Step-by-step guide to Making Peanut Butter Balls at Home
- Combine the base: In a large mixing bowl, stir together the creamy peanut butter, honey, and vanilla extract until glossy and well mixed.
- Add dry ingredients: Gradually fold in the powdered sugar and crushed graham crackers until a pliable dough forms. It should hold together without being sticky. If too dry,add a teaspoon of milk; if too wet,dust with more powdered sugar.
- Shape the balls: Scoop tablespoons of dough and roll them between your palms into smooth, uniform balls. Aim for about 1-inch diameter for the perfect bite.
- Coat your creations: Choose a coating from mini chocolate chips, cocoa powder, or chopped nuts. Roll each ball gently in the coating of choice for texture and an extra flavor punch.
- chill and set: Arrange the peanut butter balls on a parchment-lined tray and refrigerate for at least 30 minutes. This step firms them up, making handling and serving easier.
- Enjoy instantly or store: Once chilled, these affordable treats are ready to delight. Keep reading for storage tips to maintain freshness.
Creative Variations to Stretch your Ingredients Further
When working with budget-friendly ingredients, think outside the box to multiply your treats:
- Oats Deluxe: Swap half the graham crackers for quick oats to add fiber and chewiness while saving costs.
- Chocolate swirl: melt inexpensive baking chocolate and drizzle over chilled balls for a decadent look that’s easy on your wallet.
- Seasonal spins: Add a pinch of cinnamon or pumpkin spice to mix up flavors throughout the year.
- Nutty textures: incorporate crushed peanuts or sunflower seeds to enhance crunch without extra cost.
- Mini bites: roll smaller balls to stretch the recipe further-perfect for parties and portion control.
Tips for Storing and Serving Your Affordable Treats
Store your peanut butter balls in an airtight container in the fridge for up to two weeks. If you want to keep them longer, freeze on a tray and transfer to a freezer-safe bag-defrost in the fridge overnight before serving.For presentation, stack these treats on a decorative plate or tiered tray, dust with powdered sugar, or garnish with fresh mint leaves for a pop of color. pair with a cup of chai tea or cold milk to highlight their rich, nutty sweetness. These budget-conscious bites are as remarkable visually as they are delicious!
Nutritional Information Per serving
| Calories | protein | Carbs | Fat |
|---|---|---|---|
| 110 | 4g | 12g | 6g |
for those eager to explore more budget-friendly snack recipes, check out our guide to Healthy Peanut Snacks on a Budget. To understand the nutritional benefits of peanuts,visit USDA Nutrient Database.

Q&A
Q&A: Peanut Butter Balls on a Budget – Delicious & Affordable Treats
Q1: What makes peanut butter balls such a popular treat?
A1: Peanut butter balls are beloved for their rich, creamy texture and irresistible combination of sweet and nutty flavors. Plus, they’re bite-sized, making them perfect for sharing-or sneaking a few when no one’s watching!
Q2: How can I make peanut butter balls without breaking the bank?
A2: The key is using simple, affordable ingredients like creamy peanut butter, powdered sugar, and crushed graham crackers or oats. These pantry staples are inexpensive and often already on hand, so you can whip up a batch without a special trip to the store.
Q3: Are there budget-friendly variations to the classic recipe?
A3: Absolutely! Swap crushed cookies for oats or rice cereal, use honey instead of syrup, or add a dash of cinnamon for a warm twist.Even dipping them in melted chocolate chips (a small investment) can elevate your peanut butter balls without costing a fortune.
Q4: How long do peanut butter balls last, and how should I store them?
A4: Stored in an airtight container in the fridge, peanut butter balls stay fresh for up to two weeks. You can also freeze them for longer storage-just thaw at room temperature before enjoying.
Q5: Can peanut butter balls be made allergen-friendly on a budget?
A5: Definitely! Use sunflower seed butter or soy nut butter as a substitute for peanut butter. For coating, consider crushed allergen-free cereal or coconut flakes. Many allergen-friendly ingredients are surprisingly affordable, especially when bought in bulk.
Q6: what’s the easiest way to make peanut butter balls kid-friendly and fun?
A6: Get kids involved by letting them roll the mixture into balls and decorate with sprinkles or mini chocolate chips. It’s an easy, hands-on activity that doubles as a tasty treat and budget-friendly bonding time.
Q7: How can I incorporate health benefits without upping the cost?
A7: Add a sprinkle of ground flaxseed or chia seeds into the mix. These boost fiber and omega-3s, and a small amount goes a long way without impacting flavor or budget. Using natural peanut butter (no added sugar) also keeps things wholesome and wallet-wise.
Q8: Any pro tips for making peanut butter balls perfectly every time?
A8: Chill the mixture before rolling to make shaping easier. Use gloves or lightly oil your hands to prevent sticking. And if the mixture is too sticky, add a bit more powdered sugar or crushed crackers to balance it out.
Peanut butter balls prove that you don’t have to drain your wallet to enjoy a tasty treat. With simple tweaks and pantry basics, you can create delicious snacks that satisfy both cravings and budgets!
The Way Forward
Whether you’re whipping up a quick snack for the kids or craving a sweet treat that won’t break the bank, these peanut butter balls prove that deliciousness doesn’t have to come with a hefty price tag. Simple ingredients, minimal effort, and maximum flavor combine to make these bites a budget-friendly delight perfect for any occasion. So next time you want to satisfy your sweet tooth without splurging, remember: a little creativity and peanut butter can go a long way in turning everyday pantry staples into irresistible, affordable treats. Happy snacking!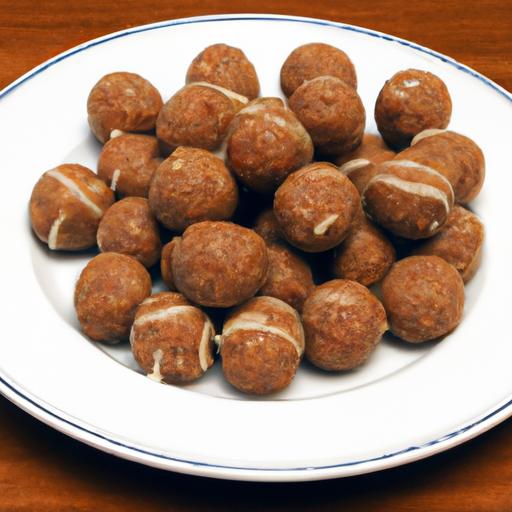
15-Minute Peanut Butter Recipes unlock a world of quick,satisfying snacks and meals fueled by the rich,creamy magic of peanut butter. These ideas bring a perfect balance of indulgence and nutrition,ideal for busy days when cravings hit hard but time is short. Whether you’re grabbing a bite between meetings or fueling up for an active morning, peanut butter’s versatility shines through each dish presented here.
Prep and Cook Time
- Preparation: 5 minutes
- Cooking: 10 minutes
- Total Time: 15 minutes
Yield
Serves 2-3 people
Difficulty Level
Easy
Energizing Peanut Butter Banana Power Toast
- 2 slices whole-grain bread, toasted
- 3 tbsp creamy peanut butter
- 1 medium ripe banana, thinly sliced
- 1 tsp chia seeds
- 1 tsp honey or maple syrup (optional)
- Pinch of cinnamon
- Spread 1½ tbsp of peanut butter evenly over each toasted slice while still warm, allowing it to soften and meld beautifully with the bread.
- Arrange the banana slices over the peanut butter, layering to cover the surface evenly.
- Sprinkle the chia seeds across the bananas, adding a burst of crunch and omega-3 goodness.
- Drizzle with honey or maple syrup if a touch of sweetness is desired, than dust lightly with cinnamon for warmth and aroma.
Wholesome Peanut Butter Chickpea Salad Wraps
- 1 cup canned chickpeas, rinsed and slightly mashed
- 2 tbsp peanut butter (natural, no added sugar)
- 1 tbsp fresh lemon juice
- 1 small carrot, grated
- 2 tbsp chopped fresh cilantro
- Salt and pepper to taste
- 2 large whole wheat tortillas or lettuce leaves
- Combine mashed chickpeas and peanut butter in a bowl, stirring until creamy but retaining some texture.
- Mix in lemon juice, grated carrot, and cilantro; season with salt and pepper to brighten and enhance natural flavors.
- Divide the mixture between tortillas or crisp lettuce leaves for a gluten-free option.
- roll tightly and slice in half to reveal the colorful filling – perfect for a quick, wholesome lunch.
Decadent Peanut Butter Chocolate Mug cake
- 4 tbsp all-purpose flour
- 2 tbsp sugar
- 1 tbsp unsweetened cocoa powder
- 1/8 tsp baking powder
- 3 tbsp milk
- 2 tbsp peanut butter
- 1 tbsp vegetable oil
- Optional: chocolate chips, pinch of salt, vanilla extract
- In a microwave-safe mug, combine flour, sugar, cocoa powder, and baking powder; whisk gently to blend dry ingredients uniformly.
- Mix in milk, vegetable oil, and peanut butter until a smooth batter forms. For extra depth, stir in a few chocolate chips or a dash of vanilla.
- Microwave on high for 60-75 seconds. Watch carefully to prevent overflow. The cake should spring back lightly when touched, indicating perfect doneness.
- Allow to cool for a minute, then indulge directly from the mug or tip onto a plate for a more elegant touch.
Tips for Success
- Use natural, creamy peanut butter for the smoothest texture and richest flavor across all recipes.
- Adjust sweetness to your preference, especially in the mug cake – try stevia or coconut sugar for a healthier twist.
- For crispier wraps, briefly toast your tortillas before assembling to prevent sogginess.
- Store any leftovers in airtight containers; the chickpea salad wrap filling can brighten your next salad or sandwich.
- Substitute almond or cashew butter for peanut allergy alternatives, though adjust quantities to taste as they vary in consistency.
Serving Suggestions
Complement your energizing breakfast toast with a fresh iced coffee or a fruit smoothie. The chickpea salad wraps pair wonderfully with crunchy pickles or a light side of cucumber salad. For dessert, serve the chocolate mug cake warm with a scoop of vanilla ice cream or a dollop of Greek yogurt and a sprinkle of crushed peanuts for an extra layer of texture and flavor.

| Nutrient | Per Serving (Toast) | Per Serving (Wrap) | Per Serving (Mug Cake) |
|---|---|---|---|
| Calories | 310 | 290 | 350 |
| Protein (g) | 9 | 12 | 8 |
| Carbohydrates (g) | 38 | 34 | 40 |
| Fat (g) | 13 | 14 | 18 |
Discover more peanut butter inspirations with our Healthy Peanut Butter Smoothies. for nutritional benefits and guidelines, visit Healthline’s Peanut Butter Nutrition Guide.
Q&A
Q&A: 15-Minute Peanut Butter Recipes – Quick & Delicious Ideas
Q1: Why is peanut butter such a great ingredient for quick recipes?
A: Peanut butter is a superstar pantry staple! It’s packed with protein,healthy fats,and rich flavor,making it incredibly versatile. Plus,it requires no cooking time and blends beautifully with both sweet and savory ingredients,perfect for whipping up tasty dishes in just minutes.
Q2: What makes a peanut butter recipe suitable for a 15-minute prep?
A: Simplicity is key! Recipes that rely on minimal ingredients, no long cooking or baking, and quick assembly fit the bill. Think no-bake snacks, easy dips, smoothies, or quick stovetop stir-fries-where peanut butter lends creaminess and flavor instantly without waiting around.
Q3: Can you share a fun, quick peanut butter recipe anyone can try?
A: Absolutely! Try “Peanut Butter Banana Toast”: Toast a slice of your favorite bread, spread a generous layer of peanut butter, then top with sliced bananas and a drizzle of honey. Sprinkle some chia seeds or cinnamon if you like. Ready in under 5 minutes and utterly delicious!
Q4: Are peanut butter recipes only for snacks and desserts?
A: Not at all! Peanut butter shines in savory dishes too. For instance, a simple peanut sauce made from peanut butter, soy sauce, lime juice, and a touch of honey can be tossed with noodles or used as a dip for veggies-a quick way to add depth and richness to your meal.
Q5: How can I make my peanut butter recipes even healthier?
A: Opt for natural or unsweetened peanut butter to avoid added sugars and unhealthy oils. Pair it with fresh fruits, whole grains, and veggies to balance out flavors and nutrients. Also, control portions since peanut butter is calorie-dense-even in quick bites, a little goes a long way!
Q6: What kitchen tools are helpful for 15-minute peanut butter recipes?
A: Keep it simple: a sharp knife, a toaster or microwave, mixing bowls, a whisk or spoon, and measuring spoons. A blender or food processor can come in handy for smoothies and sauces but isn’t mandatory. The goal is fast, fuss-free prep.
Q7: Can peanut butter recipes be customized easily?
A: Definitely! Swap out nuts (try almond or cashew butter),sweeteners (maple syrup,agave),or add-ins (chocolate chips,seeds,dried fruits). Season savory versions with chili flakes, garlic, or ginger to tailor each dish to your taste.Q8: Where can I find inspiration for creative 15-minute peanut butter recipes?
A: Look beyond traditional PB&J! Food blogs, cooking apps, and social media are full of creative twists. Try peanut butter smoothies, energy balls, quick stir-fries, or even peanut butter salad dressings.experimentation is half the fun!
Ready to dive into the rich, creamy world of peanut butter? These quick recipes prove that delicious doesn’t have to mean complicated – just 15 minutes and a spoonful of peanut butter away from yum!
To Conclude
With these 15-minute peanut butter recipes at your fingertips, quick meals no longer mean sacrificing flavor or nutrition. Whether you’re whipping up a savory snack, a sweet treat, or a balanced breakfast, peanut butter’s creamy richness adds that perfect punch of protein and satisfaction. Next time you find yourself pressed for time but craving something delicious, remember these simple, speedy ideas-because good food doesn’t have to wait. So go ahead, embrace the versatility of peanut butter and make every minute in the kitchen count!
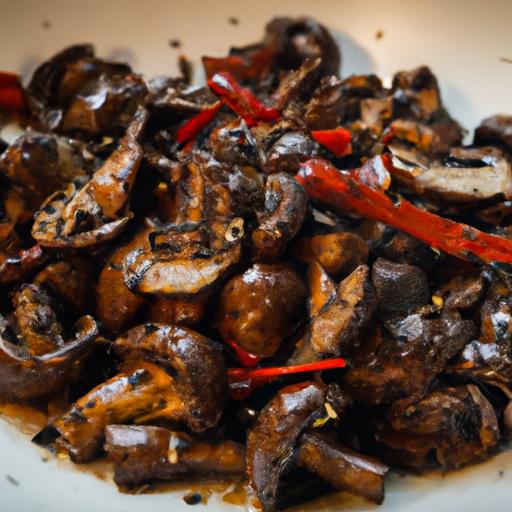
Affordable Ingredients That Maximize Flavor in your Chili Garlic Butter Mushrooms
Budget-Friendly Chili Garlic Butter Mushrooms are a game-changer for anyone craving bold, savory tastes without splurging.These mushrooms capture the magic of vibrant garlic and fiery chili,perfectly balanced in luscious butter,all while being made with accessible pantry staples. Drawing from simple yet effective ingredients, this dish bursts with umami and heat, transforming humble mushrooms into a crowd-pleasing treat.
prep and Cook Time
- Readiness: 10 minutes
- Cooking: 15 minutes
- Total Time: 25 minutes
Yield
- serves 4 as an appetizer or side dish
Difficulty Level
- Easy – perfect for cooks of all skill levels
Ingredients
- 500g (1 lb) cremini or button mushrooms, cleaned and sliced
- 4 tbsp unsalted butter
- 6 garlic cloves, finely minced
- 1-2 tsp red chili flakes (adjust to heat preference)
- 1 tbsp olive oil
- 1 tbsp soy sauce (adds rich umami)
- 1 tsp smoked paprika
- Salt and freshly ground black pepper, to taste
- Fresh parsley, chopped, for garnish
- Juice of half a lemon (optional, balances richness)
Step-by-Step Guide to Crafting Perfectly Sautéed Mushrooms with a Spicy Twist
- Prepare your mushrooms. Clean gently with a damp cloth and slice evenly to ensure uniform cooking.
- Heat olive oil plus 2 tbsp butter in a large skillet over medium-high heat untill shimmering.
- Add mushrooms in a single layer and let them cook undisturbed for 3 minutes to develop a golden-brown crust.
- Stir and sauté for another 4-5 minutes until mushrooms release their moisture and start caramelizing.
- Lower heat to medium and add minced garlic and red chili flakes. Stir constantly for about 1-2 minutes until fragrant but not burnt.
- Pour in soy sauce,smoked paprika,and the remaining 2 tbsp butter. Stir well to coat all mushrooms evenly, letting the sauce thicken slightly.
- Season with salt and pepper to taste. For a bright finishing touch, squeeze in lemon juice if using, and toss gently.
- Remove from heat and garnish with fresh parsley. Serve hot to enjoy the full garlic butter goodness.
Tips for Customizing Heat Levels and Enhancing Garlic Butter Goodness
Adjusting the spice is simple: start with 1 tsp chili flakes if you prefer mild heat, or crank it up to 2 tsp or more for a fiery punch. for a smoky depth, consider swapping regular paprika with chipotle powder.To boost garlic flavor, add a pinch of garlic powder along with your fresh garlic, or finish the dish with a drizzle of garlic-infused oil. If you want creaminess, stir in a teaspoon of cream cheese or a sprinkle of Parmesan just before serving.For vegan variations, replace butter with plant-based margarine and opt for coconut aminos instead of soy sauce.
Serving Suggestions and Budget-Friendly pairings to Elevate Your Mushroom Dish
These chili garlic butter mushrooms shine bright as a starter, but they also complement many meals. Serve over a bed of fluffy steamed rice or alongside simple garlic bread to soak up the luscious sauce. For a hearty meal, pile them onto a slice of warm toasted sourdough or toss into cooked pasta with a drizzle of extra olive oil.Pair with a crisp green salad dressed in lemon vinaigrette for freshness, or add to grain bowls layered with roasted veggies and legumes. Garnish with additional parsley or a light sprinkle of crushed red pepper for a polished look.

Chef’s notes
- Choosing mushrooms: cremini have a slightly earthier flavor than button mushrooms, making them ideal but either works.
- Don’t overcrowd the pan: To achieve perfect caramelization, give mushrooms room to breathe and brown rather of steam.
- make ahead: Prepare the mushrooms ahead and reheat gently on the stovetop, adding a pat of butter to refresh flavors.
- Storage: Keep leftovers refrigerated up to 3 days; they reheat beautifully in a skillet or microwave.
- Spice swap: Use fresh chilies minced rather of flakes for a fresher heat layer, or experiment with chili garlic paste for a more pungent profile.
| Nutrient | Per Serving (4 servings) |
|---|---|
| Calories | 150 kcal |
| Protein | 3 g |
| Carbohydrates | 8 g |
| Fat | 12 g |
For an in-depth look at mushroom varieties and their cooking techniques,check out our Comprehensive Mushroom Cooking Guide. To learn more about the health benefits of garlic and chili, visit this Healthline article.
Q&A
Q&A: Unlocking the Flavors of Budget-Friendly Chili Garlic Butter Mushrooms Delight
Q1: What makes this chili garlic butter mushrooms recipe budget-friendly?
A1: This recipe uses simple,affordable ingredients like fresh mushrooms,garlic,butter,and pantry staples such as chili flakes or powder. By focusing on these accessible ingredients, it delivers rich, bold flavors without the need for costly add-ons or specialty items.
Q2: Can I use any type of mushroom for this dish?
A2: Absolutely! While cremini or button mushrooms are most common and budget-friendly, you can experiment with shiitake, portobello, or oyster mushrooms depending on your preference and local availability.Just keep in mind that different mushrooms may alter the texture and intensity of flavor slightly.Q3: How do the chili and garlic contribute to the overall taste?
A3: Garlic brings a warm, aromatic depth, while chili injects a subtle heat that awakens the palate. Together,they create a savory,slightly spicy foundation that pairs beautifully with the creamy butter and earthy mushrooms,ensuring every bite bursts with flavor.
Q4: Is this dish suitable for weeknight dinners or meal prepping?
A4: Definitely! This recipe is quick to prepare, requiring only around 15-20 minutes. It reheats well, making it perfect for meal prepping or a speedy, satisfying weeknight dinner that won’t break the bank or your schedule.
Q5: What are some serving suggestions to elevate this mushroom delight?
A5: Serve these buttery mushrooms over a bed of steamed rice,tossed with pasta,or piled atop toasted bread for an easy appetizer or snack. For a heartier meal, consider pairing with grilled chicken or tofu to round out the nutrition.Q6: can this recipe be adapted for dietary preferences?
A6: Yes! To make it vegan, substitute butter with plant-based alternatives like olive oil or vegan margarine. Adjust the chili level to your spice tolerance, and you’ll have a versatile dish that suits various diets without sacrificing taste.
Q7: What kitchen tips will help perfect this recipe?
A7: For best results, sauté the mushrooms over medium-high heat without overcrowding the pan to ensure they brown nicely rather than steam. Use fresh garlic for vibrant flavor, and add chili towards the end to preserve its bright heat. Don’t forget a sprinkle of fresh herbs or a squeeze of lemon juice to brighten the dish before serving!
This Q&A reveals the secret behind creating an affordable, flavorful, and versatile chili garlic butter mushrooms recipe that anyone can whip up to delight their taste buds without stretching their wallet.
To Wrap It Up
As you wrap up this culinary adventure with our Budget-Friendly Chili Garlic Butter Mushrooms, you’re not just ending a recipe-you’re opening the door to a world where bold flavors meet simplicity and affordability. This delightful dish proves that you don’t need extravagant ingredients or complex techniques to create something truly memorable. whether served as a snack, a side, or a centerpiece, these mushrooms bring a sizzling kick and buttery richness that will keep your taste buds dancing without dipping deep into your wallet. So next time you crave a little heat and comfort on a budget, remember this recipe-it’s proof that deliciousness and frugality can happily coexist on your plate.
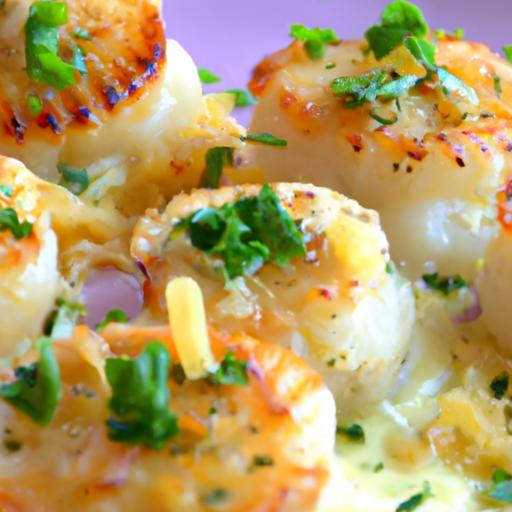
Garlic Butter Baked Scallops offer a sublime marriage of tender, juicy scallops infused with the rich and aromatic flavors of garlic-infused butter-a perfect keto delight that elevates any seafood feast.This dish brings out the natural sweetness of fresh scallops, enhanced by a buttery garlic glaze that’s both indulgent and perfectly suited for a low-carb lifestyle. Originating from coastal culinary traditions, this recipe has become my go-to for impressing guests or indulging in a quick, luxurious dinner without sacrificing keto principles.
Prep and Cook Time
- Planning: 10 minutes
- Cooking: 15 minutes
- Total: 25 minutes
Yield
Serves 4 generous portions
Difficulty Level
Easy - perfect for beginner to intermediate home cooks looking to impress without stress.
Essential Ingredients for an Authentic Keto Experience
- 1 lb fresh sea scallops, rinsed and patted dry
- 4 tbsp unsalted butter
- 4 garlic cloves, finely minced
- 1 tbsp fresh lemon juice
- 2 tbsp chopped fresh parsley (reserve some for garnish)
- 1/4 tsp smoked paprika
- Salt and freshly cracked black pepper to taste
- 1/4 cup grated Parmesan cheese (optional for a richer crust)
- 1 tbsp olive oil
Step by Step Guide to perfectly Baked Scallops Every Time
- Preheat yoru oven to 400°F (200°C). This ensures a hot surroundings to gently bake scallops without drying them out.
- Prepare the garlic butter sauce: In a small saucepan, melt the butter over medium heat. Add the minced garlic and sauté until fragrant and golden, about 2 minutes, avoiding browning to keep it sweet and mild.
- Stir in the lemon juice, smoked paprika, and half the parsley. Remove from heat.
- Lightly grease a baking dish with olive oil to prevent sticking and add a subtle fruity flavor.
- Arrange scallops in a single layer in the dish, spacing them evenly to allow heat circulation and even cooking.
- Spoon the garlic butter mixture generously over each scallop, ensuring each one is well-coated but not swimming in liquid.
- sprinkle the grated Parmesan over the scallops, if using, to create a golden, flavorful crust.
- Bake in the preheated oven for 12-15 minutes, or until scallops turn opaque with golden edges-avoid overcooking to keep them tender.
- Garnish with remaining fresh parsley and a light crack of black pepper before serving.
Tips and Tricks to Elevate Your Keto Seafood Feast
- Choose dry Scallops: Opt for dry-packed scallops rather than wet (soaked in preservatives) for superior flavor and texture.
- Don’t overcrowd: baking scallops in a single layer prevents steaming and encourages a perfect sear under the butter.
- Make Ahead: Prepare the garlic butter sauce in advance and store in the fridge up to 2 days; warm gently before using.
- Try Variations: Add a sprinkle of chili flakes for heat or swap smoked paprika for cayenne for a smoky kick.
- Pair Perfectly: Serve alongside creamy cauliflower mash or roasted asparagus for a complete keto meal.
Serving Suggestions
Present your garlic butter baked scallops in a shallow serving dish with a drizzle of any leftover garlic butter sauce. Sprinkle extra fresh parsley or a few lemon wedges on the side for brightness. A light arugula salad tossed in olive oil and lemon complements beautifully.For a festive touch, scatter toasted pine nuts or slivered almonds atop your scallops to add a crunchy contrast. This dish shines served immediately, steaming hot, with a poised balance of dark, rich flavors and luminous citrus lifted freshness.

| Nutrition Per Serving | Amount |
|---|---|
| Calories | 280 |
| Protein | 22g |
| Net carbs | 3g |
| Fat | 20g |
For a deeper dive into keto-friendly seafood recipes, check our thorough keto seafood dinners guide. For expert insights on choosing and storing fresh scallops, the NOAA’s official seafood sustainability page is an invaluable resource.
Q&A
Q&A: Garlic Butter Baked Scallops – A Keto Delight Recipe
Q1: What makes garlic butter baked scallops a perfect keto dish?
A1: Garlic butter baked scallops are a keto superstar because they’re low in carbs, high in healthy fats, and packed with protein. The rich butter and savory garlic add flavor without any sugar or carb-heavy ingredients, keeping your macros in check while satisfying your taste buds.
Q2: How do scallops fit into a ketogenic diet?
A2: Scallops are an excellent choice for keto as they’re naturally low in carbohydrates but high in protein and essential nutrients like magnesium and vitamin B12. Their delicate texture and mild flavor make them versatile and easy to pair with keto-friendly ingredients like butter and garlic.
Q3: What’s the secret to making the garlic butter sauce so irresistibly flavorful?
A3: The magic lies in fresh garlic sautéed gently in real, grass-fed butter to release its sweet, aromatic essence without bitterness. A sprinkle of fresh herbs like parsley or thyme adds brightness, while a pinch of sea salt and cracked pepper enhances every bite with balanced seasoning.Q4: Can I prepare this dish ahead of time?
A4: absolutely! You can prep the scallops and garlic butter sauce separately and store them in the fridge for up to a day.When ready, simply assemble and bake to give your scallops that fresh-from-the-oven sizzle and buttery aroma.
Q5: what are some keto-friendly side dishes to serve with garlic butter baked scallops?
A5: Consider pairing your scallops with roasted asparagus,cauliflower rice,or a crisp leafy green salad drizzled with olive oil and lemon. These low-carb sides balance the richness of the scallops and round out a nutrient-packed ketogenic meal.
Q6: Can this recipe be modified for other seafood lovers?
A6: Totally! While scallops shine in this garlic butter bath,shrimp,cod,or even lobster tails can be swapped in for a similar luxurious keto treat. Just adjust the baking time to suit your chosen seafood’s texture and thickness.
Q7: Is garlic butter baked scallops suitable for keto beginners?
A7: Definitely. This recipe is straightforward, requires minimal ingredients, and delivers big flavor without any complex keto math. It’s an excellent way for newbies to dive into keto cooking while indulging in restaurant-quality seafood right at home.
Q8: How can I ensure the scallops don’t overcook and become rubbery?
A8: Timing is everything! Bake your scallops just until they turn opaque and firm to the touch-usually around 10-12 minutes at 400°F (200°C). Because scallops cook quickly, keep an eye on them to preserve that tender, melt-in-your-mouth texture.
Ready to embrace the buttery, garlicky goodness of this keto delight? Garlic butter baked scallops invite you to savor luxury with every forkful, all while staying perfectly aligned with your ketogenic goals. Bon appétit!
Closing Remarks
In the world of keto-friendly dishes, Garlic Butter Baked Scallops shine as a perfect marriage of rich flavors and wholesome ingredients. This recipe not only satisfies your craving for something decadent but also keeps your carb count in check, making it a true delight for low-carb enthusiasts. Whether you’re hosting a dinner party or simply treating yourself to a gourmet meal at home, these succulent scallops bathed in fragrant garlic butter will elevate your culinary repertoire. So, fire up your oven and indulge in this simple yet refined dish-your taste buds and keto goals will thank you.