Mastering Börek begins with selecting the perfect filling-one that bursts with authentic flavors while honoring the rich culinary tradition of this beloved savory pastry. Whether you lean towards succulent meats, fresh herbs, creamy cheeses, or hearty vegetables, the right filling transforms each delicate, flaky layer into a memorable experience. Let’s dive into creating that harmony of flavors and textures, starting with how to choose fillings that elevate your börek from simple to sensational.
Choosing the Perfect Filling for Authentic Flavors
To truly master börek, aim for fillings that balance moisture and seasoning to complement the pastry’s crisp, buttery layers. Customary options include:
- Ground lamb or beef sautéed with onions, garlic, and aromatic spices like cumin and cinnamon;
- Feta cheese combined with fresh parsley or dill for a tangy, herbaceous bite;
- Spinach and leeks cooked down with a hint of nutmeg;
- Potato puree seasoned with paprika and caramelized onions for a comforting vegetarian choice.
Fresh herbs are a must-thyme, mint, or chives can infuse your filling with vibrant notes. Keep fillings slightly firm and not too wet to prevent soggy layers, ensuring that each bite stays crisp and inviting.
Crafting the Ideal Dough Texture for Flaky Perfection
Your dough is the foundation of every great börek. A masterful dough strikes the perfect balance of elasticity and tenderness, enabling you to roll it paper-thin without tearing. Use all-purpose flour combined with a dash of oil and warm water for pliability.Resting the dough for at least 30 minutes under a damp cloth relaxes the gluten and simplifies rolling.
Pro tip: If you want extra flaky layers, consider layering your sheet with melted butter or olive oil as you assemble the börek. This technique creates irresistible golden crispiness once baked.
expert techniques for Rolling and Shaping Börek
Once rested, divide the dough into small balls. Using a lightly floured surface, roll each ball into an ultra-thin circle-almost translucent.The key here is patience, gentle pressure, and a careful swirl of your wrist, which helps elongate the dough evenly.
For shaping, try classic forms such as:
- Triangles: Place a spoonful of filling near the edge, fold into a neat triangle, sealing edges firmly.
- Spirals: Spread filling on a thin sheet, then roll tightly before coiling it into a spiral.
- Rectangular layers: Stack multiple thin sheets brushed with butter, layering filling intermittently for a luxurious multi-layered börek.
ensure edges are well sealed with a touch of water or beaten egg to avoid filling leakage during baking.
Baking Tips and Presentation Ideas to Impress Your Guests
Before baking, brush your börek generously with egg wash or melted butter to achieve that coveted golden sheen. Place on a parchment-lined tray and bake in a preheated oven at 375°F (190°C) for 25-30 minutes until crisp and bubbly.
For a stunning presentation, serve börek warm on a rustic wooden board, garnished with fresh herbs like parsley or mint and accompanied by a bowl of creamy yogurt or tzatziki. Add a wedge of lemon to brighten each bite and elevate the flavor profile.
Prep and Cook Time
- Readiness: 40 minutes (includes dough resting)
- Cooking: 30 minutes
- Total: 1 hour 10 minutes
Yield
Serves 6-8 people,perfect for sharing at brunch or dinner parties.
Difficulty Level
Medium - requires some dough handling skills and attention to rolling techniques, but easily achievable with practice.
Ingredients
- For the Dough:
- 3 cups all-purpose flour, sifted
- 1 cup warm water
- 2 tbsp olive oil
- 1 tsp salt
- For the Filling (Classic Spinach and Feta):
- 400g fresh spinach, washed and roughly chopped
- 200g feta cheese, crumbled
- 1 medium onion, finely diced
- 2 tbsp olive oil
- 1/4 tsp freshly ground black pepper
- 1/2 tsp nutmeg
- 1/4 cup fresh dill, chopped
- For Assembly:
- 1 egg, beaten (for egg wash)
- 3 tbsp melted butter or olive oil (for layering)
Instructions
- Make the dough: In a large bowl, mix sifted flour and salt. Gradually add warm water and olive oil, stirring until dough forms. Knead on floured surface for 8-10 minutes until smooth and elastic. Cover and let rest for 30 minutes.
- Prepare filling: Heat olive oil in skillet over medium heat. Sauté onions until translucent,about 5 minutes,stirring occasionally. Add spinach and cook until wilted, about 4 minutes. Remove from heat; stir in crumbled feta, dill, nutmeg, and black pepper. Let cool.
- Divide dough: Cut rested dough into 8 equal balls. Lightly flour surface and roll each ball into thin, nearly translucent circles.
- assemble börek: Brush dough with melted butter. Spoon filling along one side, then fold dough into desired shape (triangle, spiral, or rectangle). Seal edges gently with water or beaten egg.
- Layer (optional): For multi-layer börek, stack sheets alternately spreading melted butter and filling layers.
- Preheat oven: Set to 375°F (190°C). Line baking tray with parchment paper.
- Brush börek: Generously apply egg wash to each shaped pastry.
- Bake: Place börek on tray and bake for 25-30 minutes until golden and crisp.
- Serve: Let cool 5 minutes before serving warm with fresh herbs and yogurt dips.
Tips for Success
- use warm water for dough to help activate gluten and ease rolling.
- Resting dough is essential – don’t skip it to avoid shrinkage during rolling.
- Keep your work surface lightly floured to prevent sticking, but avoid excess flour that toughens dough.
- If dough tears,repair by gently pressing the edges or patching with a little extra flour and water mixture.
- for a vegan version, substitute feta with seasoned tofu and use olive oil instead of egg wash.
- Make ahead: Börek can be formed and refrigerated for up to 6 hours before baking-ideal for meal prep or entertaining.
Serving Suggestions
Present börek stacked or spiraled on a large platter, garnished with freshly chopped parsley or mint for a splash of color. Pair with a side of cooling garlic yogurt sauce or a crisp salad made from cucumbers, tomatoes, and red onions tossed in a lemon vinaigrette. Add lemon wedges alongside to enhance the flaky pastry’s savory depth.
| Nutritional Info (per serving) | Calories | Protein | Carbohydrates | Fat |
|---|---|---|---|---|
| Spinach & Feta Börek | 320 kcal | 14g | 28g | 18g |

For further inspiration, explore our Turkish pastry and baklava recipes. To deepen your understanding of traditional Turkish spices and herbs, visit Britannica’s guide on Turkish cuisine.
Q&A
Q&A: Mastering Börek – A Delicious Step-by-Step Recipe Guide
Q1: What exactly is Börek?
A1: Börek is a savory pastry originating from the Ottoman Empire, beloved throughout Turkey and the Balkans. It features thin layers of dough-frequently enough phyllo or yufka-wrapped or layered with fillings ranging from cheese and spinach to minced meat, then baked to golden, flaky perfection. Think of it as the crispy, indulgent cousin of your favorite stuffed pie.
Q2: Why is mastering Börek worth the effort?
A2: Becuase Börek isn’t just food; it’s an experience-a delightful dance between crisp layers and rich fillings. With patience and technique, you’ll unlock textures and flavors that wow the senses. Plus, once mastered, Börek becomes your signature dish for gatherings or a comforting weeknight treat.
Q3: Which ingredients are essential for a traditional Börek?
A3: At the heart of Börek is the dough-typically phyllo or handmade yufka-which provides the signature crispness. Common fillings include salty feta or Turkish white cheese,spinach or fresh herbs,onions,and sometimes ground lamb or beef for meat lovers. Olive oil or melted butter is key for brushing the dough layers to achieve that irresistible golden crunch.Q4: Can I make the dough from scratch?
A4: Absolutely! Making yufka dough by hand is a rewarding part of the Börek art. It requires flour, water, a pinch of salt, and lots of stretching to create impossibly thin sheets. For beginners, supermarket phyllo dough offers a convenient shortcut without compromising taste.
Q5: What’s the secret to perfectly crispy Börek?
A5: The magic lies in layering and moisture control. Brush every layer generously with butter or oil, but avoid overly wet fillings that can sog the dough. Bake at a high enough temperature-usually around 375°F (190°C)-until the top is beautifully golden and crisp.
Q6: How versatile is Börek? Can I customize the fillings?
A6: Börek invites creativity! Traditional fillings abound, but you can get playful with mushrooms, pumpkin, or even sweet versions with nuts and honey. The key is balancing moisture and flavor to preserve that flaky texture.
Q7: What’s the best way to serve Börek?
A7: Serve Börek warm, straight from the oven, accompanied by a dollop of tangy yogurt or a fresh salad. The contrast between the crispy pastry and cooling sides creates an unforgettable bite.
Q8: Any tips for beginner Börek makers?
A8: Yes! Take your time with layering-thinner layers mean crispier Börek. If using phyllo, keep the sheets covered with a damp towel to prevent drying out. Practice makes perfect: your hands will become more confident,and you’ll soon master folding or rolling techniques.
Q9: Can Börek be frozen?
A9: Indeed! Börek freezes beautifully before baking. Assemble your Börek, wrap it tightly, and freeze. When ready, bake it straight from frozen, adding a few extra minutes to the baking time, and enjoy fresh, flaky goodness whenever you please.
Q10: Where can I learn more about Börek’s cultural roots?
A10: Dive into Turkish and Balkan culinary blogs, cookbooks, or documentaries exploring Ottoman-era kitchens. Börek is more than a dish-it’s a story of tradition,family,and shared tables that have spanned centuries.
Embark on your Börek journey with patience and passion, and you’ll soon be slicing into layers of golden, crispy delight that tell a delicious story with every bite!
Closing Remarks
Mastering börek is more than just following a recipe-it’s an invitation to embark on a culinary journey filled with flaky layers, rich fillings, and the warm embrace of tradition. With each fold and brush of butter, you craft not only a dish but a story that bridges cultures and generations. Whether you’re a seasoned cook or a curious beginner, this step-by-step guide equips you with the tools and confidence to bring the magic of börek into your kitchen. So roll up your sleeves, embrace the dough’s delicate texture, and let your taste buds savor the triumph of homemade börek-as great cooking, much like life, is best enjoyed one delicious layer at a time.
essential Ingredients for Flavorful Pasta on a Budget
Delicious & Affordable Pasta Recipes are a gateway to creating comforting,satisfying meals without straining your wallet. Pasta’s humble roots in Italy remind us that simplicity paired with quality ingredients yields unforgettable flavors. Starting with foundational pantry staples,you can build on classic dishes and infuse them with creative twists that elevate both taste and presentation.
Prep and cook Time
- Planning: 10 minutes
- Cooking: 15 minutes
- Total Time: 25 minutes
Yield
Serves 4 generous portions-perfect for family dinners or meal prepping for the week.
Difficulty Level
Easy – Ideal for beginner cooks and anyone looking for fast, economical meals.
Ingredients
- 12 oz dried spaghetti or any budget-friendly pasta
- 3 tbsp olive oil (extra virgin for best flavor)
- 4 cloves garlic, thinly sliced
- 1/2 tsp red pepper flakes (adjust to taste)
- 1 cup canned diced tomatoes (drained)
- 1/4 cup grated Parmesan cheese (optional but adds umami)
- 1 tbsp dried Italian herbs or a mix of dried oregano and basil
- Salt and freshly ground black pepper, to taste
- Fresh parsley (optional, roughly chopped for garnish)
- 1 cup frozen peas or any affordable seasonal vegetable (optional)
Instructions
- Bring a large pot of salted water to a rolling boil. Add the pasta and cook according to package instructions untill al dente,usually about 8-10 minutes. Drain, reserving 1/2 cup of pasta water.
- meanwhile, heat olive oil in a large skillet over medium heat. Add the sliced garlic and red pepper flakes. Sauté until fragrant and the garlic is golden brown, about 2-3 minutes-be careful not to burn the garlic.
- Stir in the canned diced tomatoes and dried Italian herbs. Allow the mixture to simmer for 5-7 minutes, letting the flavors meld and the sauce thicken slightly. If using frozen peas or veggies, add them now and cook until heated through.
- Toss the drained pasta into the skillet with the tomato sauce. Add reserved pasta water a little at a time to loosen the sauce and help it coat each strand beautifully.
- Season with salt and freshly ground black pepper to taste. Stir in the grated Parmesan cheese until melted and mixed well.
- Remove from heat and garnish with chopped fresh parsley just before serving for a pop of color and freshness.
Tips for Success
- Use good quality dried pasta-the inexpensive tubular or long pasta shapes perform wonderfully in budget recipes.
- Replace fresh garlic with garlic powder if needed; it still imparts that punch of flavor.
- Stirring frequently during sauce simmering prevents scorching and helps concentrate the flavors evenly.
- if you want to boost protein without adding meat, toss in a can of drained chickpeas or white beans during step 3.
- make extra sauce and store in the fridge for up to 3 days-it makes a quick reheat meal even simpler!
Serving Suggestions
For a beautifully plated dish, twirl the pasta onto warmed plates and drizzle a little extra virgin olive oil on top. Garnish with freshly ground black pepper, a sprinkle of Parmesan, and a few basil leaves or parsley sprigs for color. Serve with crusty bread or a simple green salad to round out the meal.
| Nutrient | per Serving |
|---|---|
| Calories | 350 kcal |
| Protein | 12 g |
| Carbohydrates | 58 g |
| Fat | 8 g |

Smart Shopping Tips to Maximize Your pasta Budget
Stock your pantry with staples like dried pasta, canned tomatoes, and dried herbs-thay form the backbone of countless Delicious & Affordable Pasta Recipes. buying store-brand or bulk items can slash costs while maintaining quality. Stay seasonal by incorporating fresh vegetables available at local markets or frozen varieties on sale-both add color and nutrients without inflating the price.
Additionally, keep an eye out for discounted cheese pieces or bulk garlic bulbs, which last well and pack big flavor. Planning meals around sales and mixing in affordable protein sources such as beans or eggs transforms your pasta repertoire into a versatile and wallet-friendly solution. for inspiration on budget-friendly meal planning, check out this Smart Meal Planning Guide and for nutritional insights visit EatRight.org.
Q&A
Q&A: Delicious & Affordable Pasta Recipes – Budget-Friendly Meals
Q1: Why is pasta such a great choice for budget-friendly meals?
A1: Pasta is a pantry superhero! Its inexpensive, shelf-stable for months, and extremely versatile.whether it’s spaghetti, penne, or fusilli, pasta acts as a blank canvas, ready to soak up affordable, flavorful ingredients.With just a few pantry staples, you can whip up hearty meals that satisfy both your taste buds and your wallet.
Q2: What are some key tips for making pasta dishes more affordable without sacrificing flavor?
A2: Start by focusing on simple ingredients like garlic, canned tomatoes, onions, and herbs, which are cheap yet pack a punch of flavor. Use seasonal or frozen veggies instead of fresh to cut costs. Don’t shy away from pantry proteins like beans or lentils-they stretch meals further and add nutritional value. Lastly, make your own sauces from scratch instead of buying pre-made ones to control both cost and quality.
Q3: How can I make a classic pasta dish that feels indulgent but stays budget-friendly?
A3: Take spaghetti aglio e olio, a traditional Italian staple: just garlic, olive oil, chili flakes, and parsley.It’s quick, elegant, and uses only a handful of affordable ingredients. Add a sprinkle of grated Parmesan or nutritional yeast for extra umami. This minimalist dish proves that luxury doesn’t have to come with a hefty price tag.
Q4: What are some creative ways to use leftovers in pasta recipes?
A4: Leftover roasted veggies, cooked chicken, or even stale bread (turned into breadcrumbs) can be stars in a pasta meal. Toss veggies with pasta and a generous drizzle of olive oil; mix chicken chunks into a tomato sauce; sprinkle toasted breadcrumbs on top for crunch. Leftover cheese bits or herbs can refresh and elevate any dish. Think of your fridge as a flavor treasure chest!
Q5: Are there budget-friendly pasta recipes suitable for picky eaters or kids?
A5: Absolutely! Simple pasta with butter and Parmesan is a classic that pleases many palates. You can sneak in finely grated veggies like carrots or zucchini into the sauce for added nutrition without altering the familiar taste. Meatballs made from affordable ground turkey or beans are another hit, combined with a basic tomato sauce. Keep it fun and customizable with mix-ins like olives, corn, or cheese cubes to engage little eaters.
Q6: How can I make these affordable pasta meals healthier without increasing costs too much?
A6: Incorporating plant-based proteins like chickpeas or lentils boosts fiber and keeps expenses low. Bulk up your pasta with chopped seasonal greens or frozen spinach for vitamins and minerals. Use whole wheat or legume-based pasta when possible for extra nutrients. Balancing simple sauces with fresh herbs and citrus zest adds brightness without extra cost or calories.
Q7: Can pasta recipes be made in large batches to save time and money?
A7: Definitely! Pasta dishes like baked ziti, pasta salads, or one-pot meals scale up wonderfully. Cooking in bulk saves energy and time, plus you’ll have ready-to-eat meals for busy days. Just be mindful to store sauces and pasta separately if you want leftovers to maintain their texture. Repurposing leftovers creatively into new dishes can also reduce waste and stretch your grocery budget further.
Embracing pasta as a budget-friendly staple doesn’t mean you have to sacrifice taste or creativity. With a splash of imagination and a handful of affordable ingredients,every meal can be a festivity of flavor and nourishment-without breaking the bank!
Future Outlook
Whether you’re a seasoned chef or a kitchen novice,these delicious and affordable pasta recipes prove that eating well doesn’t have to break the bank. With a little creativity and simple ingredients, you can whip up satisfying meals that delight the senses and stretch your budget. So next time hunger strikes, remember: great taste and savings go hand in hand-one tasty twirl at a time. ready, set, pasta!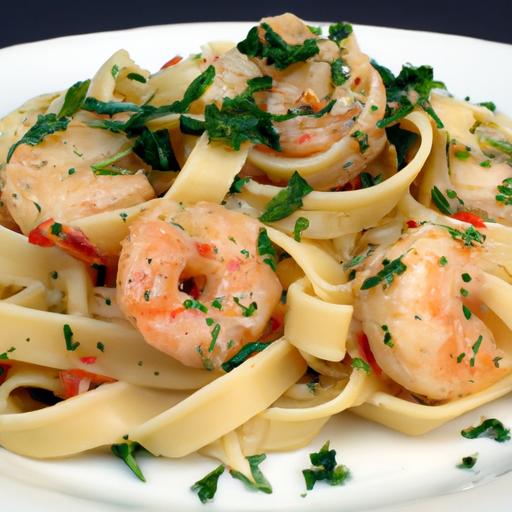
Spinach juice is a true nutritional powerhouse, packed with vitamins and minerals that energize your body and invigorate your senses. This vibrant green elixir, celebrated globally for its health benefits, transforms ordinary leafy greens into a refreshing drink that feels as good as it tastes. Drawing from my years as a Culinary Content Creator and Food Stylist, I’m excited to guide you through creative flavor blends and foolproof methods that bring out the best in every drop of this green goodness.
Prep and Cook Time
Prep Time: 10 minutes
Cook Time: 0 minutes (no cooking required)
Yield
Serves 2 (approximately 16 oz total)
Difficulty Level
Easy – beginner-friendly and fast to prepare
Ingredients
- 3 cups packed fresh spinach leaves, washed and roughly chopped
- 1 medium cucumber, peeled and sliced
- 1 green apple, cored and quartered
- 1/2 lemon, juiced
- 1-inch piece fresh ginger, peeled
- 1 cup cold filtered water
- 1 tbsp honey or pure maple syrup (optional, for natural sweetness)
- Ice cubes as needed
Instructions
- Prepare your ingredients: Start by thoroughly washing your spinach to remove any dirt or grit. Chop loosely for easier blending.
- Add ingredients to your blender: Combine the spinach, cucumber, green apple, fresh ginger, lemon juice, and cold water. The cucumber and apple add a naturally sweet, hydrating base that balances the earthiness of spinach.
- Blend until smooth: Pulse on high for about 1 minute, then blend continuously for 30 seconds or until perfectly smooth. If your blender struggles,add a splash more water.
- Strain your juice: For a silky finish, pour the mixture through a fine mesh sieve or nut milk bag into a bowl or large glass. Use a spatula to gently press out every last drop of vibrant liquid.
- Sweeten and chill: Stir in honey or maple syrup if desired,then fill glasses with ice cubes. Pour the juice over the ice for an instantly refreshing drink.
- Serve immediately: Spinach juice tastes best fresh but can be stored covered in the fridge for up to 24 hours.
Chef’s Tips for Elevating Your Spinach Juice
- Amplify nutrition: Add a tablespoon of chia seeds or flaxseeds post-blend for extra omega-3s and fiber, stirring well.
- Flavor twists: Try swapping lemon for lime or adding fresh mint leaves to brighten the profile.
- Texture variations: Blend in half an avocado for creamy richness – perfect for a morning boost.
- Keep it cold: Chilling your ingredients beforehand preserves vibrant color and fresh taste.
- Make it a smoothie: Add a scoop of plant-based protein powder for an energizing meal replacement.
- Quick storage: Use an airtight glass jar for storing your juice, which helps preserve nutrients longer.
Serving Suggestions
Present your spinach juice in tall, clear glasses to showcase its vibrant emerald hue. Garnish with a thin slice of cucumber on the rim or a sprig of fresh mint for a visually enticing touch. Pair it with light breakfast options like avocado toast or a toasted nut granola bowl to balance refreshments with substance. For an on-the-go refresh, pour into a reusable bottle, keeping it chilled until the perfect moment to sip.
| Nutrient | Amount per Serving |
|---|---|
| Calories | 85 kcal |
| Protein | 3 g |
| Carbohydrates | 18 g |
| Fat | 0.5 g |
| Vitamin A | 140% DV |
| Vitamin C | 45% DV |
| Iron | 15% DV |

Discover more refreshing juices like this in our Detox Juice Recipes collection, or learn about the science behind the benefits offered by spinach at Healthline.
Q&A
Q&A: Green Goodness – 7 Delicious Spinach Juice Recipes to Try
Q1: Why is spinach juice considered a “green goodness”?
A: Spinach juice is a powerhouse of nutrients, packed with vitamins A, C, K, iron, and antioxidants. Drinking it fresh helps your body absorb these nutrients quickly, boosting energy, improving digestion, and promoting glowing skin. It’s nature’s vibrant green elixir that fuels your day!
Q2: How can I make the perfect spinach juice at home?
A: Start with fresh, organic spinach to get the most nutrients. Wash the leaves thoroughly, then combine them with fruits and veggies like apples, cucumbers, or celery for a balanced flavor. Use a juicer or a high-speed blender (strain if desired) and serve immediately to enjoy maximum freshness.
Q3: What are some creative flavor pairings for spinach juice?
A: Spinach’s mild, slightly earthy taste blends beautifully with tart ingredients like lemon or grapefruit, sweet fruits like pineapple or mango, and cooling veggies such as cucumber or mint.Adding a hint of ginger or turmeric can give your juice a spicy, health-boosting kick!
Q4: Can spinach juice help with weight loss or detox?
A: Absolutely! Spinach juice is low in calories but high in fiber and antioxidants, making it an excellent choice for detoxifying your body and aiding weight loss. It supports digestion, reduces inflammation, and keeps you full longer without excess calories.
Q5: What’s a quick and tasty spinach juice recipe for beginners?
A: Try this simple combo: 2 cups fresh spinach, 1 green apple, 1/2 cucumber, a squeeze of lemon, and a small piece of ginger.Juice or blend, then enjoy a refreshing, nutrient-rich drink that’s packed with flavor and vitality.
Q6: How can I store spinach juice without losing its freshness?
A: Due to its delicate nutrients, spinach juice is best enjoyed fresh. If you must store it, keep it in an airtight container in the fridge for up to 24 hours. Adding a splash of lemon juice can help preserve its vibrant color and nutrients.
Q7: Are there any precautions when drinking spinach juice regularly?
A: While spinach juice is healthy, it contains oxalates which in large amounts might affect kidney health for some people. Moderation is key-enjoy your green goodness a few times a week and balance with other juices and balanced meals to keep things nutritious and safe.
Unlock the magic of greens with these spinach juice recipes-it’s not just a drink, it’s a celebration of health in every sip!
To Wrap It Up
As you embark on your green juice journey, these seven vibrant spinach recipes offer a delicious gateway to nature’s nourishing bounty. Each sip is more than a refreshing treat-it’s a celebration of health, energy, and the simple joy found in leafy goodness. Whether you’re a seasoned juicer or just starting to explore plant-powered drinks,let these blends inspire you to embrace spinach’s verdant vitality and unlock a world of flavors that’s as wholesome as it is indeed delightful. Here’s to your next green adventure-may it be as revitalizing as a garden in full bloom!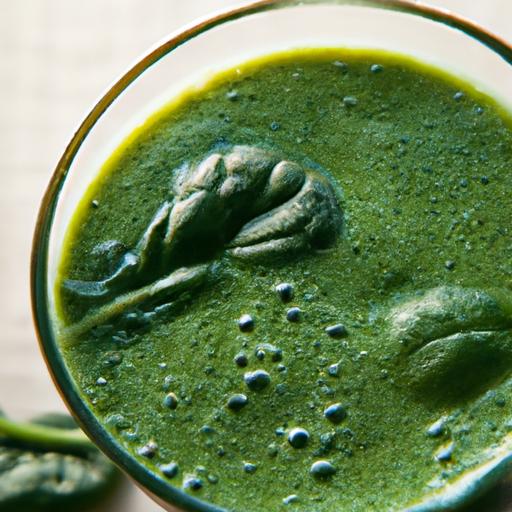
Budget-Friendly Bites: Delicious Cheap Vegetarian Meals to Try
Budget-Friendly Bites: Delicious Cheap Vegetarian Meals to Try are not only a lifesaver for busy weeks but also a party of vibrant flavors that don’t break the bank. Imagine a bubbling pot of wholesome ingredients melding together-the aroma alone invites you to the table. Drawing from pantry staples and fresh produce, this recipe transforms simple beans, grains, and spices into a comforting feast that feels nourishing and indulgent all at once.
Prep and Cook Time
Prep Time: 10 minutes
Cook time: 30 minutes
Total Time: 40 minutes
Yield
Serves 4 hearty portions
Difficulty Level
Easy
Ingredients
- 1 cup dried lentils, rinsed and picked over
- 1 can (14 oz) diced tomatoes, with juices
- 1 medium onion, finely chopped
- 3 cloves garlic, minced
- 1 medium carrot, diced
- 1 bell pepper, diced (any color)
- 1 tsp smoked paprika
- 1 tsp ground cumin
- 1/2 tsp chili flakes (optional for a kick)
- 2 cups vegetable broth
- 2 tbsp olive oil
- Salt and freshly ground black pepper, to taste
- Fresh cilantro or parsley for garnish
- Cooked rice or crusty bread for serving
Instructions
- Heat olive oil in a large pot over medium heat. Add the chopped onion and sauté untill translucent and fragrant, about 5 minutes, stirring frequently.
- Add the minced garlic, diced carrot, and bell pepper. Cook for another 5 minutes until the vegetables soften, stirring occasionally to prevent sticking.
- Sprinkle in the smoked paprika, ground cumin, and chili flakes. Stir well to toast the spices and release their aromatic oils-about 1 minute.
- Add the rinsed lentils and canned diced tomatoes with their juices. Mix thoroughly to combine all ingredients.
- Pour in the vegetable broth,stirring once. Bring the mixture to a gentle boil,then reduce heat to low.
- cover the pot and let simmer for 25-30 minutes until the lentils are tender and the liquid is mostly absorbed. Stir occasionally to prevent sticking and check seasoning halfway through.
- Season with salt and freshly ground black pepper to taste. If the dish feels too thick, add a splash of water or broth to loosen.
- Remove from heat and let it rest for 5 minutes before serving.
Chef’s Notes
- Variations: Swap lentils for chickpeas or black beans for a different texture and protein profile.
- make it creamier: Stir in a dollop of plain yogurt or coconut cream just before serving.
- Storing: this one-pot meal keeps well in the fridge for up to 3 days and freezes beautifully for up to 2 months.
- Boost flavor: Add a squeeze of fresh lemon juice at the end to brighten the dish.
- Spice level: Adjust chili flakes or add a dash of hot sauce based on your heat preference.
Serving Suggestions
Serve this colorful lentil and vegetable stew over a bed of steaming brown rice or alongside fresh-cut, crusty bread to soak up every bit of savory sauce. Garnish with vibrant sprigs of cilantro or parsley for a fresh, green contrast. For an added texture, sprinkle toasted pumpkin seeds or crushed nuts on top. Pair it with a simple green salad dressed lightly with lemon and olive oil for a complete,balanced meal that’s as affordable as it is satisfying.

| Nutrient | Per Serving |
|---|---|
| Calories | 320 kcal |
| Protein | 18 g |
| Carbohydrates | 45 g |
| Fat | 7 g |
Discover more ways to create delicious vegetarian meals on a budget by exploring our guide on Wholesome Vegetarian Meals on a Budget. For nutritional facts straight from trusted sources, visit Nutrition.gov.
Q&A
Q&A: Budget-Friendly Bites – Delicious Cheap Vegetarian Meals to Try
Q1: Why choose vegetarian meals when on a tight budget?
A: Vegetarian meals often center around plant-based ingredients like beans, grains, and veggies, which tend to be more affordable than meat. Plus, they’re nutrient-packed and versatile, making it easy to stretch your dollar without sacrificing flavor or nutrition.
Q2: What are some staple ingredients to keep on hand for budget-friendly vegetarian cooking?
A: Keep your pantry stocked with beans (black beans, chickpeas, lentils), rice or quinoa, canned tomatoes, frozen vegetables, potatoes, and whole grains. These are inexpensive,store well for ages,and can morph into countless mouthwatering meals.
Q3: Can eating vegetarian really save money?
A: absolutely! Meat and dairy often make up the bulk of grocery costs. By leaning into affordable plants, you reduce your bill and open up creative culinary possibilities like hearty stews, flavorful curries, and vibrant salads-without spawning a mountain of receipts.
Q4: What are some quick and tasty vegetarian meals that won’t break the bank?
A: Try a spicy chickpea curry with rice, comforting lentil soup, veggie stir-fry over noodles, or classic pasta with a rich tomato and basil sauce. All these dishes use budget-friendly ingredients and can be whipped up in 30 minutes or less.
Q5: How can I make vegetarian meals more satisfying without expensive extras?
A: Focus on layering flavors with affordable spices, herbs, garlic, and onions. Incorporate texture contrasts-crispy roasted veggies alongside creamy mashed potatoes, for example. And don’t skimp on protein-rich plant foods like beans and lentils; they’ll keep you feeling full and fueled.
Q6: Are there any tips for reducing food waste while cooking cheap vegetarian meals?
A: Absolutely! plan meals around overlapping ingredients, store extras properly (freeze leftover beans or veggies), and get creative with scraps-think vegetable stock from peelings or a quick stir-fry with wilting greens. Less waste means more savings.Q7: How can someone new to vegetarian cooking get started without feeling overwhelmed?
A: Start simple. Pick a few easy recipes and experiment with familiar ingredients. Use online resources or veggie meal planners to guide you. Over time, you’ll build confidence-and a repertoire of delicious, wallet-friendly meals that you love.
Q8: What’s the most vital mindset shift for embracing cheap vegetarian eats?
A: Embrace creativity and adaptability. Budget-friendly vegetarian cooking isn’t about strict limitations; it’s about unlocking the potential of humble ingredients and transforming them into satisfying, wholesome meals-with a splash of love and inventiveness!
Key Takeaways
As you embark on your culinary journey through budget-friendly bites, remember that eating well doesn’t have to mean spending a fortune. These delicious,cheap vegetarian meals prove that wholesome ingredients and vibrant flavors can come together without breaking the bank. Whether you’re a seasoned veggie lover or simply looking to stretch your grocery budget, these recipes offer a tasty testament to creativity in the kitchen. so, grab your apron, explore these affordable dishes, and savor the satisfying blend of nutrition, flavor, and frugality-because great meals don’t have to cost a lot to make a big impact on your plate and your wallet.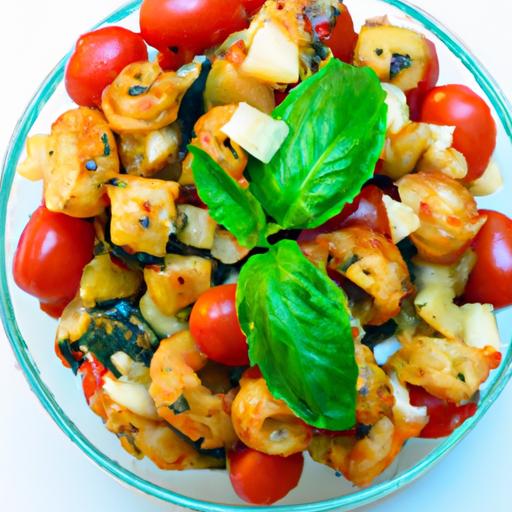
Delicious Gluten-Free Vegan banana Oat Chocolate Chip Muffins
delicious Gluten-Free Vegan Banana Oat Chocolate Chip muffins are a delightful treat that perfectly marries wholesome ingredients with irresistible flavors. Inspired by my journey to craft a snack that’s both nourishing and indulgent, these muffins celebrate the natural sweetness of ripe bananas combined with the hearty texture of gluten-free oats.Each bite offers a symphony of soft, fluffy crumb dotted with melty vegan chocolate chips-making them an ideal companion for breakfast, an afternoon pick-me-up, or a guilt-free dessert.
Prep and Cook Time
- Preparation: 15 minutes
- Baking: 22-25 minutes
- Total time: 40 minutes
Yield
Makes 12 generously sized muffins
Difficulty Level
Easy – perfect for beginner and seasoned bakers alike
Ingredients
- 2 large ripe bananas,mashed (about 1 cup)
- 1 ½ cups gluten-free rolled oats,blitzed into flour
- ½ cup almond flour (for extra moisture and tenderness)
- ¼ cup organic coconut sugar (natural sweetness,adjustable)
- 1 tsp baking powder (gluten-free)
- ½ tsp baking soda
- ½ tsp ground cinnamon (optional,adding warmth)
- ¼ tsp sea salt
- ⅓ cup unsweetened almond milk (or any plant-based milk)
- 2 tbsp melted coconut oil
- 1 tsp vanilla extract
- ¾ cup high-quality vegan chocolate chips (see note below)
Instructions
- Preheat your oven to 350°F (175°C) and line a 12-cup muffin tray with paper liners or grease with coconut oil.
- place the gluten-free rolled oats in a blender or food processor and pulse until they form a fine oat flour.
- In a large bowl, whisk together the oat flour, almond flour, coconut sugar, baking powder, baking soda, cinnamon, and sea salt until evenly combined.
- in a separate bowl, mash the ripe bananas until smooth, then stir in the almond milk, melted coconut oil, and vanilla extract.
- Pour the wet ingredients into the dry ingredients and gently fold them together until just combined-avoid overmixing to maintain a tender crumb.
- Fold in the vegan chocolate chips, reserving a few to sprinkle on top for a stunning finish.
- Divide the batter evenly among the muffin cups, filling each about three-quarters full.
- Sprinkle the reserved chocolate chips on top of each muffin for a tempting visual and extra melty pockets.
- Bake for 22-25 minutes, or until a toothpick inserted into the center comes out clean with just a few moist crumbs attached.
- Allow the muffins to cool in the pan for 10 minutes, then transfer to a wire rack to cool completely. This prevents sogginess and keeps the texture perfect.
Tips for Baking Moist and Fluffy Muffins Every Time
- Use very ripe bananas (with plenty of brown spots) to naturally enhance sweetness and moisture without added sugar.
- Blending the oats into flour ensures a consistent texture and prevents dense patches.
- Do not overmix the batter; stir until ingredients are just combined for loftier muffins.
- Adding almond flour increases tenderness, balancing the heartiness of oats.
- Try warming your almond milk slightly to activate the baking soda and powder better, providing extra rise.
Crafting the Perfect Texture with Gluten-Free Oats and Ripe bananas
Combining gluten-free oats with ripe bananas creates a unique texture that’s both sturdy and soft.Oats bring a subtle chewiness and hearty bite, while bananas infuse every crumb with natural moisture, ensuring the muffins stay fresh and juicy even days after baking. If you want to further enhance texture,sprinkle a handful of chopped walnuts or Pecans into the batter for a delightful crunch or swap almond flour with oat bran for extra fiber.
Balancing Sweetness Naturally for a Healthier Muffin Experience
These muffins rely on the natural sweetness of ripe bananas and a touch of coconut sugar, a less refined sweetener with a lower glycemic index then white sugar. this approach maintains flavor without overwhelming added sugars, perfect for those mindful of healthier choices. Feel free to adjust the sweetness by swapping coconut sugar for maple syrup or agave nectar-just reduce other liquid accordingly to keep batter consistency.
Choosing the Best Vegan Chocolate Chips for Ultimate Indulgence
The choice of vegan chocolate chips makes a difference in every bite of your muffin. Opt for ethical, high-cocoa content vegan chips for deep richness and smooth melting. Brands free from dairy and palm oil offer the best guilt-free indulgence, with hints of dark chocolate cutting through the sweetness perfectly. You can also experiment with adding cocoa nibs or chopped dairy-free dark chocolate chunks for texture and intensity.
Chef’s Notes
- To make these muffins nut-free,substitute almond flour with an additional ¼ cup oat flour or gluten-free all-purpose flour.
- Make-ahead tip: Store cooled muffins in an airtight container and refrigerate for up to 5 days or freeze individually wrapped for up to 3 months.
- For a more decadent twist, fold in 2 tablespoons of dairy-free peanut butter into the batter before baking.
- Swap coconut oil for melted vegan butter to introduce a subtle buttery flavor.
Serving Suggestions
For a picture-perfect presentation, serve these muffins with a dusting of powdered coconut sugar or a light drizzle of vegan chocolate sauce. They pair beautifully with a hot cup of vanilla almond milk latte or a fresh herbal tea. Garnish with a small slice of banana and a few chocolate chips on the side for a charming touch that invites indulgence.

| Nutrient | Per muffin |
|---|---|
| Calories | 180 kcal |
| protein | 3 g |
| Carbohydrates | 30 g |
| Fat | 6 g |
| Fiber | 4 g |
Ready to explore more wholesome baking? Try our Gluten-Free Vegan Blueberry Muffins recipe for another fruity favorite.
Q&A
Q&A: All About Delicious Gluten-Free Vegan Banana Oat Chocolate Chip Muffins
Q1: What makes these banana oat chocolate chip muffins both gluten-free and vegan?
A1: These muffins swap out conventional wheat flour for nutrient-packed oats, naturally gluten-free when certified, and ditch eggs and dairy in favor of plant-based ingredients like mashed bananas and plant milk. this combination ensures everyone-from celiacs to vegans-can enjoy a moist, flavorful treat without worries.
Q2: How do bananas contribute to the texture and taste of these muffins?
A2: Bananas are the unsung heroes here! They add natural sweetness,moisture,and that tender crumb everyone loves in a muffin. Plus, they act as a natural binder, helping ingredients meld together smoothly without the need for eggs.
Q3: Can I use regular chocolate chips rather of vegan ones?
A3: While regular chocolate chips will work, vegan chocolate chips keep this recipe 100% plant-based. They’re free from dairy and sometimes expensive emulsifiers too. For a small splurge, you get creamy, dairy-free bursts of chocolate that keep the muffins aligned with vegan values.
Q4: How do I ensure my oats are truly gluten-free?
A4: Oats themselves don’t contain gluten, but cross-contamination is common during processing. Look for oats labeled “gluten-free” on the package.This certification means they’ve been processed in gluten-free facilities-safe for those with gluten sensitivities.
Q5: Can these muffins be frozen for later?
A5: Absolutely! After baking, let the muffins cool completely, then store them in an airtight container or freezer bag. Pop them in the freezer for up to three months.When ready to enjoy, thaw at room temperature or warm gently in the oven for that fresh-baked magic.
Q6: What’s the secret to getting the perfect rise without eggs?
A6: Baking soda and apple cider vinegar team up in this recipe, creating a bubbly reaction that gives your muffins a fluffy lift.Combined with the moisture from bananas and plant milk, this natural combo ensures tender, airy muffins every time.
Q7: Can I tweak the recipe for added nutrition?
A7: Definitely! Toss in a handful of chopped nuts for crunch, sprinkle chia or flax seeds for omega-3s, or add a dash of cinnamon for warmth. Each addition can elevate both flavor and nutrition-making these muffins a powerhouse snack!
Q8: Are these muffins suitable for kids?
A8: Kids love them! Sweet,chocolaty bites packed with wholesome ingredients make these muffins a perfect lunchbox treat or after-school snack. Plus, knowing they’re free from gluten and animal products gives parents peace of mind.
Q9: How do these muffins compare nutritionally to traditional muffins?
A9: Swapping refined flour and butter for oats and bananas boosts fiber content and reduces unhealthy fats. The natural sweetness means less added sugar, and with plant-based ingredients, these muffins are easier to digest and great for anyone looking for a wholesome, guilt-free indulgence.
Q10: What’s the best way to enjoy these muffins?
A10: Wonderfully versatile! Have them warm for breakfast with a smear of almond butter, pack them for a midday energy boost, or serve them alongside a cup of tea for a cozy afternoon treat.No matter when, these muffins never disappoint!
The Conclusion
Whether you’re navigating dietary restrictions or simply seeking a wholesome treat, these Delicious Gluten-Free Vegan Banana Oat Chocolate Chip Muffins prove that indulgence and nutrition can coexist beautifully. With the natural sweetness of ripe bananas, the hearty goodness of oats, and just the right touch of chocolate, each muffin offers a perfect bite of comfort and energy. easy to whip up and satisfying to eat, they’re an ideal addition to your breakfast table, snack stash, or anytime craving. So go ahead-bake a batch, share with loved ones, and savor the delightful harmony of flavors that make healthy living both simple and scrumptious.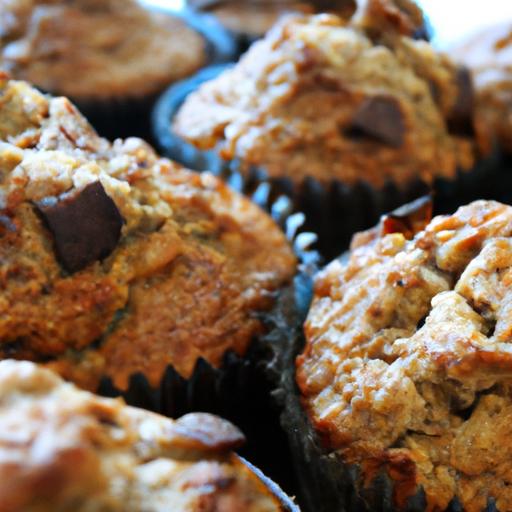
Zero Carb Wonders: Delicious Recipes Without the carbs unlock a whole new culinary playground where rich flavors and satisfying textures reign supreme. Embracing a zero-carb lifestyle doesn’t mean sacrificing taste or creativity.Instead, it invites adventurous cooking with nutrient-dense, wholesome ingredients that nourish your body and excite your palate.By mastering essential ingredients and innovative techniques, you can craft meals that quell every craving – from breakfast’s comforting sizzle to dinner’s hearty indulgence.
Prep and Cook Time
Prep Time: 15 minutes
cook time: 20 minutes
Total Time: 35 minutes
yield
Serves 4 generous portions
Difficulty Level
Easy to Medium – perfect for home cooks looking to elevate their zero-carb repertoire.
Essential Ingredients for Carb-Free Culinary Excellence
- Fresh,high-quality proteins: Grass-fed beef,free-range chicken,wild-caught fish,and pasture-raised eggs create the foundation of flavor and nutrition.
- Healthy fats: Avocado oil, coconut oil, ghee, and butter help build richness while keeping meals satisfying.
- Low-carb vegetables: Leafy greens, zucchini, cauliflower, and mushrooms impart texture, color, and micronutrients.
- Natural seasoning: Himalayan pink salt, black pepper, fresh herbs (rosemary, thyme, parsley), and spices (paprika, cumin, chili flakes) elevate each bite.
- Flavor boosters: fermented foods, bone broth, and umami-rich condiments like anchovy paste or nutritional yeast provide depth without carbs.
Innovative Cooking Techniques to Elevate Every Bite
Exploring cooking methods such as searing, sous vide, roasting, and smoking unlocks layers of flavor and irresistible textures. As an example, sous vide ensures perfectly tender proteins, while swift pan-searing caramelizes the exterior for a stunning crust and juicy interior. Creative uses of spiralizers and dehydrators bring fresh vegetables new form, replacing traditional carb-heavy sides. Incorporating infused fats like herb or chili oils adds an aromatic punch that lingers deliciously on the tongue.
Top Zero Carb Recipes Perfect for Breakfast, Lunch, and Dinner
Breakfast: Start your day with a Zero Carb Wonders: Delicious Recipes Without the Carbs favorite – zucchini “hash browns” with crispy bacon and soft-scrambled pasture-raised eggs, seasoned with fresh chives.
Lunch: Indulge in a seared salmon salad featuring baby kale, avocado slices, and a drizzle of lemon-garlic vinaigrette made with avocado oil and fresh herbs.
Dinner: Savor a slow-roasted herb butter chicken served alongside garlicky sautéed mushrooms and creamy cauliflower mash, proving carb-free doesn’t mean flavor-free.
Recipe: Herb Butter Roasted Chicken with Creamy Cauliflower Mash
Ingredients
- 1 whole free-range chicken (about 3 to 4 lbs), cleaned and patted dry
- 4 tbsp grass-fed butter, softened
- 2 cloves garlic, minced
- 1 tbsp fresh rosemary, finely chopped
- 1 tbsp fresh thyme, finely chopped
- Salt and freshly cracked black pepper, to taste
- 1 medium head cauliflower, chopped into florets
- ¼ cup heavy cream
- 2 tbsp ghee
- 1 tbsp fresh parsley, chopped (for garnish)
Instructions
- Preheat oven to 425°F (220°C). In a small bowl, combine the softened butter, minced garlic, chopped rosemary, and thyme.
- Gently loosen the chicken skin around the breasts and thighs with your fingers. Spread the herb butter mixture evenly under the skin and all over the chicken’s exterior.
- Season the chicken liberally with salt and black pepper. Place it breast-side up on a roasting rack inside a baking pan.
- Roast for about 1 hour and 15 minutes or until the internal temperature reaches 165°F (74°C). Baste every 20 minutes with pan juices for buttery,moist results.
- While the chicken roasts, steam cauliflower florets until tender, about 10 minutes.
- Transfer cauliflower to a food processor. Add heavy cream and ghee. Blend until smooth and creamy. Season with salt and pepper.
- Remove chicken from oven and let rest 10 minutes before carving. Serve alongside cauliflower mash, sprinkle fresh parsley over both for a vibrant finish.
Chef’s Notes
- For a smoky twist, add a teaspoon of smoked paprika to the herb butter mixture.
- Substitute heavy cream with coconut cream for a dairy-free version without compromising creaminess.
- Make the cauliflower mash ahead, reheat gently on low with a splash of cream or broth to maintain silkiness.
- Use leftover chicken juices as a flavorful base for a zero-carb pan sauce by deglazing with bone broth and simmering until reduced.
Serving Suggestions
This dish shines when served with crisp roasted asparagus or a simple arugula salad tossed with lemon and olive oil. Garnish with additional fresh herbs and a lemon wedge to brighten the whole plate. A glass of dry white wine or sparkling mineral water with a rosemary sprig creates an elegant pairing without adding carbs.

| Nutrient | per Serving |
|---|---|
| Calories | 420 kcal |
| Protein | 48 g |
| Carbohydrates | 2 g |
| Fat | 24 g |
Explore more zero carb recipes on our site and expand your culinary horizons. For expert nutritional guidance on carbohydrate reduction, visit the American Diabetes Association.
Q&A
Q&A: Zero Carb Wonders – Delicious Recipes Without the Carbs
Q1: What exactly does “zero carb” mean in the context of these recipes?
A: Zero carb means the recipes are designed to have virtually no carbohydrates-think 0g or so close it won’t impact your carb count. These dishes focus on proteins and fats, steering clear of sugars, starches, and fiber-rich ingredients. The goal? delicious meals that won’t spike your blood sugar or kick you out of ketosis if you’re on a ketogenic diet.
Q2: Why should someone consider zero carb recipes?
A: Peopel turn to zero carb for a variety of reasons-weight loss, blood sugar management, mental clarity, or simply to cut back on carbs for overall health. Zero carb diets can reduce cravings, stabilize energy levels, and often promote fat burning, all while letting you enjoy flavorful, satisfying meals.
Q3: Can zero carb meals really be delicious and satisfying?
A: Absolutely! Think beyond the bland “just meat” stereotype. With creative seasoning, herbs, and cooking techniques, zero carb dishes can be bursting with flavor. Imagine juicy ribeye steaks, crispy pork belly, creamy egg-based dishes, or rich seafood medleys-with sauces and sides that add depth without the carbs.
Q4: What are some common ingredients used in zero carb recipes?
A: The building blocks are meats like beef, pork, chicken, and lamb; seafood including fish and shellfish; eggs; and fats like butter, ghee, olive oil, and animal fats. For seasoning, salt, pepper, garlic powder, herbs (think rosemary, thyme), and spices (paprika, cumin) bring the magic without carbs.
Q5: How do zero carb recipes deal with texture and variety without vegetables or grains?
A: Texture comes from careful cooking techniques-crisping, roasting, slow braising, or searing. Variety comes from exploring different cuts of meat, organ meats, incorporating bone broths, and using eggs and cheeses (if tolerated). Some recipes cleverly use permitted spices and fats to create layers of flavor and mouthfeel.
Q6: Are zero carb recipes suitable for everyone?
A: While many thrive on zero carb diets, it’s important to listen to your body and consult with a healthcare provider especially if you have underlying health conditions. Zero carb can be very effective, but it’s not a one-size-fits-all approach. Some people may prefer low-carb or moderate-carb alternatives for long-term sustainability.
Q7: What’s a simple zero carb recipe a beginner can try?
A: Start with a classic: Pan-seared ribeye steak with herb butter. Season the steak with salt and pepper, sear it in hot butter until beautifully browned, than top with a dollop of butter mixed with fresh herbs like parsley and thyme. Pair with a side of boiled eggs or crispy pork rinds for some crunch!
Q8: How can zero carb recipes fit into a busy lifestyle?
A: Zero carb meals can be surprisingly quick and easy. Bulk cooking roasted meats, slow cooker stews, or making breakfast egg muffins with bacon means you have ready-to-go meals. Many zero carb staples keep well in the fridge or freezer, perfect for weekday lunches or dinners on the run.
Whether you’re a carb-conqueror or just curious, zero carb wonders prove you don’t need bread or pasta to enjoy sumptuous, satisfying food. Dive in, experiment with flavors, and discover a new world of delicious simplicity!
The Conclusion
As we wrap up our journey through the world of zero-carb wonders, it’s clear that cutting out carbs doesn’t mean sacrificing flavor or satisfaction. From savory mains to decadent desserts,these recipes prove that the culinary possibilities are as vast as they are delicious-inviting you to savor every bite without a pinch of guilt. So whether you’re embracing a low-carb lifestyle or simply looking to shake up your meal routine, these dishes are your ticket to flavorful freedom. Dive in,experiment boldly,and discover just how delightful a no-carb kitchen can be. Your taste buds-and your body-will thank you.
Choosing the Perfect Ingredients for Authentic pastelitos
Delicious Pastelitos Recipe begins with selecting the freshest, highest-quality ingredients that make all the difference between an ordinary pastry and a truly authentic, flavorful delight. Opt for all-purpose flour that is finely sifted to ensure a tender dough, and seek out unsalted butter or, even better, a combination of butter and vegetable shortening for that signature flaky texture. When it comes to fillings, freshness is key-whether you’re using ripe fruits, seasoned meats, or rich cheeses, fresh ingredients will elevate your pastelitos to an irresistible level.
Don’t shy away from exploring your local markets for aromatic spices and herbs like cumin, oregano, or fresh cilantro that can add a depth of flavour to savory fillings. For sweet pastelitos, quality fruit preserves or freshly diced fruits with a touch of cinnamon or vanilla will create a harmonious balance of sweetness and texture.
Mastering the Art of Dough Readiness for flaky, Crispy Layers
To achieve perfectly flaky layers in your pastelitos, the dough preparation is a critical step. Start by chilling your butter and shortening before cutting them into the flour; this keeps pieces solid and creates those signature puffed, delicate layers as the dough bakes. Use cold water sparingly to bring the dough together-too much moisture can make the pastry tough.
Work quickly as you fold and laminate the dough,rolling gently but with deliberate folds to build layers. Resting the dough in the refrigerator, wrapped in plastic, for at least 30 minutes allows the gluten to relax and prevents shrinkage during baking. Once rolled out, use a sharp knife or pastry cutter to create clean edges for perfect pastelito shapes that crisp beautifully in the oven.
Exploring Irresistible Filling Combinations to Satisfy Every Palate
One of the joys of this Delicious Pastelitos Recipe is the versatility of fillings. For savory options, try a mixture of ground beef sautéed with onions, garlic, and a pinch of smoked paprika, or opt for a creamy blend of cheese and sautéed spinach for a vegetarian twist. Sweet pastelitos delight the palate with luscious guava paste paired with cream cheese, or a cinnamon-spiced apple filling bursting with natural juice and texture.
Don’t limit yourself-experiment with combinations like pumpkin and nutmeg, or even spicy chicken with fresh herbs. The key is to balance moisture content and seasoning so the pastry holds up well without becoming soggy.
Pro Tips for Baking and Serving pastelitos Like a pro
Baking pastelitos to golden perfection requires precision. Always preheat your oven to a high temperature-around 400°F (200°C)-to activate the rising steam within the dough layers, resulting in irresistibly crispy, flaky pastry. Use a parchment-lined baking sheet for even heat distribution and easy cleanup.
To achieve a shiny, golden crust, brush each pastry gently with an egg wash just before baking. Keep an eye on the baking time; 15-20 minutes is usually sufficient, but ovens vary. Rotate the tray halfway through baking to encourage even browning.
Once baked, allow pastelitos to rest for a few minutes on a wire rack to retain their crispness. Serve warm, garnished with fresh herbs for savory versions or a dusting of powdered sugar for sweet ones. Accompany them with dipping sauces such as a zesty chimichurri, a creamy queso dip, or a simple honey drizzle for an elevated experience.
prep and Cook Time
- Prep Time: 30 minutes
- Cook Time: 20 minutes
- Total Time: 50 minutes
Yield
- Serves 8 pastelitos
Difficulty Level
- Medium
Ingredients
- 2 cups all-purpose flour, sifted
- 1/2 cup unsalted butter, cold and cubed
- 1/4 cup vegetable shortening, cold
- 1/2 tsp salt
- 1/2 cup ice-cold water
- 1 large egg for egg wash
- Filling of your choice:
- 1 cup ground beef, cooked and seasoned
- or 1 cup guava paste and 1/2 cup cream cheese
Instructions
- Prepare the dough: In a large bowl, combine sifted flour and salt. cut in chilled butter and shortening using a pastry cutter until mixture resembles coarse crumbs with pea-sized pieces.
- Add cold water: Gradually pour ice-cold water, mixing gently with a fork until the dough just comes together. Do not overwork.
- Chill the dough: Form the dough into a disc, wrap in plastic wrap, and refrigerate for 30 minutes to relax the gluten.
- Roll and fold: On a lightly floured surface, roll dough into a rectangle approximately 12×8 inches. Fold into thirds like a letter.rotate the dough, roll again, and repeat the fold twice more to create layers. Chill again for 15 minutes.
- Preheat oven: Heat your oven to 400°F (200°C). Line a baking sheet with parchment paper.
- Shape pastelitos: Roll the dough to about 1/8 inch thick. Cut into rectangles or squares. Place about 1 tablespoon of filling on one half of each piece. Fold over and seal edges firmly with a fork.
- Egg wash: Beat the egg and brush the top of each pastelito lightly for a glossy finish.
- Bake: transfer pastelitos to the baking sheet and bake for 15-20 minutes, until puffed and golden brown. Rotate halfway through for even browning.
- Cool and serve: Remove from oven and place on a wire rack to cool slightly. Serve warm for best flavor and texture.
Chef’s Notes
- For flakier dough: Keep all ingredients cold and avoid over-kneading to prevent toughness.
- Filling tips: Drain excess liquid from fruits or cooked meats to avoid soggy pastelitos.
- Make ahead: Dough can be prepared and chilled up to 24 hours in advance.
- substitutions: Butter can be replaced with all-shortening or half butter, half lard for a traditional touch.
Serving Suggestions
Present these pastelitos on a vibrant platter garnished with fresh cilantro or parsley for savory versions. Accompany with dipping sauces such as a smoky chipotle mayo or a classic garlic aioli. Sweet pastelitos shine with a dusting of powdered sugar and a side of fresh berries or a drizzle of honey. Pair your creation with a bright,refreshing beverage-consider a sparkling lemonade or a robust coffee to complement the rich layers.
| Nutritional Information (per serving) | Calories | Protein | Carbs | Fat |
|---|---|---|---|---|
| Pastelito with Ground Beef Filling | 280 kcal | 12 g | 28 g | 14 g |
| Pastelito with Guava & Cream Cheese | 260 kcal | 6 g | 32 g | 10 g |

want to deepen your pastry skills? Check out our Ultimate Flaky Pastry Dough guide for expert techniques.For more on authentic pastry crafting, visit Serious Eats, a trusted culinary resource.
Q&A
Q&A: Delicious Pastelitos Recipe – A Flavorful Pastry Guide
Q1: What exactly are pastelitos?
A1: Pastelitos are flaky, buttery pastries originating from Latin America and the Caribbean. thay’re typically filled with a sweet or savory mixture, ranging from guava and cream cheese to seasoned meats and cheeses. Think of them as little pockets of joy, bursting with flavor in every bite!
Q2: What makes pastelitos different from other pastries?
A2: Unlike many pastries that rely on a single flavor profile, pastelitos offer a delightful contrast-crispy, golden layers surrounding rich, frequently enough vibrant fillings. Their versatility allows them to shine as either a breakfast treat, snack, or even a party appetizer, bridging cultures and cuisines effortlessly.
Q3: What are the essential ingredients for making pastelitos?
A3: At the heart, pastelitos need good quality puff pastry dough, which gives that signature flaky texture. For the filling, common choices include guava paste with cream cheese for a sweet twist or spiced ground beef or chicken for savory lovers. fresh spices, a touch of sugar or salt depending on the filling, and an egg wash for that golden finish complete the list.
Q4: Can I use store-bought puff pastry for convenience?
A4: Absolutely! Store-bought puff pastry is a fantastic shortcut that still yields delicious results. Just be sure to thaw it properly and handle it gently to maintain those delicate layers. For purists or adventurous bakers, making puff pastry from scratch can be a rewarding challenge, but convenience never compromises flavor.
Q5: How do you prevent pastelitos from becoming soggy?
A5: The trick lies in ensuring the filling isn’t too wet. For fruit fillings, reduce excess juices by cooking them down a bit before filling the dough. For savory options, drain any liquids thoroughly. Also, brushing the pastry edges with egg wash and sealing tightly prevents leaks, keeping the layers crisp and perfect.
Q6: What’s the best way to bake pastelitos to achieve that golden, flaky crust?
A6: Bake them in a preheated oven at around 375°F (190°C) until they puff up and turn a rich golden brown-usually about 20-25 minutes. Applying an egg wash before baking gives them that irresistible sheen and helps with browning. For even baking, place them on a parchment-lined tray and avoid overcrowding.
Q7: Are pastelitos best enjoyed fresh, or can I reheat leftovers?
A7: Pastelitos are undoubtedly best fresh and warm, with that perfect crunch and melting filling. However, leftovers can be reheated in a toaster oven or conventional oven to revive the crispiness. Avoid microwaving if possible, as it tends to make the pastry soggy.
Q8: Can pastelitos be frozen for later?
A8: Yes! Assemble your pastelitos but don’t bake them.Freeze them on a tray until firm, then transfer to a sealed container or bag. When ready to enjoy, bake them straight from frozen-just add a few extra minutes to the baking time. This is a great way to have a fast,delicious snack on hand.
Q9: What creative filling combinations can I try beyond the classic options?
A9: The sky’s the limit! Try spinach and feta for a Mediterranean flair, sweet potato and cinnamon for a cozy twist, or even a spicy black bean and cheese combo for a vegetarian delight. Mixing sweet and savory within one pastelito also makes for a surprising and delightful culinary adventure.
Q10: Any tips for serving pastelitos at gatherings or parties?
A10: Serve pastelitos warm alongside a variety of dips like guava sauce, spicy salsa, or creamy aioli to elevate the experience. Pair them with fresh fruit or a crisp salad to balance richness. Their handheld size makes them perfect finger food-just warn guests to bring napkins as they can get deliciously messy!
With this flavorful pastry guide, you’re now equipped to master pastelitos that dazzle the eyes and delight the palate. Happy baking and buen provecho!
Insights and Conclusions
As you’ve discovered, pastelitos are more than just delightful pastries-they’re edible stories filled with rich flavors and vibrant culture. whether you prefer a savory bite or a sweet treat, mastering this recipe opens the door to endless variations and culinary adventures. So, roll up your sleeves, embrace the flaky dough, and let your kitchen become a haven where tradition meets taste. With each pastelito you create, you’re not just baking-you’re crafting a flavorful experience that brings people together, one delicious pastry at a time.
savor the Sea: Delicious Budget-Friendly Seafood Recipes invite you to discover a world of affordable, nutritious, and versatile seafood staples that fit perfectly in every pantry. Whether fresh or frozen,seafood can be transformed using creative cooking techniques and bold,flavor-packed sauces,making each bite a festivity without breaking the bank.
Prep and Cook Time
Prep Time: 15 minutes
Cook Time: 20 minutes
Total Time: 35 minutes
Yield
Serves 4 generous portions
Difficulty Level
Easy to Medium – Perfect for home cooks ready to elevate simple fish dishes
Ingredients
- 1 lb white fish fillets (such as tilapia, pollock, or cod), thawed if frozen
- 2 tablespoons olive oil
- 1/2 cup all-purpose flour, sifted
- 1 teaspoon smoked paprika
- 1 teaspoon garlic powder
- Salt and freshly ground black pepper, to taste
- 2 cloves garlic, minced
- 1 lemon, juiced and zested
- 1/4 cup low-sodium soy sauce
- 1 tablespoon honey
- 1 teaspoon grated fresh ginger
- Fresh parsley or cilantro, chopped for garnish
- Optional: red pepper flakes for a subtle kick
Instructions
- Prepare the dredge: In a shallow bowl, whisk together the all-purpose flour, smoked paprika, garlic powder, salt, and pepper. This flavorful coating will create a crispy crust and seal in moisture.
- coat the fish: Pat your white fish fillets dry with paper towels.Lightly dredge each piece in the seasoned flour, shaking off any excess to avoid clumping.
- Make the sauce: In a small bowl,combine the minced garlic,lemon juice and zest,soy sauce,honey,and grated ginger. Whisk thoroughly until the honey dissolves into a bright, aromatic glaze.
- Cook the fish: Heat the olive oil in a large non-stick skillet over medium heat. Gently place the coated fillets in the pan and sauté until golden brown on both sides, about 4-5 minutes per side depending on thickness. Tip: Avoid overcrowding the pan to ensure an even crust and prevent steaming.
- Glaze and finish: Once both sides are beautifully crisp, reduce the heat to low and spoon the sauce over the fish fillets.Allow the sauce to simmer gently, glazing the fish until glossy and slightly thickened, about 2 minutes.
- plate and garnish: Carefully transfer the fillets to a serving platter.Drizzle any remaining sauce from the pan over the top and sprinkle with fresh parsley or cilantro. Add a pinch of red pepper flakes if desired for extra depth.
Tips for Success
- Choose your fish wisely: Affordable white fish like tilapia, pollock, or cod are pantry-friendly staples and absorb marinades beautifully.
- for a gluten-free option: substitute all-purpose flour with rice flour or chickpea flour without compromising crispness.
- Make ahead: The sauce can be prepared 24 hours in advance and refrigerated to intensify flavors.
- Control moisture: Ensure fish fillets are fully patted dry to achieve a crisp outer layer and avoid sogginess.
- Frozen seafood tips: Thaw fish slowly overnight in the refrigerator to maintain texture and freshness.
Serving Suggestions
Serve your elegantly simple fish alongside fluffy jasmine rice or buttery mashed potatoes for a comforting meal. Add a crisp green salad dressed with a lemon vinaigrette to echo the citrus notes in the sauce. Garnish plates with thin lemon wedges and fresh herbs to brighten both the visual and flavor experience. A crusty artisan bread makes a perfect companion to mop up the luscious sauce.
| Nutrient | Per Serving |
|---|---|
| Calories | 280 kcal |
| protein | 32 g |
| Carbohydrates | 12 g |
| Fat | 8 g |
for more creative ideas on budget-friendly seafood dishes, visit our Easy seafood Recipes collection. To learn about sustainable seafood shopping and smart budgeting, check out the comprehensive guide at Seafood Watch.

Q&A
Q&A: Savor the Sea – Delicious Budget-Friendly Seafood Recipes
Q1: Why choose seafood for budget-friendly meals?
A: Seafood often gets a reputation for being pricey, but there are plenty of affordable options like canned tuna, sardines, mackerel, and even certain fresh catches depending on your region. These options provide rich flavors and nutrients without sinking your budget-plus, seafood’s versatility means you can whip up everything from hearty stews to simple salads.
Q2: What are some cost-effective seafood ingredients to keep on hand?
A: Canned seafood (tuna, salmon, anchovies, sardines), frozen shrimp, mussels when in season, and tilapia or pollock fillets are wallet-friendly staples. These ingredients store well and can be transformed into quick meals packed with flavor.
Q3: How can I infuse inexpensive seafood dishes with bold flavors?
A: Use fresh herbs, citrus zest, garlic, smoked paprika, chili flakes, or a splash of vinegar to elevate simple seafood. Marinades with soy sauce or a squeeze of fresh lemon can turn humble ingredients into taste sensations without stretching your budget.
Q4: What are some easy seafood dishes suitable for beginners?
A: Try a quick shrimp stir-fry with frozen veggies and rice,a tuna pasta tossed with olive oil and capers,or a hearty fish chowder made with inexpensive white fish and potatoes. These recipes are approachable,flavorful,and won’t require a culinary degree to prepare.
Q5: How can I ensure my seafood remains fresh and safe on a budget?
A: Buy from trusted sources, check for firm texture and fresh smell, and store seafood in the coldest part of your fridge or freezer promptly. Using frozen options can reduce spoilage and waste, making your seafood meals both safer and more economical.
Q6: Can I eat seafood often without breaking the bank?
A: Absolutely! Incorporate seafood into your weekly meal rotation by mixing affordable canned or frozen options with fresh varieties when on sale. Balancing seafood with grains, legumes, and vegetables creates satisfying, nutritious meals that keep costs low.
Q7: What’s a creative way to repurpose leftover seafood?
A: Transform leftovers into sandwiches, fish cakes, or seafood salad wraps. For example, flake leftover fish into a spicy taco filling or mix canned tuna with herbs and breadcrumbs to make patties. These ideas reduce waste and multiply your meals creatively.
Q8: Where can I find budget-friendly seafood recipes?
A: Check blogs dedicated to frugal cooking, watch cooking channels with creative affordable meals, and explore cookbooks focused on simple seafood dishes. Local community forums or farmers’ markets can also be treasure troves of inspiration and discounts.
Have fun diving into the world of seafood without the splurge! With a little creativity, you can savor the sea’s bounty while keeping your wallet afloat.
Key Takeaways
as you dive into the rich flavors of the ocean without stretching your wallet, remember that savoring seafood doesn’t have to be a luxury reserved for special occasions. with a little creativity and smart shopping, these budget-friendly recipes invite you to bring the taste of the sea right to your kitchen, any day of the week. So next time you’re craving something fresh and flavorful, cast your net wide-there’s a world of affordable seafood treasures waiting to be discovered and enjoyed. Bon appétit, and happy sailing on your delicious culinary voyage!
Whip Up a Delicious Chia Pudding Bowl in Just 15 Minutes
Whip up a delicious chia pudding bowl in just 15 minutes and unlock a world of vibrant flavors, creamy textures, and nourishing goodness that feels like a wholesome treat every single time. This quick and satisfying dish blends the humble chia seed’s nutritional powerhouse with the silkiness of your favorite plant milks, crowned by a colorful medley of fresh fruits and superfoods for an energizing start to your day or a guilt-free snack.
Prep and Cook Time
- Prep Time: 10 minutes
- Chilling Time: 5 minutes (or overnight for thicker pudding)
- Total Time: 15 minutes
Yield
Serves 2 generous bowls
Difficulty Level
Easy
Ingredients
- 3 tbsp chia seeds (black or white)
- 1 cup unsweetened almond milk (or oat/coconut milk)
- 1 tbsp maple syrup or honey (optional)
- ½ tsp pure vanilla extract
- 1 medium banana, sliced
- ½ cup fresh mixed berries (blueberries, raspberries, strawberries)
- 1 tbsp shredded coconut (unsweetened)
- 1 tsp hemp seeds or flaxseeds
- 1 tbsp chopped nuts (almonds, walnuts, or pistachios)
- Optional superfoods: goji berries, cacao nibs, or a sprinkle of spirulina powder
Instructions
- Combine the chia seeds and plant milk. In a medium bowl or jar, whisk together chia seeds, almond milk, maple syrup, and vanilla extract until combined and slightly thickened. Let it sit for 2 minutes, then whisk again to prevent clumping.
- Chill briefly to activate the gel. Place the mixture in the refrigerator for at least 5 minutes or,for best results,overnight. this allows the chia seeds to absorb the liquid and create a luscious pudding texture.
- Prepare fresh toppings. While the pudding sets, slice your banana and wash the mixed berries. Toast the shredded coconut lightly in a dry pan until golden and fragrant (about 2 minutes).
- Assemble your pudding bowls. Stir the chia pudding once chilled and divide it evenly between two serving bowls. Artfully arrange banana slices, berries, toasted coconut, hemp seeds, nuts, and your chosen superfoods on top.
- Serve immediately or store. Enjoy right away for a cooling, creamy delight or keep covered in the fridge for up to 3 days.Stir before serving if stored.
Tips for Success
- choosing chia seeds: Opt for organic, non-GMO black or white chia seeds with a nutty aroma. White chia seeds tend to create a lighter-colored pudding for a more elegant presentation.
- Crafting the creamiest base: Use rich plant milks like oat or coconut for extra creaminess. For a protein boost, try soy milk or add a spoonful of nut butter before chilling.
- Flavor layering: Customize sweetness with natural syrups or mashed ripe bananas. Add spices like cinnamon or cardamom for warm notes.
- Make-ahead tips: Prepare your chia pudding the night before for a ready-to-eat breakfast.Store toppings separately to preserve freshness and texture.
- Texture tricks: If the pudding is too thick after chilling,stir in a splash of plant milk to loosen it gently.
Serving Suggestions
For a vibrant presentation, serve your chia pudding bowl in clear glass jars or wide bowls, allowing the layers and colors to shine. Garnish with a sprig of fresh mint or edible flowers to elevate the look. Pair it with homemade gluten-free granola or crisp seed crackers for contrasting crunch. this pudding is perfect as a refreshing breakfast, an energizing snack, or even a light dessert paired with herbal tea or a frothy turmeric latte.

| Nutrient | Per Serving |
|---|---|
| Calories | 220 |
| Protein | 6g |
| Carbohydrates | 24g |
| Fat | 9g |
For more wholesome breakfast ideas, visit our Healthy Breakfast Recipes collection. To dive deeper into the science behind chia seeds’ superfood status, check out this thorough guide from Healthline.
Q&A
Q&A: Whip Up a Delicious Chia Pudding Bowl in Just 15 Minutes
Q1: What makes chia pudding a great choice for breakfast or snack?
A1: Chia pudding is like a tiny superfood powerhouse! Packed with fiber, omega-3s, and protein, it fuels your body while keeping you feeling full and energized.Plus,its creamy texture and versatility make it a delightful treat any time of day.
Q2: How can I prepare a chia pudding bowl in just 15 minutes? Isn’t it supposed to soak longer?
A2: Traditionally, chia seeds soak for several hours or overnight to achieve that perfect gel-like consistency. but with a little trick-stirring vigorously and using slightly warm milk or milk option-you can speed up the process. Within 10-15 minutes, your pudding will be ready to spoon into a bowl and top with delicious extras!
Q3: what ingredients do I need to make a basic chia pudding bowl?
A3: The basics are simple: chia seeds, your choice of milk (almond, coconut, dairy, oat – anything works!), and a natural sweetener like honey, maple syrup, or agave. from there, you can get creative with toppings-fresh fruit, nuts, granola, coconut flakes-the sky’s the limit!
Q4: Can I customize the flavors of my chia pudding?
A4: Absolutely! Vanilla extract, cocoa powder, matcha, or even a hint of cinnamon can transform your pudding into a flavor adventure. Mix in blends or layer toppings to create your own signature bowl.
Q5: How do I store leftover chia pudding?
A5: Store it in an airtight container in the refrigerator for up to 3-4 days. Give it a quick stir before serving,as the seeds tend to settle or thicken over time. It makes for a quick grab-and-go snack or breakfast when you’re in a rush.
Q6: Is chia pudding suitable for people with dietary restrictions?
A6: Definitely! It’s naturally gluten-free and vegan-amiable (if you use plant-based milk).It’s also dairy-free, nut-free options are possible with oat or rice milk, making it accessible for many dietary needs.
Q7: Any tips for making the perfect pudding texture?
A7: Use a ratio of about 3 tablespoons of chia seeds to 1 cup of liquid for a creamy,spoonable texture. Stir thoroughly right after mixing to prevent clumps. For an extra silky feel, blend the pudding after soaking, then add toppings and enjoy.
Whip up your own nutritious and delectable chia pudding bowl in just 15 minutes-no fuss, no wait, just wholesome yum!
in Conclusion
With just a handful of simple ingredients and a sprinkle of creativity, your 15-minute chia pudding bowl transforms from a quick fix into a delightful, nourishing treat. Whether you’re fueling up for a busy day or craving a wholesome snack, this versatile recipe invites you to customize, experiment, and savor each spoonful.So next time hunger calls, remember: a vibrant, creamy chia pudding is just minutes away from turning your kitchen into a haven of healthful indulgence. Whip it up, dig in, and let your taste buds thank you!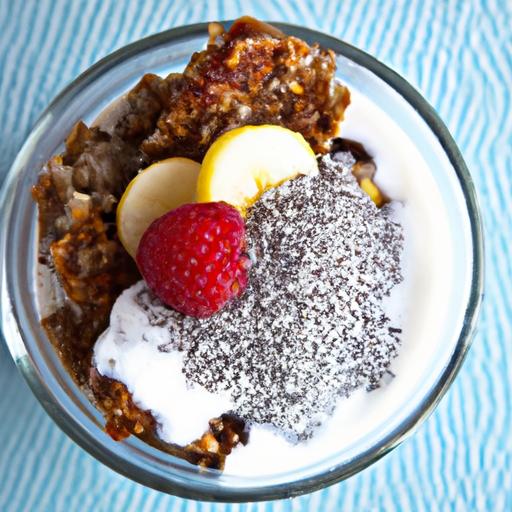
power-packed protein gets a vibrant makeover with these succulent grilled chicken skewers that promise juicy flavor infused deep within every tender bite. Achieving that perfect balance between charred edges and moist interiors starts with your choice of marinade-an artful blend that both tenderizes and elevates the natural savor of chicken. Imagine juicy morsels kissed with smoky caramelization, infused with herbs, spices, and a subtle tang that awakens the senses; this recipe brings it all together in an approachable and flavorful way.
Prep and cook time
- Preparation: 20 minutes
- Marinating: 1 to 4 hours (optional but highly recommended)
- cooking: 12-15 minutes
- Total Time: Approximately 1 hour 45 minutes (including marinating)
Yield
- Serves 4 people (approximately 12 skewers)
Difficulty Level
- Easy to Medium – Perfect for both beginners and seasoned grillers.
Ingredients
- 1.5 lbs (700g) boneless, skinless chicken thighs or breasts, cut into 1.5-inch cubes
- 3 tbsp olive oil
- 2 tbsp fresh lemon juice
- 3 cloves garlic, minced
- 1 tbsp honey or maple syrup
- 1 tsp smoked paprika
- 1 tsp ground cumin
- 1 tsp dried oregano
- 1/2 tsp salt
- 1/4 tsp freshly ground black pepper
- Wooden or metal skewers (if using wooden, soak in water for 30 minutes)
- Optional: sliced bell peppers, red onion, or cherry tomatoes for skewering
Instructions
- Prepare the Marinade: In a medium bowl, whisk together olive oil, lemon juice, garlic, honey, smoked paprika, cumin, oregano, salt, and pepper until well combined. This marinade is the secret weapon for juicy flavor infusion and tender textured chicken.
- Marinate the Chicken: Add the cubed chicken pieces to the marinade, tossing thoroughly to coat each piece. Cover and refrigerate for at least 1 hour, up to 4 hours for deeper flavor penetration.
- Preheat the Grill: Whether using a charcoal, gas grill or grill pan, heat to medium-high (about 400°F/200°C). Proper heat is critical for achieving tender, charred perfection on the outside without drying out the chicken.
- Prepare Skewers: Thread the marinated chicken cubes alternately with optional veggies like bell peppers, onions, or cherry tomatoes to add bursts of color and texture. Avoid overcrowding for even cooking.
- Grill the Skewers: Place skewers on the grill and cook for 6-8 minutes per side, turning once. Watch carefully for those coveted grill marks and a lightly charred exterior. Chicken is done when juices run clear and internal temperature reaches 165°F (74°C).
- rest & Serve: Allow skewers to rest for 5 minutes after grilling. This rest mirrors a flavor curtain letting the juices redistribute, keeping each bite delectably moist.
Tips for Success
- Marinating Time Matters: For ultimate tenderness and flavor, let the chicken soak up the marinade at least 1 hour, preferably 3-4 hours.Overnight marinating in the fridge is ideal but not mandatory.
- Wooden vs. Metal Skewers: If using wooden skewers, soak them in water for 30 minutes prior to grilling to prevent burning. Metal skewers heat faster, helping cook the chicken evenly from inside as well.
- Cut Uniformly: Consistent chicken cube size ensures even cooking-avoid overly large pieces to prevent dryness.
- Grill Temperature: Maintain medium-high heat. Too hot and the outside will burn before the inside cooks; too low and the meat will dry out.
- Substitutions: Swap chicken thighs for breasts for leaner protein or add herbs like rosemary or thyme for a fresh twist.
- Make Ahead: Marinated chicken can be stored covered in the fridge for up to 24 hours before grilling,making prep easy for gatherings.
Creative Serving Ideas to Elevate Your chicken skewers
Serve your vibrant chicken skewers over a bed of fluffy herbed couscous or fragrant basmati rice for an inviting meal. Complement the smoky, tender chicken with a crisp side salad dressed with lemon vinaigrette or a cooling tzatziki sauce dotted with fresh cucumber and mint. For an added textural contrast,sprinkle toasted pine nuts or sliced almonds on top just before serving.Consider skewering colorful bell peppers and cherry tomatoes alongside for a rainbow of charred sweetness.
For casual gatherings, pair the skewers with warm pita bread and dips like hummus or baba ganoush for a fun, interactive feast. A squeeze of fresh lemon over the skewers just before serving injects a zesty,luminous punch that livens the palate with every bite.
Nutritional Benefits and Protein power Explained
Chicken skewers aren’t just bursting with flavor-they pack a powerful protein punch that supports muscle repair, satiety, and energy balance. Using lean chicken breast or thigh provides an excellent source of high-quality complete protein, vital B vitamins, and minerals like phosphorus and selenium.
Grilling also locks in nutrients while minimizing the need for heavy oils or batters, making this dish both nutritious and light. The addition of antioxidant-rich herbs and vitamin C from lemon juice enhances nutrient absorption and supports healthy metabolism.
| Nutrient | Per Serving (3 Skewers) |
|---|---|
| Calories | 280 kcal |
| Protein | 35 g |
| Carbohydrates | 5 g |
| Fat | 9 g |

Ready to master the art of juicy, flavorful grilled chicken? Dive into our Healthy Grilling Tips for more smart cooking strategies and visit EatRight.org for expert insights on protein benefits.
Q&A
Q&A: Power-Packed Protein – Delicious Grilled Chicken Skewers
Q1: What makes grilled chicken skewers a powerhouse of protein?
A1: Grilled chicken skewers are a lean source of high-quality protein, essential for muscle repair, growth, and overall vitality. Each bite packs a satisfying punch of amino acids without the extra fat found in many other protein options, making them perfect for anyone chasing fitness goals or just craving a nutritious meal.
Q2: How can I make my grilled chicken skewers both tasty and nutritious?
A2: The secret lies in the marinade and fresh ingredients! Think vibrant herbs like rosemary and thyme, a splash of zesty lemon, and a drizzle of heart-healthy olive oil. this combo not only enhances flavor but also locks in moisture,yielding tender,juicy skewers that delight your taste buds while fueling your body.Q3: Are grilled chicken skewers suitable for meal prepping?
A3: Absolutely! They hold up well in the fridge and can be quickly reheated without losing their juiciness. Portion them with plenty of colorful veggies or whole grains for a balanced, grab-and-go meal that keeps you energized throughout the day.
Q4: Can I make these skewers kid-amiable and fun?
A4: Yes! Kids love handheld foods,so serve these on colorful skewers alongside a variety of dipping sauces-think mild yogurt-based ranch or tangy honey mustard.Customize with bite-sized veggies like bell peppers or cherry tomatoes to sneak in extra nutrients.
Q5: What’s the best way to grill chicken skewers evenly?
A5: Start by cutting chicken into uniform pieces to ensure they cook at the same rate. Preheat your grill to medium-high, and turn the skewers every few minutes. Keep an eye out for that beautiful golden char while making sure the internal temperature hits 165°F (75°C) – juicy,safe,and absolutely delicious!
Q6: Can grilled chicken skewers be adapted for other dietary preferences?
A6: Definitely! Swap chicken for tofu or tempeh to suit plant-based eaters,or use turkey breast for a lean alternative. Marinades can be tweaked to accommodate allergies and spice preferences, making skewers a versatile centerpiece for any table.
Q7: How do grilled chicken skewers fit into a balanced diet?
A7: They serve as a lean protein superstar that pairs beautifully with fiber-rich sides like quinoa, leafy greens, or roasted veggies. This combo supports sustained energy release, muscle health, and overall well-being-fueling your body with every flavorful bite.
With grilled chicken skewers, eating healthy never tasted this good. Grab your skewers, fire up the grill, and enjoy a radiant blend of nutrition and flavor that powers your day!
Key Takeaways
Whether you’re powering through a busy week or fueling up for your next adventure, these grilled chicken skewers deliver a perfect punch of protein wrapped in irresistible flavor. Simple to prepare and endlessly versatile, they prove that healthy eating doesn’t have to be boring or bland.So fire up the grill, grab your favorite marinade, and let these power-packed skewers transform your meals into a celebration of taste and nutrition. Here’s to savoring every bite while fueling your body the smart way!