Boost your Energy with homemade protein bars crafted from the finest natural ingredients creates a nourishing snack that fuels your day and delights your palate. Drawing inspiration from wholesome traditions and modern nutrition science,this step-by-step guide invites you to transform simple pantry staples into the ultimate energy boost,personalized entirely by you.
Prep and Cook Time
Planning: 15 minutes
Cooking/Setting: 2 hours (includes chilling time)
Yield
12 bars (approx. 60g each)
Difficulty Level
Easy
Ingredients
- 1 ½ cups rolled oats (old-fashioned, not instant)
- 1 cup natural almond butter (smooth or crunchy per preference)
- ½ cup honey or maple syrup (raw honey preferred for texture)
- 1 cup vanilla or unflavored whey protein powder
- ½ cup ground flaxseed (adds fiber and omega-3)
- ½ cup dark chocolate chips (70% cacao or higher for antioxidant benefits)
- ⅓ cup chopped nuts (walnuts, almonds, or pecans)
- 1 tsp pure vanilla extract
- Pinch of sea salt
- Optional: ¼ cup dried fruit (cranberries, raisins, or chopped apricots)
Instructions
- Line a 9×9-inch baking pan with parchment paper, leaving an overhang on the sides for easy removal later.
- In a large bowl, combine the rolled oats, protein powder, ground flaxseed, sea salt, chopped nuts, and dried fruit if using. Stir gently to blend the dry ingredients evenly.
- In a small saucepan over low heat, warm the almond butter and honey, stirring continuously until smooth and flowing. Remove from heat and stir in the vanilla extract.
- Pour the warm almond butter mixture into the dry ingredients. Use a sturdy wooden spoon or spatula to mix until fully incorporated.The mixture should be thick but sticky enough to hold together.If it’s too dry,add a teaspoon of water or almond milk at a time.
- Fold in the dark chocolate chips last, mixing gently but thoroughly.
- Transfer the mixture to the prepared pan. Press firmly and evenly using the back of a spatula or your hands (lightly moistened) to compress the mixture compactly – this step is key to firm bars that hold their shape.
- Refrigerate for at least 2 hours until completely set. For quicker firming, place the pan in the freezer for 30-45 minutes.
- Once set, lift the parchment overhang to remove the slab. Using a sharp knife,cut into 12 equal bars.
- Store in an airtight container, layered between parchment paper, in the refrigerator. Enjoy a nourishing, flavor-packed bar whenever your energy dips.
Chef’s Notes and Tips for Customizing flavors and Textures
- Customize protein powder: Choose plant-based or collagen protein blends for dietary preferences or flavors like chocolate or vanilla to naturally enhance sweetness.
- Adjust sweetness: Substitute honey with agave or use less sweetener if preferred. Dates blended into a paste add both natural sweetness and chewiness.
- Texture fun: Swap ground flaxseed with chia seeds for a different nutrient profile and a subtle crunch, or add puffed quinoa for an airy lift.
- Nut-free option: Replace almond butter with sunflower seed butter or tahini to accommodate allergies without sacrificing creaminess.
- Flavor bursts: Incorporate fresh citrus zest, cinnamon, or espresso powder for an unexpected kick that enlivens each bite.
- Prevent stickiness: Lightly oil your hands or spatula when pressing the mixture into the pan to avoid sticking during shaping.
- Make ahead: Bars last up to 2 weeks refrigerated and freeze beautifully for up to 3 months-perfect for batch prepping.
Serving Suggestions
Place bars on a rustic wooden board or a vibrant ceramic plate for an inviting snack display. Garnish with fresh berries or a sprinkle of toasted coconut flakes. Pair with a refreshing iced green tea or cold-brew coffee for a balanced energy boost.These bars also make a fantastic workout companion or midday desk treat wrapped individually in parchment paper.

| Nutrient | Per Bar (60g) |
|---|---|
| Calories | 210 kcal |
| Protein | 12 g |
| Carbohydrates | 18 g |
| Fat | 9 g |
For more inspiration on wholesome homemade energy snacks, check out our Homemade Energy Balls Recipe Guide. For deeper insights into plant-based protein options, visit Healthline’s Protein Powder Guide.
Q&A
Q&A: Boost Your Energy with Easy Homemade Protein Bars
Q1: Why should I make my own protein bars instead of buying them?
A1: Homemade protein bars let you control every ingredient-no sneaky preservatives or excessive sugars! Plus, you can customize flavors and textures to match your cravings and dietary needs.It’s healthier, often cheaper, and incredibly satisfying to craft your own energy boost.
Q2: What are the key ingredients in a basic homemade protein bar?
A2: The magic trio includes a protein source (like whey, pea, or hemp protein powder), a natural binder (think nut butters or mashed bananas), and a sweetener (such as honey, maple syrup, or dates). From there, you can add nuts, seeds, oats, or even chocolate chips for texture and flavor.
Q3: How can I ensure my protein bars stay fresh and chewy?
A3: Store them in an airtight container,ideally refrigerated,and consume within a week for optimal freshness. Using sticky binders like nut butters and syrup helps maintain that delightful chewiness. If you want bars that last longer,consider freezing portions.
Q4: Can I make these bars vegan or allergy-amiable?
A4: Absolutely! Swap conventional protein powders for plant-based options like pea or brown rice protein. Use maple syrup or agave instead of honey. For nut allergies, sunflower seed butter or tahini work wonders. The recipe is versatile, so feel free to experiment!
Q5: How long does it take to make homemade protein bars?
A5: From start to finish, about 15-20 minutes of active preparation plus chilling time. No baking required-just mix, press into a pan, chill, and slice. Perfect for a quick weekend project or meal prep session.Q6: What makes homemade protein bars a great energy booster?
A6: They combine protein, healthy fats, and complex carbs that release energy steadily, preventing the mid-afternoon crash. Tailoring your bars with ingredients like chia seeds or oats means you get fiber and micronutrients alongside that satisfying punch of protein.
Q7: Can kids enjoy these homemade protein bars?
A7: Definitely! They’re a wholesome snack choice to sugary treats. Just adjust sweetness and texture according to their preference,and ensure there are no allergens. Homemade bars can be a fun way to get kids involved in the kitchen and teach healthy habits.
Q8: Where can I find a simple starter recipe?
A8: Here’s a quick combo: mix 1 cup oats,½ cup peanut or almond butter,½ cup protein powder,⅓ cup honey or dates (blended),and a handful of dark chocolate chips or dried fruit. Press into a pan, chill, slice, and enjoy your personalized energy bar masterpiece!
insights and Conclusions
With a batch of these homemade protein bars always within reach, powering through your day just got a whole lot tastier-and healthier. Forget the expensive store-bought options loaded with mystery ingredients; now you hold the recipe to fuel your body the way it deserves. Whether you need a quick morning pick-me-up, a post-workout refuel, or an afternoon energy boost, these easy-to-make bars are your new go-to snack. So roll up your sleeves, get creative with your favorite nuts and flavors, and start enjoying energy that’s as natural as it is delicious. Here’s to a more energized you, one homemade bar at a time!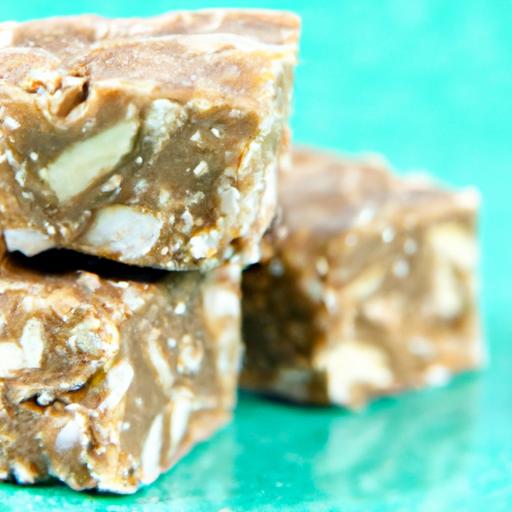
One-Pot Chicken Wonders bring incredible ease and flavor to your busy weeknights, transforming simple chicken cuts into mouthwatering meals that satisfy the whole family. Whether you’re craving tender thighs,juicy drumsticks,or succulent breast meat,the journey to a perfect one-pot dish begins with choosing the right chicken cuts. Drawing inspiration from classic rustic cooking techniques and modern kitchen shortcuts, these dishes emphasize rich, layered flavors built effortlessly in a single pot. Let’s dive into essential tips and recipes that make weeknight dinners not only manageable but truly memorable.
Prep and Cook Time
- Readiness: 15 minutes
- Cooking: 35-45 minutes
- Total Time: 50-60 minutes
Yield
Serves 4 hungry adults
Difficulty Level
Easy – Perfect for weeknight cooks with limited time but a desire for big flavor
choosing the Perfect Chicken Cuts for Flavorful One-Pot Dishes
When aiming to create mouthwatering one-pot chicken wonders,the cut of chicken you select profoundly influences the depth and texture of your dish. Bone-in, skin-on cuts like chicken thighs and drumsticks provide a juicy, tender bite with deep flavor due to slow rendering fats and marrow release. These cuts remain moist through simmering or oven cooking,resulting in a luscious finish.
On the other hand,boneless,skinless breasts cook faster and work best in recipes where a lighter protein highlight is desired,such as in a tomato-based one-pot stew or a lemon-herb rice dish. Mixing cuts can provide balance: thighs add richness, breasts keep it lean. Always ensure even-sized pieces for cooking uniformity, and for extra flavor, briefly sear the chicken skin-side down before adding liquids to your pot.
Essential Pantry Staples to elevate Your One-Pot Creations
stock your kitchen with a handful of versatile essentials that elevate each one-pot chicken wonders recipe. Aromatics like garlic, onions, and shallots build a savory foundation. Dried herbs such as thyme, rosemary, and smoked paprika add warmth and complexity. For body and texture,keep chicken broth or stock,canned tomatoes, and rice or small pasta varieties handy. Don’t forget acid elements like lemon juice, vinegar, or even white wine to brighten the finished dish. A splash of heavy cream or coconut milk can soften and enrich the sauce, adding a luxurious touch to humble ingredients.
Step-by-Step Techniques for Effortless One-pot Cooking
- Sear Your chicken: Heat oil in a heavy-bottomed pot over medium-high heat. place chicken pieces skin-side down and sauté until golden brown, about 5 minutes, stirring occasionally to prevent sticking. This seals in juices and creates flavor through caramelization.
- Sauté Aromatics: Remove the chicken, then add minced onions, garlic, and any other desired aromatics to the pot.Cook until fragrant and translucent, roughly 3-4 minutes, stirring frequently.
- Deglaze the Pot: Pour in a splash of broth, wine, or even water, scraping up any browned bits from the bottom. These bits infuse a deep, roasted flavor base.
- Add Remaining Ingredients: Stir in herbs, spices, rice (or pasta), and vegetables. Nestle back the chicken pieces,cover with broth or sauce,and bring to a gentle simmer.
- Simmer with Lid: Reduce heat to low, cover, and cook until chicken is tender and grains are cooked through-typically 20-30 minutes depending on the starch used.
- Finish and Rest: Remove from heat, let sit covered for 5 minutes to thicken and meld flavors before serving.
Appetizing One-Pot Chicken Recipes Tailored for Busy Weeknights
Try the classic One-Pot Lemon Herb Chicken with Rice, where zesty lemon brightens tender dark meat slow-cooked with fragrant thyme and garlic. Or opt for a cozy Chicken and tomato Orzo Stew with sweet chunks of ripe tomatoes, smoky paprika, and silky orzo pasta that soaks up all the flavors.
Ingredients
- 4 bone-in, skin-on chicken thighs
- 1 tablespoon olive oil
- 1 large onion, finely chopped
- 3 cloves garlic, minced
- 1 ½ cups long-grain white rice, rinsed
- 3 cups low-sodium chicken broth
- 1 lemon, zested and juiced
- 1 teaspoon dried thyme
- ½ teaspoon smoked paprika
- Salt and freshly ground black pepper, to taste
- Fresh parsley, chopped, for garnish
Instructions
- Prepare the chicken: Pat chicken thighs dry with paper towels and season generously with salt, pepper, thyme, and smoked paprika.
- Sear chicken: Heat olive oil in a large Dutch oven over medium-high heat.Place chicken skin-side down and sear until golden brown, about 5 minutes. Flip and cook another 3 minutes. remove chicken and set aside.
- Sauté aromatics: Add onion to the pot and cook until soft and translucent, about 4 minutes. Stir in garlic and cook for 1 minute.
- Add rice and lemon zest: stir the rice into onions and garlic,letting it toast slightly,about 2 minutes.
- Combine liquids and chicken: Pour chicken broth and lemon juice into the pot.Stir well, scraping any browned bits off the bottom. Nestle chicken thighs on top.
- Simmer: Bring to a gentle boil, reduce heat to low, cover, and cook for 25 minutes or until rice is tender and chicken is cooked through.
- Rest and garnish: Remove from heat and let sit covered for 5 minutes. Garnish with freshly chopped parsley before serving.
Tips for Success
- For crispier skin, briefly broil the chicken uncovered for 2-3 minutes before resting.
- Swap rice for quinoa or couscous for different textures but adjust liquid accordingly.
- Add vegetables such as diced bell peppers or peas halfway through cooking for a colorful boost.
- To make this dish gluten-free, ensure your broth and seasonings contain no wheat ingredients.
- Make-ahead: Prepare through step 5, refrigerate overnight, then cook when ready.
Serving Suggestions
Serve directly from the pot for a rustic family-style feel. Pair with a crisp green salad or roasted seasonal vegetables. A wedge of fresh lemon on the side adds a delightful burst of freshness. Garnishing with chopped parsley or cilantro elevates the presentation and adds a vibrant herbaceous note.

| Nutrient | Per Serving |
|---|---|
| calories | 450 kcal |
| Protein | 38 g |
| Carbohydrates | 35 g |
| Fat | 15 g |
For further inspiration, explore our One-Pot Dinners Collection. For tips on selecting high-quality chicken, check out the USDA guidelines at USDA Poultry Selection Tips.
Q&A
Q&A: One-Pot Chicken Wonders – Easy Meals for Busy Weeknights
Q1: What makes one-pot chicken meals ideal for busy weeknights?
A: One-pot chicken meals combine simplicity and flavor in a single dish, minimizing prep time, cooking steps, and cleanup. Perfect for hectic evenings, they deliver hearty nutrition without the stress of juggling multiple pots and pans.
Q2: Can I really make a flavorful dinner using just one pot?
A: Absolutely! The magic lies in layering ingredients and cooking techniques.By sautéing, simmering, and roasting all in one vessel, flavors meld beautifully, resulting in meals that taste rich and complex despite their easy preparation.
Q3: What types of chicken cuts work best for one-pot recipes?
A: Versatility is key here. Boneless thighs cook quickly and stay juicy, while bone-in pieces add depth of flavor and tenderness. Even shredded or diced chicken breast can work if you adjust cooking times accordingly.
Q4: Are one-pot chicken dishes healthy?
A: Yes! These recipes often incorporate vegetables, whole grains, and lean protein, making them balanced and nutritious. Plus, controlling the ingredients means you can easily customize for dietary preferences or restrictions.
Q5: How can I keep my one-pot chicken meals from becoming bland?
A: Spices, herbs, and layering are your best friends. Experiment with garlic, paprika, cumin, fresh herbs, or zesty citrus to elevate flavors. Don’t forget to season at each cooking stage for depth.
Q6: Can I prepare these meals ahead of time?
A: Definitely! Many one-pot chicken dishes taste even better the next day as flavors deepen.Cook in advance, store properly, and simply reheat for a quick, satisfying meal.
Q7: What are some quick tips for perfect one-pot chicken meals?
A: Brown your chicken first to lock in juices and develop a flavorful crust. Add vegetables in stages to maintain their texture. Use homemade or quality broth to boost taste. And keep your pot covered during simmering to trap steam and tenderize ingredients evenly.
Q8: Any standout one-pot chicken recipes to try on a tight schedule?
A: Yes! Think creamy chicken and mushroom skillet, vibrant chicken jambalaya, or a comforting Mediterranean chicken and rice bake. Each delivers bold flavors with minimal fuss.
Q9: How adaptable are one-pot chicken recipes?
A: Very adaptable! Swap veggies based on seasonality, adjust spices to your palate, or turn a weeknight meal into next-day leftovers by adding fresh greens or a squeeze of lemon. The possibilities are endless.
Q10: What kitchen equipment do I need to get started?
A: A sturdy, heavy-bottomed pot or deep skillet with a lid is essential. An enameled Dutch oven,cast-iron skillet,or even a large sauté pan works wonders for creating your one-pot chicken wonders.
Embrace the ease and magic of one-pot chicken meals - your weeknight dinners just found their new best friend!
Future Outlook
As the dinner bell rings on those hectic weeknights, one-pot chicken wonders prove that simplicity doesn’t meen sacrificing flavor. With minimal prep and maximum taste, these recipes transform your kitchen into a sanctuary of ease and nourishment. So next time time is tight and hunger is high, remember: a handful of ingredients, one trusty pot, and a dash of creativity are all you need to turn dinner into a quick, delicious triumph. Here’s to savoring every bite without the overwhelm-because busy nights deserve meals that work just as hard as you do.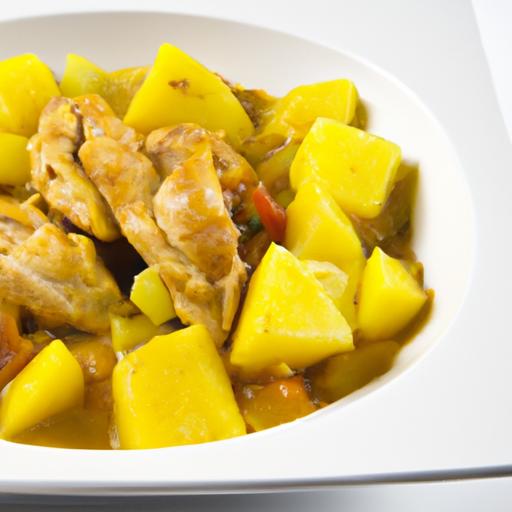
Creamy Delight: Quick & Easy Chicken Alfredo Recipe invites you to experience an indulgent, soul-satisfying classic that combines tender chicken with a luscious, velvety sauce. This dish, rooted in Italian-American tradition, transforms simple ingredients into a masterpiece of comfort and elegance. Every bite delivers the perfect harmony of rich cream, sharp Parmesan, and the savory depth of sautéed garlic, making it a go-to favorite for both weeknight dinners and special occasions. Whether you’re a seasoned home cook or just beginning your culinary journey, this recipe promises a delightful, foolproof approach to mastering the iconic Alfredo sauce paired flawlessly with juicy chicken.
Prep and Cook Time
- preparation: 10 minutes
- Cooking: 20 minutes
- Total Time: 30 minutes
Yield
Serves 4 generous portions
Difficulty Level
Easy – Perfect for cooks of all skill levels
Ingredients
- 2 large boneless, skinless chicken breasts, thinly sliced or pounded to even thickness
- 12 oz fettuccine pasta
- 4 tbsp unsalted butter
- 4 cloves garlic, minced
- 2 cups heavy cream
- 1 ½ cups freshly grated Parmesan cheese
- Salt and freshly ground black pepper, to taste
- 2 tbsp olive oil
- Fresh parsley, finely chopped for garnish
- Optional: A pinch of freshly grated nutmeg or red pepper flakes for depth and subtle heat
Choosing the Perfect Ingredients for a Rich and Flavorful Chicken Alfredo
To achieve the perfect Chicken Alfredo, start with the freshest ingredients you can find. Opt for high-quality chicken breasts that are plump and fresh for tender meat that soaks up the creamy sauce beautifully. When selecting your cream, choose heavy cream with at least 36% fat content for that signature silkiness and body. Use freshly grated Parmigiano-Reggiano cheese rather of pre-grated versions; its complexity and granular texture melt smoothly, enriching every forkful. Lastly, fresh garlic-crushed and minced-injects aromatic intensity that elevates the sauce, while fresh parsley introduces a splash of vibrant color and subtle herbaceous notes. These exceptional ingredients build the foundation for a flavorful, vibrant dish that’s anything but ordinary.
Mastering the Creamy Sauce: Tips for a Smooth and Silky Texture
Creating that iconic Creamy Delight: Quick & Easy Chicken Alfredo Recipe sauce requires attention to temperature and timing. Begin by gently melting butter before adding garlic, allowing the flavors to bloom without burning the cloves. Next,pour in chilled heavy cream slowly,stirring constantly on medium-low heat-this prevents curdling and encourages a luscious texture. Incorporate Parmesan gradually, whisking continuously to melt the cheese evenly without graininess. Adjust seasoning thoughtfully; salt enhances while freshly ground pepper and a hint of nutmeg balance the richness. Avoid boiling the sauce vigorously; rather, keep it at a gentle simmer for that perfect, clingable consistency that wraps each strand of fettuccine in creamy goodness.
Step-by-Step Guide to Quick and Easy Chicken Preparation
- Prepare the chicken: Pat the chicken breasts dry and season both sides generously with salt and pepper.
- Heat olive oil: Warm 2 tablespoons of olive oil in a large skillet over medium-high heat until shimmering.
- Sauté chicken: Place the chicken breasts in the skillet and cook undisturbed for 5 minutes or until a golden crust forms. Flip and cook another 4-5 minutes until cooked through.
- Rest and slice: Remove chicken from the pan and let rest for 5 minutes. Slice into thin strips or bite-sized pieces for easy serving.
- Cook pasta simultaneously: While the chicken cooks, boil salted water and cook fettuccine according to package instructions until al dente.Reserve ½ cup pasta water and drain.
- Combine sauce and pasta: Pour your creamy Alfredo sauce into the skillet; toss in the drained pasta and add reserved pasta water as needed to loosen and coat the noodles beautifully.
- Add chicken: Gently fold sliced chicken into the sauce-coated pasta, letting the flavors meld on low heat.
Serving Suggestions and Pairings to Elevate Your Alfredo Experience
presentation is key to elevating your Creamy Delight: Quick & Easy Chicken Alfredo Recipe. Serve the dish immediately while piping hot, plating a generous nest of fettuccine topped with the golden chicken slices.Garnish with a sprinkle of finely chopped fresh parsley for vivid contrast and a burst of freshness. For added indulgence, shave extra parmesan over the top and crack a few twists of black pepper. Pair this with a crisp Caesar salad or sautéed garlic spinach to introduce textural variety and vibrant greens. A chilled glass of dry Pinot Grigio or a bright Chardonnay perfectly complements the richness, cutting through the creamy sauce for a balanced dining experience. For bread lovers, a warm, crusty garlic bread or homemade focaccia rounds out the meal beautifully.
Chef’s Notes & Tips for success
- Chicken Variations: Substitute boneless thighs for an even juicier result. Just adjust cooking time slightly.
- Make-Ahead Tip: Prepare the sauce in advance and reheat gently,adding reserved pasta water to revive texture.
- Dairy Alternatives: For a lighter option, swap half of the heavy cream with whole milk-but avoid skim, which can curdle.
- Seasoning Balance: Taste the sauce before tossing with pasta; Parmesan adds saltiness, so season cautiously.
- Storage: Leftovers keep well for 2 days refrigerated in an airtight container. Reheat over low heat, stirring often.
Nutritional Information per Serving
| Calories | Protein | Carbohydrates | Fat |
|---|---|---|---|
| 720 kcal | 48 g | 58 g | 35 g |

For more recipes inspired by Italian classics, check out our Classic Italian Pasta Dishes. to learn about the rich history behind Alfredo sauce, visit Encyclopedia Britannica.
Q&A
Q&A: Creamy delight – Quick & Easy Chicken Alfredo Recipe
Q1: What makes this Chicken Alfredo recipe stand out from conventional versions?
A1: Our Creamy Delight recipe balances rich, velvety sauce with a surprisingly quick prep time. We ditch hours of simmering in favor of simple, fresh ingredients that come together in under 30 minutes-perfect for weeknight indulgence without the fuss.
Q2: Can I make this recipe healthier without sacrificing flavor?
A2: Absolutely! Swap heavy cream for half-and-half or a mix of milk and Greek yogurt to lighten the sauce. Use whole wheat pasta or spiralized veggies to add fiber, and lean chicken breasts ensure a protein-packed meal that’s as nourishing as it is delicious.Q3: What are the key ingredients for that irresistibly creamy Alfredo sauce?
A3: The magic trio is butter,garlic,and freshly grated parmesan. Butter creates a luscious base, garlic infuses aromatic depth, and Parmesan gives that signature cheesy punch. Adding a splash of pasta water at the end helps bind the sauce perfectly to your noodles.
Q4: Can I prepare this dish ahead of time?
A4: You can prep the chicken and sauce separately in advance. Reheat gently over low heat with a splash of milk or cream to revive the sauce’s luscious texture before tossing with freshly cooked pasta. Though, for best creaminess, cook and combine just before serving.
Q5: what side dishes pair well with Chicken Alfredo?
A5: Light, fresh sides like a crisp Caesar salad or garlic-roasted broccoli complement the richness beautifully. For a heartier spread, consider warm garlic bread or sautéed mushrooms to enhance the comforting flavors.
Q6: How do I avoid common mistakes like a grainy or separated sauce?
A6: The key is low and slow heat when melting cheese-high temperatures can cause it to clump or separate.Also, temper the sauce with reserved pasta water gradually to maintain smoothness. Stir constantly to marry all elements into a silky, dreamy sauce.
Q7: Can this recipe be customized for other proteins or dietary preferences?
A7: Definitely! Swap chicken for shrimp or tofu for a delightful twist. For gluten-free options, use rice or chickpea pasta. Herb lovers can add fresh basil or parsley for extra zing, and a pinch of red pepper flakes offers a subtle heat to awaken the palate.
Q8: What’s the best way to serve Chicken Alfredo for an impressive presentation?
A8: Twirl the pasta neatly onto plates using tongs, place juicy chicken slices elegantly on top, and drizzle with extra sauce. Garnish with freshly cracked black pepper, chopped parsley, and a few Parmesan shavings to elevate your dish visually and flavor-wise.
Enjoy your journey to creating a truly creamy delight that’s as quick as it is easy!
Key Takeaways
There you have it-a creamy delight that transforms simple ingredients into a comforting, flavorful feast. This quick and easy Chicken Alfredo recipe proves that delicious doesn’t have to mean complicated. Whether you’re cooking for a busy weeknight or impressing guests with minimal effort,this dish delivers rich,velvety satisfaction in every bite. So, grab your skillet, gather your ingredients, and let this timeless classic become your go-to comfort meal-becuase sometimes, the simplest pleasures truly are the most unforgettable.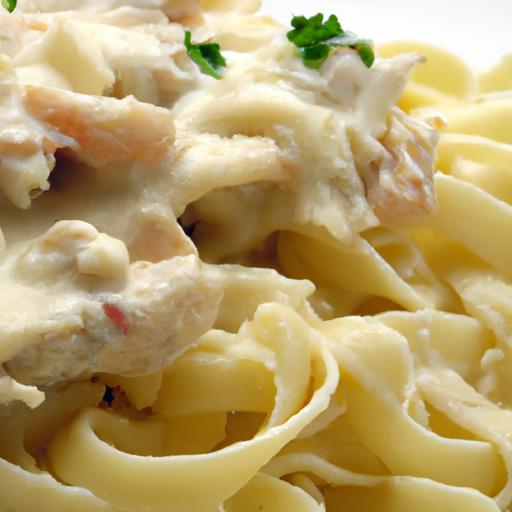
Simple One-Pot Wonders: Easy Meals for Kitchen Newbies unlock a world of convenience and rich flavors while minimizing cleanup. The charm lies in combining all elements-proteins, grains, vegetables, and seasonings-into a single pot, creating harmonious dishes that boast depth and comfort. Inspired by traditions from rustic European casseroles to the vibrant one-pot stews of Asia, this cooking method has been my trusted go-to for speedy weeknight dinners and cozy weekend meals.
Prep and Cook Time
Prep: 10 minutes
Cook: 30-40 minutes
Yield
Serves 4 hearty portions
Difficulty Level
Easy - perfect for those new to the kitchen and eager to build confidence
Ingredients
- 1 tablespoon olive oil
- 1 medium onion,finely chopped
- 3 cloves garlic,minced
- 1 cup long-grain white rice,rinsed
- 2 cups low-sodium chicken or vegetable broth
- 1 cup diced bell peppers (any color)
- 1 cup cherry tomatoes,halved
- 1 cup cooked shredded chicken (optional for added protein)
- 1 teaspoon smoked paprika
- 1 teaspoon dried oregano
- Salt and freshly ground black pepper,to taste
- Fresh parsley for garnish
Instructions
- Heat the olive oil in a large,heavy-bottomed pot or deep skillet over medium heat. Add the onion and sauté until translucent, about 4 minutes, stirring occasionally.
- Stir in the minced garlic and cook for 30 seconds until fragrant, careful not to let it burn.
- Add the rinsed rice and toast it gently in the pot for 2 minutes, stirring frequently so it acquires a light golden hue.
- Pour in the broth and bring the mixture to a gentle boil.
- Add the diced bell peppers,cherry tomatoes,smoked paprika,and oregano. Stir to combine, then reduce the heat to low and cover with a tight-fitting lid.
- simmer gently for about 18-20 minutes, or until the rice is tender and the liquid is absorbed. Avoid lifting the lid too frequently enough to ensure perfect steaming.
- Fold in the cooked shredded chicken, if using, warming it through for 3-5 minutes before serving.
- Season with salt and pepper to taste, garnish generously with fresh parsley, and serve immediately.
Tips for Success
- Rice choice matters: Use long-grain white rice for this recipe. Brown rice or other grains may require different cooking times and additional liquid.
- Customize with vegetables: swap bell peppers for zucchini or mushrooms to suit your preferences or seasonal availability.
- Protein options: For a vegetarian version, omit the chicken and add a can of drained chickpeas or white beans just before simmering.
- Prevent sticking: Use a heavy-bottomed pot with a lid and watch the liquid levels closely. Stir gently only when instructed.
- Make-ahead: This dish can be assembled a few hours ahead and refrigerated, then cooked fresh when ready.
Serving Suggestions
This vibrant one-pot meal is a feast on its own but shines even brighter with the right accompaniments. Serve alongside a crisp green salad drizzled with lemon vinaigrette or a wedge of crusty artisan bread to soak up any remaining juices. For an extra burst of freshness, a dollop of plain Greek yogurt with a sprinkle of smoked paprika adds creamy tang.Garnish with freshly chopped parsley or cilantro to brighten both flavor and presentation.

| nutrient | Amount per Serving |
|---|---|
| Calories | 320 kcal |
| Protein | 18 g |
| Carbohydrates | 40 g |
| Fat | 8 g |
Essential Kitchen Tools for Effortless One-Pot Meals
Mastering Simple One-Pot Wonders: Easy Meals for Kitchen Newbies starts with having the right kitchen tools at hand. A sturdy, heavy-bottomed pot with a well-fitting lid is paramount to ensure even heat distribution and steam retention. Cast iron Dutch ovens or enameled cast iron pots are often favorites among culinary professionals for their heat retention and durability. Don’t underestimate the importance of a sharp chef’s knife for prepping ingredients quickly and safely, and a heatproof silicone spatula for scraping down the pot sides without damage. These tools create a seamless cooking experience, turning simple pantry staples into inviting, flavorful one-pot meals.
Flavorful Ingredients That Transform Simple Dishes
The magic of Simple One-Pot Wonders: Easy Meals for Kitchen Newbies shines strongest when a balanced blend of aromatic herbs and spices complements fresh veggies and quality proteins. Using ingredients like smoked paprika, garlic, and fresh herbs elevates or else basic preparations, offering layers of flavor with every bite. Quality broth-whether homemade or low-sodium store-bought-is a quiet hero, infusing each grain and vegetable with savory richness. Adding a splash of acidity from lemon juice or a sprinkle of chili flakes can transform the dish’s profile, stimulating the palate and making the humble pot feel gourmet.
Easy One-Pot Recipes Perfect for Beginners
Dive into effortless success with recipes that merge simplicity and flavor. This one-pot rice and chicken dish exemplifies how Simple One-Pot Wonders: Easy Meals for Kitchen Newbies introduce approachable cooking with rewarding results. Each step is designed for kitchen beginners, with minimal ingredients and clear instructions, proving that delicious doesn’t mean complicated. Other beginner-friendly one-pot meals include creamy vegetable risottos, rustic lentil stews, and hearty pasta bakes-each bringing warmth and satisfaction with just a single pot.
For more comprehensive meal ideas, check out our collection of easy one-pot dinners. To learn about the nutritional science behind one-pot cooking, the Academy of Nutrition and Dietetics offers excellent trusted resources.
Q&A
Q&A: Simple One-Pot wonders - easy Meals for Kitchen Newbies
Q1: What exactly is a one-pot meal?
A1: A one-pot meal is a dish where all the ingredients are cooked together in a single pot, pan, or Dutch oven. This approach means less mess, fewer dishes, and a streamlined cooking process-perfect for kitchen newbies looking to build confidence without the chaos.
Q2: Why are one-pot meals ideal for beginners?
A2: One-pot meals simplify cooking by combining steps and ingredients in one vessel,reducing both preparation time and cleanup. This helps new cooks focus on mastering basic techniques without feeling overwhelmed by multitasking or juggling multiple pots and pans.
Q3: Can one-pot meals still be flavorful and nutritious?
A3: Absolutely! One-pot wonders pack layers of flavor by simmering ingredients together, allowing spices and aromatics to meld perfectly. Plus, you can easily incorporate proteins, veggies, and grains for a balanced and wholesome meal in just one go.
Q4: What are some beginner-friendly one-pot dishes to try?
A4: Start with classics like hearty chili, comforting risottos, cozy soups, or simple pasta primavera. These recipes often have forgiving techniques and common ingredients,making them excellent practice grounds for new cooks.
Q5: how do I avoid undercooking or overcooking ingredients in one-pot recipes?
A5: Timing is key! add ingredients based on their cooking times-for example, tougher veggies or raw proteins often go in first, while delicate greens or herbs come late. Following the recipe instructions closely and checking doneness as you go will help you nail it.
Q6: What kitchen tools do I need to get started?
A6: A sturdy, medium- to large-sized pot or Dutch oven with a lid is your best friend. A good wooden spoon, a sharp knife, and measuring spoons complete the basic toolkit for one-pot cooking success.
Q7: Can one-pot meals fit into a busy lifestyle?
A7: Definitely! One-pot recipes frequently enough require minimal hands-on time and can double as leftovers, making them time-saving and convenient.Just set it and forget it,or stir occasionally while you focus on other tasks.
Q8: How can I customize one-pot meals to suit my taste?
A8: Feel free to swap proteins, experiment with different veggies, or adjust spices to match your preferences.One-pot cooking is forgiving and allows creativity-just remember to balance flavors and cooking times.
Q9: Where can beginners find reliable one-pot recipes?
A9: Look for cooking blogs,beginner-friendly cookbooks,or apps dedicated to simple meals. Many sites offer step-by-step photos and videos, helping you visualize each stage and build your skills confidently.
Q10: What’s the biggest tip for someone nervous about cooking their first one-pot meal?
A10: Embrace the process and expect some trial and error! Cooking is as much about practice as it is indeed about ingredients. Keep it simple, trust the recipe, and remember-every great cook started right where you are now.
In Retrospect
As you embark on your culinary journey, remember that simplicity doesn’t mean sacrificing flavor or fun. These one-pot wonders are your trusty companions-streamlining cooking, minimizing cleanup, and maximizing satisfaction with every bite. whether you’re tackling your very first recipe or looking for quick weeknight solutions, embracing easy meals in a single pot opens the door to confidence and creativity in the kitchen. So grab your favorite pot, gather your ingredients, and let these simple dishes inspire you to turn everyday cooking into an effortless, enjoyable adventure. Happy cooking!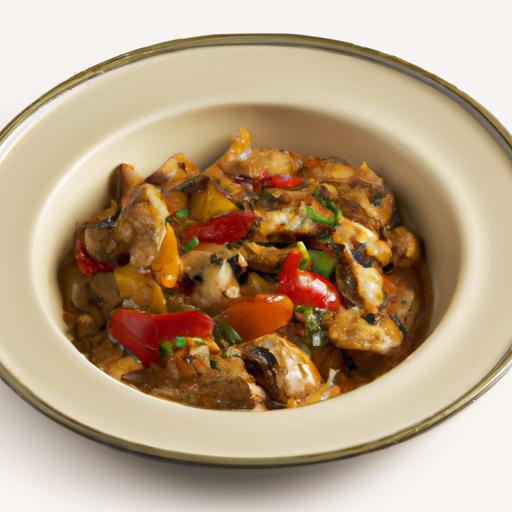
Quick & Easy Microwave Mug Brownie: Dessert in Minutes
If you’re craving a decadent chocolate fix but short on time, this Quick & Easy Microwave Mug Brownie is your ultimate solution. Born from the need to satisfy sweet tooths in a flash, this recipe combines simple pantry staples to deliver a rich, moist, and fluffy brownie that’s ready in minutes – ideal for solo indulgences or impromptu dessert cravings.
Prep and cook Time
- Preparation: 3 minutes
- Cooking Time: 1 minute 30 seconds
- Total Time: 4 minutes 30 seconds
Yield
1 mug serving – perfect for a single decadent treat or scaled up for a quick batch of individual brownies.
Difficulty Level
Easy: Minimal ingredients,no baking expertise required!
Ingredients That Make Your microwave Mug Brownie Irresistibly Rich
- 4 tablespoons all-purpose flour,sifted - for a tender crumb
- 4 tablespoons granulated sugar – imparts the perfect sweetness
- 2 tablespoons unsweetened cocoa powder – for deep,chocolatey richness
- 1/8 teaspoon salt - to balance and elevate flavor
- 3 tablespoons vegetable oil – ensures moistness and softness
- 3 tablespoons milk – adds fluffiness and helps blend the batter
- 1/4 teaspoon vanilla extract - gives a fragrant,warm aroma
- Optional: 2 tablespoons chocolate chips or chopped nuts - for delightful texture contrast
Step by step Guide to Perfectly Moist and Fluffy Mug Brownies
- Mix Dry Ingredients: In a microwave-safe mug (roughly 12 oz capacity),whisk together the sifted flour,granulated sugar,cocoa powder,and salt until well combined to avoid lumps and bitterness.
- Add Wet Ingredients: Pour in the vegetable oil, milk, and vanilla extract. Stir vigorously with a fork or small whisk until a smooth, thick batter forms. Avoid overmixing to keep the brownie tender.
- Fold in Extras: Gently incorporate chocolate chips or nuts if desired – these add a marvelous flavor burst and texture.
- Microwave Carefully: Place the mug in the microwave and cook on high for 90 seconds. Watch closely; microwave powers vary, so start with less time and add 10-second increments as needed. The brownie should look set on top but remain moist inside.
- Cool Slightly: Let the brownie cool for 2 minutes before digging in. This resting time allows the molten texture to set just right without overcooking.
Tips for Customizing Your Dessert with Mix-Ins and Toppings
- Swap cocoa powder: Try dark cocoa for an intense chocolate hit or add a teaspoon of espresso powder to deepen the flavor.
- Mix-ins: Consider adding mini marshmallows,crushed pretzels for salty crunch,or shredded coconut for tropical flair.
- toppings: top your mug brownie with a scoop of vanilla ice cream, a drizzle of caramel or raspberry sauce, or a sprinkle of sea salt flakes for contrast.
- Healthier tweaks: Substitute half the oil with applesauce to reduce fat, or swap sugar for coconut sugar for a subtle caramel flavor.
- Vegan version: Use almond milk and coconut oil, plus crushed flaxseed as an egg substitute (1 tbsp flaxseed + 3 tbsp water, rested 5 min).
Troubleshooting Common mug Brownie mishaps for Flawless Results
- Dry or rubbery texture: most frequently enough from overcooking. Reduce microwave time by 10 seconds and test frequently.
- Raw batter in the center: Power may be low; extend cooking by 10-second intervals but do not exceed 2 minutes in total to avoid dryness.
- Uneven cooking or cracked surface: Use a microwave-safe mug with straight sides and stir batter well before cooking. Avoid using plastic mugs.
- Too dense or heavy: Make sure to sift the flour and cocoa powder. also, do not overmix once wet ingredients are combined.
- Flavor imbalance: Always include the salt and vanilla to bring depth and balance, countering the sweetness and bitterness of cocoa.
Chef’s Notes
Make-ahead option: Mix dry ingredients in bulk and store in an airtight jar. When ready for brownie time, scoop 10 tablespoons of the mix into your mug, add wet ingredients fresh, and microwave.
Microwave wattage tip: If your microwave exceeds 1000 watts, reduce cook time to 1:10 for the best results. Adjust based on your appliance.
Presentation: Use a mini silicone spatula to loosen edges before serving for a neat, easy lift from the mug.
Internal link suggestion: for other speedy sweets, check out our quick No-Bake Desserts.
External resource: Learn more about microwave cooking tips from serious Eats.
Serving Suggestions
- garnish with a fresh dusting of powdered sugar or cocoa powder for a classy touch.
- Add a dollop of whipped cream or a spoonful of Greek yogurt for creaminess and contrast.
- Sprinkle chopped toasted pecans or walnuts for an earthy crunch.
- Serve alongside a bright scoop of fruit sorbet or fresh berries to cut through the richness.
- Pair with a warm cup of coffee or chai tea for the ultimate cozy combo.

| nutrient | Per Serving |
|---|---|
| Calories | 320 kcal |
| Protein | 4 g |
| Carbohydrates | 42 g |
| fat | 15 g |
Q&A
Quick & Easy Microwave Mug Brownie: Dessert in Minutes – Q&A
Q1: What makes a microwave mug brownie so special?
A1: A microwave mug brownie is the superhero of desserts-ready to rescue your sweet tooth in mere minutes! It’s a single-serving treat cooked right in a mug, eliminating the need for bowls, pans, or long baking times. Perfect for last-minute cravings or those “I need chocolate now” moments.
Q2: Can I really make a brownie in the microwave that tastes as good as a conventional one?
A2: Absolutely! While it might not have the same crispy edges as an oven-baked brownie, the microwave mug brownie is rich, fudgy, and delightfully gooey. The secret lies in the right balance of ingredients and timing. Plus, it’s warm, melty, and perfect for dunking a spoon straight in!
Q3: What basic ingredients do I need?
A3: The classic recipe calls for a few pantry staples: flour, sugar, unsweetened cocoa powder, a pinch of baking powder, a splash of milk, a bit of vegetable oil (or melted butter), and a tiny sprinkle of salt. Optional extras like chocolate chips or vanilla extract can amp up the flavor to brownie perfection.
Q4: How long does it take to cook and how do I avoid overcooking?
A4: Typically, your brownie will be ready in 40 to 90 seconds, depending on your microwave’s power.The key to avoiding a rubbery brick is to stop the microwave when the top looks just set but still soft. It continues to cook slightly in the mug once out, so err on the side of slightly undercooked for that ideal fudgy center.
Q5: Can I customize my microwave mug brownie?
A5: Oh yes! Think of your mug brownie as a blank canvas. stir in nuts for crunch,swirl in caramel or peanut butter,sprinkle with sea salt,or toss in some dried fruit. You can even experiment with flavors like espresso powder or chili flakes for an adventurous twist. Your mug, your rules!
Q6: Is it healthy or just a guilty pleasure?
A6: While it’s undeniably a dessert treat, you can tweak the recipe for a slightly healthier spin-substitute whole wheat flour, use less sugar, or add a handful of oats. But honestly,sometimes a quick indulgence is exactly what the soul craves. Moderation is key, and the speed makes it easy to enjoy just one portion!
Q7: Any tips for serving and enjoying the mug brownie?
A7: Serve it straight from the mug for that cozy “just for me” vibe. top with a scoop of vanilla ice cream, a drizzle of chocolate syrup, or a dollop of whipped cream for extra decadence. And if you’re feeling fancy, sprinkle crushed candies or a pinch of cinnamon. Ready, set, spoon!
Q8: What if I want to make multiple servings at once?
A8: Simply multiply the ingredients by the number of servings and prepare each in its own microwave-safe mug, cooking them one at a time or side-by-side if your microwave is large. quick,easy,and perfect for sharing that midnight craving-or a surprise dessert for friends!
Ready to whip up your chocolatey miracle? Your microwave and mug are waiting!
Closing Remarks
With just a few simple ingredients and mere minutes in the microwave,your craving for a rich,fudgy brownie can be satisfied anytime-no oven required. This quick & easy microwave mug brownie proves that indulgent desserts don’t have to be elaborate or time-consuming. So next time the sweet tooth strikes, reach for your favorite mug, follow these simple steps, and enjoy a warm, comforting treat that’s ready before you know it.Dessert bliss has never been this effortless!
Fresh & Easy Egg Salad Lettuce Wraps for Beginners offer a delightful blend of creamy, tangy egg salad wrapped in crisp, refreshing leaves-perfect for a light lunch or snack that feels homemade yet effortlessly elegant. Drawing inspiration from classic deli-style sandwiches,these wraps transform simple ingredients into a mouthwatering experience that’s both low-carb and packed with flavor.
prep and Cook Time
Preparation: 15 minutes | Cooking: 10 minutes | Total Time: 25 minutes
Yield
4 servings (2 wraps each)
Difficulty Level
Easy – perfect for beginners or busy weeknights
ingredients
- 6 large eggs
- 1/4 cup mayonnaise (use Greek yogurt for a healthier twist)
- 1 tsp Dijon mustard
- 1 tbsp finely chopped fresh chives
- 1/2 tsp sea salt
- 1/4 tsp freshly ground black pepper
- 1 tsp fresh lemon juice
- 8 large leaves of butter lettuce (or romaine for extra crunch)
- Optional: Paprika or smoked paprika for garnish
Choosing the Perfect Lettuce for Crisp and Flavorful Wraps
For wraps bursting with texture and freshness, selecting the right lettuce is key. Butter lettuce boasts silky-soft, pliable leaves that cradle the egg salad without tearing, making each bite smooth and luscious. If you crave more crunch, romaine hearts offer a satisfying snap and robust structure that holds fillings beautifully. Iceberg, while crisp, can be too firm and watery, detracting from the creamy filling. Always look for vibrant green, unwilted leaves; fresh lettuce elevates the entire wrap and ensures a visually appealing dish.
Crafting the Creamiest Egg Salad with Simple Ingredients
Boil eggs just right for tender whites and firm, creamy yolks. Once peeled, chop the eggs and combine with mayonnaise and dijon mustard for tang and richness. The secret to irresistibly creamy egg salad lies in balancing wet and dry textures-add lemon juice for a bright lift, while fresh chives impart a subtle oniony zing. Season thoughtfully with salt and pepper, but avoid overmixing to retain some chunks-this adds delightful texture. Remember, the simplicity of ingredients shines when quality and technique are prioritized.
Step-by-step Guide to Assembling Your Fresh Lettuce Wraps
- Prepare the eggs: place eggs in a saucepan, cover with cold water, bring to a boil, then simmer for 10 minutes. Transfer to an ice bath instantly to stop cooking and make peeling easier.
- Peel and chop: Gently peel the cooled eggs. Chop into bite-sized pieces, keeping some texture intact.
- Mix the salad: In a bowl, combine chopped eggs, mayonnaise, Dijon mustard, lemon juice, chives, salt, and pepper.Stir gently until creamy but not mushy.
- Prepare the lettuce: Rinse leaves under cold water and pat dry thoroughly. Lay them flat on a clean surface or plate.
- Assemble the wraps: Spoon a generous amount of egg salad onto the center of each lettuce leaf.For easier rolling, fold the sides inward, then roll from the bottom up.
- Garnish & serve: Sprinkle a pinch of paprika over the top for color and a slight smoky hint. arrange wraps on a platter for an inviting presentation.
Tips and Tricks for Serving and Storing Egg Salad Lettuce Wraps
Serve wraps immediately for peak crispness. Pair with fresh cucumber slices or cherry tomatoes for a vibrant, fresh plate. To store, keep the egg salad in an airtight container in the refrigerator for up to 3 days. Store lettuce leaves separately, washed and wrapped in paper towels inside a resealable bag to retain crunchiness.
For make-ahead ease, prepare the egg salad the day before and assemble just before serving. Avoid wrapping the salad tightly in lettuce in advance, preventing sogginess.Reheat isn’t recommended-these wraps shine when chilled and fresh.
Serving Suggestions
to elevate your dish, serve alongside a crisp white wine or sparkling water with a twist of lemon. Garnish the platter with edible flowers or fresh herbs like parsley or dill for added color and aroma. For a welcoming touch, offer small ramekins of pickles or olives that contrast beautifully with the creamy egg salad.

Nutritional Information
| Nutrient | Per Serving |
|---|---|
| Calories | 210 kcal |
| Protein | 12 g |
| Carbohydrates | 3 g |
| Fat | 16 g |
For a deeper dive into creative egg salad recipes, check out our Classic Egg Salad Sandwiches Guide. For additional nutrition insights on eggs, visit the U.S. department of Health and Human Services.
Q&A
Q&A: Fresh & Easy Egg Salad Lettuce Wraps for Beginners
Q1: What makes egg salad lettuce wraps a great choice for beginners?
A1: Egg salad lettuce wraps are wonderfully simple yet satisfying. They require minimal ingredients, no cooking beyond boiling eggs, and no elaborate techniques. Plus, assembling a wrap is as straightforward as layering your ingredients – perfect for those new to cooking or anyone looking for a quick, fresh meal!
Q2: How do I achieve the perfect boiled eggs for the salad?
A2: For perfectly boiled eggs, place them in a pot covered with cold water. Bring to a gentle boil, then turn off the heat and cover the pot. Let the eggs sit for about 10-12 minutes.Plunge them into ice water immediately after to stop cooking and make peeling a breeze. This method gives you firm, creamy yolks without that greenish ring.
Q3: Can I customize the egg salad to suit my taste?
A3: Absolutely! The beauty of egg salad lies in its versatility. Start with the classic base-mayonnaise, mustard, salt, and pepper-and then add your favorite extras: diced celery for crunch, fresh herbs like dill or chives for brightness, or a splash of lemon juice for zing. Feel free to experiment until it’s your perfect bite.
Q4: Why use lettuce wraps rather of traditional bread?
A4: Lettuce wraps offer a refreshing,crunchy option that keeps things light and gluten-free. They add a crisp texture and subtle flavor that complements the creamy egg salad without overpowering it. Plus, swapping bread for lettuce is a fantastic way to boost your vegetable intake effortlessly!
Q5: What type of lettuce works best for these wraps?
A5: crisp, sturdy leaves like iceberg, butter lettuce, or romaine are ideal. they hold the filling well without tearing and provide a satisfying crunch. Butter lettuce is particularly popular because its leaves are soft yet durable-like a natural,edible bowl!
Q6: Any tips for assembling the perfect lettuce wrap?
A6: Start with a dry lettuce leaf to prevent sogginess. Spoon a generous but manageable amount of egg salad onto the center, then fold or roll gently to keep everything together. Eat with your hands or a fork if you prefer less mess. For extra flair, garnish with a sprinkle of paprika or a few sprigs of fresh herbs.
Q7: Can I prepare these wraps ahead of time?
A7: You can prep the egg salad a day ahead-flavors deepen and improve overnight! Store it in an airtight container in the fridge.However, keep the lettuce leaves separate until ready to serve to avoid wilting. Assemble the wraps just before eating for maximum freshness and crunch.
Q8: Are egg salad lettuce wraps healthy?
A8: Definitely! They’re packed with protein from eggs and loaded with fresh veggies,plus fewer carbs compared to bread-based sandwiches. Using mayonnaise sparingly or substituting with Greek yogurt can further lighten the dish. These wraps make a nutrient-dense, balanced meal or snack that’s as wholesome as it is tasty.
Q9: Can I make this recipe vegan or egg-free?
A9: While classic egg salad hinges on eggs, you can get creative! Chickpea “egg” salad uses mashed chickpeas blended with vegan mayo and seasonings to mimic the texture and flavor. Pair that with crisp lettuce wraps, and you have a appetizing, plant-based alternative that beginners can also enjoy.
Q10: Where can I find inspiration for variations on this recipe?
A10: Food blogs, cooking apps, and social media platforms like Instagram or Pinterest are treasure troves of ideas. Search for “egg salad lettuce wraps” or “healthy wrap recipes” to uncover unique flavor combos, presentation tips, and beginner-friendly hacks. don’t forget: the kitchen is your canvas-have fun crafting your own signature wrap!
To conclude
whether you’re new to the kitchen or simply looking for a quick, wholesome meal, these Fresh & Easy Egg Salad Lettuce Wraps are your perfect go-to. They combine simplicity with satisfying flavor, proving that healthy eating doesn’t have to be complicated. So next time you want a light, protein-packed bite, remember that with just a few ingredients and a bit of creativity, you can whip up a dish that’s fresh, fun, and downright delicious. Happy wrapping!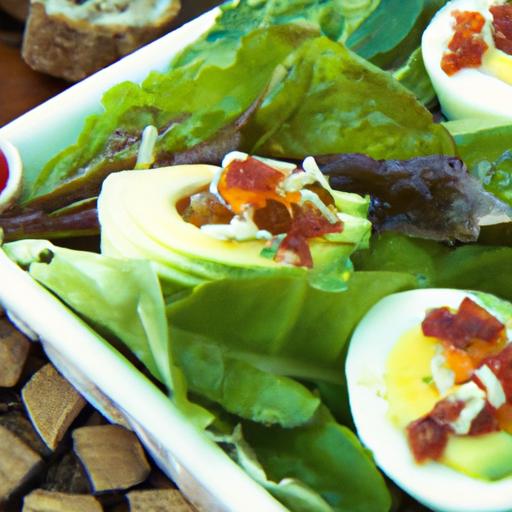
Warm up your day with easy homemade cinnamon apple juice, a timeless elixir that combines the crisp sweetness of fresh apples with the cozy, spicy embrace of cinnamon. Inspired by autumn markets and warm kitchens, this drink is more than just a beverage-it’s a comforting ritual. selecting the right apples and warming spices is the secret to unlocking a rich flavour profile that’s both vibrant and soothing. whether it’s a chilly morning or a relaxing evening, this blend promises to ignite your senses and uplift your mood.
Prep and Cook Time
- Readiness: 10 minutes
- Cooking: 40 minutes
- Total Time: 50 minutes
Yield
Serves 4 generously
Difficulty Level
Easy – perfect for beginner and seasoned home cooks alike
Ingredients
- 8 medium fresh apples (a mix of Honeycrisp and Granny Smith for balanced sweetness and tartness), quartered, core removed
- 4 cups filtered water
- 2 whole cinnamon sticks (preferably Ceylon cinnamon for authentic warmth)
- 2 whole star anise (optional, for subtle aromatic depth)
- 1/4 cup raw honey or maple syrup, adjust to taste
- 1 teaspoon fresh lemon juice (helps preserve brightness and balance sweetness)
- 1/2 teaspoon ground ginger (optional, adds gentle spice)
Instructions
- Prepare the apples: Rinse the apples thoroughly. Quarter each apple and discard the core. Leaving the skin on will add natural pectin and enhance color.
- combine in pot: Place apple quarters, cinnamon sticks, star anise, and ground ginger into a large heavy-bottomed pot. Pour in 4 cups of filtered water-just enough to cover the fruit.
- Simmer gently: Bring mixture to a gentle boil over medium heat, then reduce to low and cover. Let it simmer for 30-40 minutes, stirring occasionally to avoid scorching. The fruit should become tender and release its juices.
- Extract juice: Remove from heat and allow to cool slightly. Using a fine mesh strainer or cheesecloth set over a large bowl, press the softened apples to extract as much juice as possible. Discard or compost the pulp.
- Sweeten and brighten: Stir in raw honey or maple syrup while the juice is still warm but not boiling. add fresh lemon juice to balance the sweetness and preserve freshness.
- Final touch and warm serving: Reheat gently if needed, making sure not to boil after adding honey. Serve instantly in warmed mugs or allow to cool and refrigerate for serving chilled.
Tips for Success
- Apple selection matters: combining varieties like Honeycrisp and Granny Smith creates a complex, satisfying sweetness with balanced acidity.
- Cinnamon choice: Ceylon cinnamon offers a delicate, sweet warmth compared to Cassia’s stronger bite. Use according to your spice preference.
- Sweetener flexibility: Swap honey for pure maple syrup or agave nectar-taste as you go to achieve your preferred sweetness.
- Make ahead: Store leftover juice in an airtight container in the fridge for up to 3 days. Reheat gently on the stove or serve chilled over ice for a refreshing twist.
- Enhance texture: For a richer mouthfeel, stir in a splash of fresh apple cider vinegar or a small knob of butter when reheating.
Serving Suggestions
Pour your cinnamon apple juice into clear glass mugs to showcase its warm amber hue. Garnish with a fresh cinnamon stick,a thin slice of apple floating on top,or a twist of orange peel for added zest. This drink pairs beautifully with baked goods like cinnamon rolls or toasted spiced nuts for a full sensory experience. For colder days, serve alongside a hearty breakfast or cozy evening read to truly embrace comfort.
| Nutrient | Per serving |
|---|---|
| Calories | 110 kcal |
| Protein | 0.3 g |
| Carbohydrates | 28 g |
| Fat | 0.1 g |
| fiber | 1.8 g |

For more cozy drink recipes, check out our Homemade Winter warmers collection. Learn about the health benefits of cinnamon from this trusted medical source.
Q&A
Q&A: Warm Up Your Day with easy Homemade Cinnamon Apple Juice
Q: What makes cinnamon apple juice the perfect warm-up drink?
A: Cinnamon apple juice combines the sweet, comforting flavors of fresh apples with the spicy warmth of cinnamon. This blend not only tantalizes your taste buds but also helps to cozy up your insides, making it an ideal drink for chilly mornings or relaxing evenings.
Q: Can I use any type of apples for this recipe?
A: Absolutely! While sweeter varieties like Fuji, Gala, or Honeycrisp work beautifully to enhance the natural sweetness, a mix that includes a tart apple like Granny Smith adds a nice balance. Feel free to experiment with your favorites or what’s in season!
Q: How simple is this homemade recipe? Do I need special equipment?
A: The recipe is delightfully simple and requires minimal equipment-just a saucepan and a strainer. No fancy juicers needed! You simmer chopped apples with water, cinnamon sticks, and a touch of sweetener, then strain for pure, aromatic juice.
Q: can I customize the flavor of my cinnamon apple juice?
A: Yes! You can tweak the spice level by adding more or less cinnamon, or introduce complementary flavors like a dash of nutmeg, a slice of fresh ginger, or even a squeeze of lemon juice for brightness. The recipe is your flavorful canvas.
Q: Is this cinnamon apple juice healthy?
A: Besides tasting fantastic, this homemade juice retains many nutrients from fresh apples and the antioxidant properties of cinnamon. It’s naturally low in calories and free from preservatives or artificial additives, making it a wholesome choice.
Q: How should I serve and store this juice?
A: Serve it warm for that perfect cozy feeling,maybe with a cinnamon stick garnish. If you have leftovers, cool the juice, store it in an airtight container in the fridge, and enjoy it cold or gently reheated within 2 days for maximum freshness.
Q: Can kids enjoy this drink too?
A: Definitely! Its naturally sweet and mild spiced flavor is kid-amiable. Just ensure the juice isn’t too hot when serving to little ones.
Q: What’s the best time of day to enjoy cinnamon apple juice?
A: Morning or evening,this juice is versatile. Start your day with a warm boost or wind down after dinner with a comforting sip. It’s also great as a festive treat during the cooler months.
Warm up your day with this simple, aromatic homemade cinnamon apple juice-it’s like a hug in a glass!
Future Outlook
As the comforting aroma of cinnamon swirls through your kitchen and the sweet warmth of apple juice fills your cup, you’ve discovered more than just a simple recipe-you’ve unlocked a little ritual of cozy delight. This easy homemade cinnamon apple juice isn’t just a drink; it’s a gentle embrace on a chilly morning and the perfect companion to revive your senses any time of day. So next time you crave something both soothing and simple,remember that a blend of humble apples and a sprinkle of spice can warm your day from the inside out. Cheers to small moments of homemade happiness!
Savor Flavor: Easy Homemade Pepper Steak Recipe to Try Today is your ticket to mastering a beloved classic that transforms simple, bold ingredients into a spectacular, tender dish bursting with umami-rich essence. This recipe honors the timeless Asian-American favorite, marrying tender beef with the aromatic kick of cracked black pepper and the savory depth of a perfectly balanced sauce. Whether this dish sparks memories of family dinners or inspires your first dive into pepper steak, you’ll find each step approachable and rewarding.
prep and Cook Time
- Prep Time: 15 minutes
- Cook Time: 20 minutes
- Total Time: 35 minutes
Yield
Serves 4 hearty portions
Difficulty level
Easy - Perfect for weeknights yet impressive enough for guests
Ingredients
- 1 lb beef flank steak, thinly sliced against the grain
- 2 tbsp vegetable oil (for high-heat searing)
- 1 medium green bell pepper, julienned
- 1 medium red bell pepper, julienned
- 1 medium onion, sliced thinly
- 3 cloves garlic, minced
- 1 tbsp freshly cracked black pepper (adjust to taste)
- 2 tbsp soy sauce (low sodium preferred)
- 1 tbsp oyster sauce
- 1 tbsp cornstarch, dissolved in 3 tbsp cold water
- 1/2 cup beef broth
- 1 tsp sesame oil
- 1 tsp sugar (balances boldness)
- Salt, to taste
Choosing the Perfect Cut of Beef for Tender Pepper Steak
To achieve that melt-in-your-mouth texture, selecting the right cut is key. Flank steak is ideal for pepper steak as it’s lean yet flavorful, and slicing it thinly against the grain ensures tenderness. Other great options include sirloin or skirt steak, both offering a beautiful beefy flavor and fast cooking times. When shopping, look for deep red color with good marbling; avoid cuts that are too thick or tough, as they’ll need longer braising and won’t deliver the signature tenderness.
Mastering the Balance of Spices and Sauces for Authentic Flavor
Authenticity in pepper steak comes not just from the beef but from the harmony of sauce ingredients. The cracked black pepper adds a spicy warmth without overpowering, complimenting the umami-rich soy and oyster sauces beautifully. To get it right, incorporate a pinch of sweetness with sugar, which balances the saltiness and accentuates flavors. Fresh garlic boosts the aroma,while a splash of sesame oil at the end imparts an irresistible nutty finish. Adjust pepper intensity based on preference-from a gentle tickle to a bold blaze.
Step-by-Step Guide to Preparing and Cooking Pepper Steak at Home
- Prepare the beef: Pat the flank steak slices dry with paper towels. This helps achieve a crisp sear. Season lightly with salt and half the cracked black pepper.
- Heat the pan: Use a large cast iron skillet or wok over high heat. Add vegetable oil and swirl to coat.
- Sear the beef: Add the beef in a single layer, working in batches if necessary.Sauté for 1-2 minutes per side until browned but not fully cooked through. Remove and set aside.
- sauté the vegetables: In the same pan, add onions and bell peppers. stir-fry 3-4 minutes until tender-crisp, then add garlic and sauté 30 seconds until fragrant.
- Build the sauce: Return beef to the pan. Pour in beef broth, soy sauce, oyster sauce, sugar, remaining cracked black pepper, and stir to combine.
- Thicken the sauce: Slowly add the cornstarch slurry while stirring gently. Cook for 1-2 minutes until the sauce thickens to a glossy consistency that coats the meat and vegetables beautifully.
- Finish with sesame oil: Drizzle sesame oil over the top and give a final stir. Taste and adjust seasoning as needed.
- Serve immediately: Garnish with sliced green onions or toasted sesame seeds for extra flair.
Tips for Success
- For extra tenderness, marinate the beef in a mixture of 1 tbsp soy sauce and 1 tsp cornstarch for 15-20 minutes before cooking.
- Use a wok or cast iron skillet for optimal high-heat searing.
- If you prefer less spice, reduce black pepper but never omit; it’s the key flavor star.
- Make ahead tip: prepare the sauce and chop veggies beforehand for a quick 15-minute final meal.
- Substitute oyster sauce with mushroom sauce for a vegetarian-amiable sauce base.
Serving Suggestions and Sides to Elevate Your Pepper Steak Experience
Presentation makes the dish sing.Serve your pepper steak steaming over a bed of fluffy steamed white rice or fragrant jasmine rice to soak up every bit of the luscious sauce. For a lighter option, pair it with stir-fried greens like bok choy or snap peas tossed in garlic.A sprinkle of toasted sesame seeds and crisp green onions adds inviting color and texture. For a heartier feast, accompany with garlic mashed potatoes or a side of egg-fried rice accented with scallions and peas.

| Nutrient | Per Serving |
|---|---|
| Calories | 320 |
| Protein | 28g |
| Carbohydrates | 10g |
| Fat | 15g |
discover more flavorful beef recipes in our Best Beef Dishes Collection for your next culinary adventure.
Q&A
Q&A: Savor Flavor – Easy Homemade Pepper Steak Recipe to Try Today
Q1: What makes this homemade pepper steak recipe stand out from others?
A1: This pepper steak recipe balances bold flavors with simplicity, turning pantry staples into a savory masterpiece. Unlike complicated versions, it uses a straightforward marinade and quick stir-fry technique that locks in juicy tenderness and vibrant peppery notes, perfect for weeknight cooking without sacrificing taste.
Q2: Which cut of beef works best for pepper steak?
A2: For tender, flavorful results, flank steak or sirloin strips are ideal. These cuts have just the right amount of marbling and texture to soak up the marinade while staying juicy and tender during quick cooking-no chewy surprises hear!
Q3: How do bell peppers enhance the dish? Can I substitute them?
A3: Bell peppers add freshness, color, and a subtle sweetness that contrasts delightfully with the savory beef and black pepper kick. You can experiment with red, green, or yellow peppers, or even try poblano or anaheim peppers for a smoky twist-each brings its own personality to the plate.
Q4: What’s the secret to achieving that perfect peppery punch?
A4: Freshly cracked black pepper is the star here.Toss it generously both in the marinade and during the final stir-fry. This layering approach ensures the pepper flavor is vibrant and aromatic,giving you that signature spicy warmth without overpowering the other ingredients.
Q5: Can this recipe be made ahead of time?
A5: Absolutely! Marinate the beef strips overnight to deepen the flavors, then simply stir-fry with peppers when ready. It’s a great strategy for busy schedules, so dinnertime feels effortless yet impressive.
Q6: What sides pair well with homemade pepper steak?
A6: Steamed jasmine rice or buttery mashed potatoes are classic companions that soak up the rich sauce beautifully. For a lighter option, try sautéed greens or a crisp cucumber salad to add refreshing contrast.Q7: how can I make this recipe gluten-free?
A7: Simply swap soy sauce for tamari or coconut aminos to keep the savory umami intact without gluten. This adjustment makes the dish accessible for various dietary preferences while preserving its authentic flavor profile.
Q8: Any tips for cooking the beef perfectly?
A8: High heat and quick cooking are key! Sear the beef strips just until browned and slightly pink inside to avoid toughness.Overcrowding the pan can cause steaming instead of searing, so cook in batches if needed for that restaurant-quality crust.
Q9: Can I add other vegetables to this pepper steak?
A9: Definitely! Onions, snap peas, mushrooms, or even baby corn can elevate the dish with additional textures and flavors. Just add them according to their cooking times to maintain crisp-tender freshness.
Q10: What inspired this easy homemade pepper steak?
A10: This recipe is a party of classic Asian-inspired flavors simplified for home cooks craving bold taste without hours in the kitchen. It’s about transforming everyday ingredients into a satisfying,flavor-packed dish that invites everyone to savor each bite.
In Retrospect
With its vibrant blend of tender beef, crisp peppers, and savory sauce, this easy homemade pepper steak recipe invites you to bring bold flavors to your dinner table without the hassle. Whether you’re a seasoned cook or just starting your culinary journey, savoring this dish is a delicious way to elevate everyday meals.So grab your skillet, embrace the sizzle, and let this recipe inspire your next flavorful adventure-because great taste should always be within reach.
Quick & Easy Gluten-Free Beef stir Fry Recipe to Savor
Embark on a culinary adventure with this quick & easy gluten-free beef stir fry recipe to savor, a perfect balance of tender beef, vibrant vegetables, and rich, bold flavors that come together in minutes. Inspired by traditional asian stir-frying techniques, this dish embraces simplicity without sacrificing depth, making it an irresistible weeknight favorite.
Prep and Cook Time
Preparation: 15 minutes | Cooking: 10 minutes | Total: 25 minutes
Yield
Serves 4 generous portions
difficulty Level
Easy – perfect for both beginners and seasoned cooks seeking a speedy meal
Ingredients
- 1 lb (450g) beef skirt steak or flank steak, thinly sliced against the grain
- 2 tbsp tamari (gluten-free soy sauce)
- 1 tbsp toasted sesame oil
- 1 tbsp fresh ginger, finely grated
- 3 cloves garlic, minced
- 1 medium red bell pepper, thinly sliced
- 1 cup snap peas, trimmed
- 2 scallions, thinly sliced diagonally
- 1 tbsp cornstarch
- ½ cup gluten-free beef broth
- 1 tbsp honey or maple syrup
- 1 tbsp rice vinegar
- 2 tbsp vegetable oil (for high-heat cooking)
- 1 tsp toasted sesame seeds (optional, for garnish)
- Fresh cilantro leaves for garnish (optional)
Step-by-Step Guide to Achieving the Ultimate Quick Stir Fry
- Prepare the beef: Toss the thinly sliced beef with cornstarch in a bowl. This coating seals in moisture, ensuring your beef stays tender and juicy during the high-heat stir fry.
- Mix the sauce: In a separate bowl, whisk together tamari, gluten-free beef broth, honey, rice vinegar, and sesame oil. Set aside.
- Heat the wok or skillet: Place a large wok or heavy skillet over high heat. Once hot, add vegetable oil, swirling to coat evenly.
- Cook the beef: Add the beef in a single layer, letting it sear undisturbed for 1 minute, then stir-fry for another 1-2 minutes until browned but still tender. Remove beef and set aside to avoid overcooking.
- Sauté aromatics: Lower heat to medium-high. add ginger and garlic to the wok, stirring for 30 seconds until fragrant without burning.
- Quick cook veggies: Toss in bell pepper, snap peas, and scallions. Stir-fry for 2-3 minutes, keeping veggies crisp and vibrant.
- Combine and finish: Return beef to the wok, pour the sauce over the mixture, and toss everything together. Cook for 2 minutes, letting the sauce thicken slightly and coat the ingredients luxuriously.
- Serve immediately: Remove from heat. Sprinkle with toasted sesame seeds and fresh cilantro for an aromatic finish.
Selecting the Perfect Cuts of Beef for Tender and Flavorful Stir Fry
choosing the right cut is pivotal for a satisfying texture. flank steak and skirt steak are champions for stir-fry-they absorb marinades beautifully and remain tender when sliced thin against the grain. For an even more delicate bite, consider top sirloin or ribeye if you prefer a richer fat content. Avoid tougher cuts like chuck, as their fibers can get chewy with quick cooking.
Essential Gluten-Free Ingredients to Boost Taste and Texture
To make your stir fry authentically flavorful yet gluten-free, tamari is indispensable-offering a deep, savory umami without the wheat of traditional soy sauce. Incorporate gluten-free beef broth to add lusciousness and enhance depth. Cornstarch is your secret weapon for silky sauce consistency, while toasted sesame oil introduces a nutty aroma that elevates every bite. sweetness from natural honey or maple syrup balances salty and acidic notes for a harmonious taste.
Expert Tips for customizing Your Stir Fry with Fresh Vegetables and Sauces
The beauty of this dish lies in its versatility. Swap the classic bell peppers and snap peas for crunchy broccoli florets, tender asparagus, or thinly sliced carrots for color and contrast. Experiment with sauce bases by adding chili flakes for heat, or infuse citrus zest for brightness. Fresh herbs like Thai basil or mint can add unexpected freshness. Remember, vibrant veggies improve both texture and visual appeal, so aim for a rainbow on your plate.
Chef’s Notes and Tips for success
- Marinate briefly: For extra tenderness, marinate the beef in half the tamari and ginger for 15 minutes before cooking.
- Don’t overcrowd the pan: Stir fry in batches if needed. Overcrowding causes steaming, not searing.
- Prepare all ingredients beforehand: Stir fry moves fast! Mise en place is key to flawless execution.
- Gluten-free alternatives: If you lack tamari, coconut aminos are a flavorful, allergy-pleasant option.
- Make-ahead: Chop veggies and slice beef up to a day early. store separately and combine just before cooking.
Serving Suggestions
Serve this vibrant stir fry over steaming jasmine rice or gluten-free rice noodles for a heartwarming meal. Garnish with fresh cilantro and a sprinkle of toasted sesame seeds for pops of color and texture. A wedge of lime on the side adds a zesty twist that awakens the palate. For a low-carb option,plate alongside cauliflower rice or sautéed leafy greens.

| Nutrient | Per Serving |
|---|---|
| Calories | 320 |
| Protein | 35g |
| Carbohydrates | 15g |
| Fat | 12g |
For more gluten-free stir fry inspirations, check out our Gluten-Free Chicken Stir Fry Recipe. Want to know more about the health benefits of lean beef? Explore nutrition insights from Beef. It’s What’s For Dinner.
Q&A
Q&A: Quick & Easy Gluten-Free Beef Stir Fry Recipe to savor
Q1: What makes this beef stir fry recipe gluten-free?
A1: This recipe swaps traditional soy sauce, which frequently enough contains gluten, for tamari or coconut aminos-both naturally gluten-free alternatives.Plus, it avoids other hidden gluten sources like certain marinades or pre-packaged sauces, ensuring every bite is safe and delicious.
Q2: How can I make this stir fry so quick?
A2: The secret lies in prepping all your ingredients ahead of time-thinly sliced beef, chopped veggies, and a simple, speedy sauce. Using high heat and a hot wok or skillet sears the beef fast while keeping it tender. The stir-fry technique itself cooks everything in minutes, perfect for a weeknight meal.
Q3: What cuts of beef work best for this recipe?
A3: Choose tender, quick-cooking cuts like flank steak, sirloin, or skirt steak. These thinly sliced cuts absorb the flavors well and cook rapidly, making them ideal for a stir fry that’s both flavorful and fuss-free.
Q4: Can I customize the vegetables in the stir fry?
A4: Absolutely! Feel free to swap in your favorites-bell peppers, snap peas, broccoli, carrots, or mushrooms all work beautifully. The key is to slice them evenly so they cook quickly and maintain some crispness for that perfect texture contrast.
Q5: How do I prevent my beef from becoming tough or chewy?
A5: Quick cooking on high heat is vital. Also,marinating the beef briefly in a mixture of gluten-free sauce,a little cornstarch,and a touch of oil helps tenderize the meat and lock in moisture,delivering tender strips every time.
Q6: Is this recipe suitable for meal prep?
A6: Yes! This stir fry reheats beautifully and stays flavorful for a couple of days in the fridge. for best texture, store sauce, beef, and veggies together, then reheat quickly in a hot pan to revive that fresh-from-the-wok sizzle.
Q7: What sides pair well with this gluten-free beef stir fry?
A7: Steamed jasmine or brown rice, cauliflower rice for a low-carb twist, or even gluten-free noodles complement the stir fry perfectly. A side of fresh cucumber salad or pickled veggies can add a refreshing crunch to round out your meal.
Q8: Any tips for enhancing the flavor without extra gluten?
A8: Boost your stir fry with fresh garlic, ginger, a splash of rice vinegar or lime juice, and a sprinkle of toasted sesame seeds or chopped scallions at the end. These naturally gluten-free flavor bombs create depth and brightness to savor in every bite.
To Wrap It up
With just a handful of simple ingredients and minimal prep, this quick and easy gluten-free beef stir fry proves that delicious meals don’t have to be complicated or time-consuming. Whether you’re cooking for a busy weeknight or impressing guests with a wholesome dish, this recipe brings savory satisfaction to your table without the gluten worries. So next time hunger strikes, let this vibrant stir fry be your go-to solution-healthy, hearty, and bursting with flavor in every bite. Happy cooking and even happier savoring!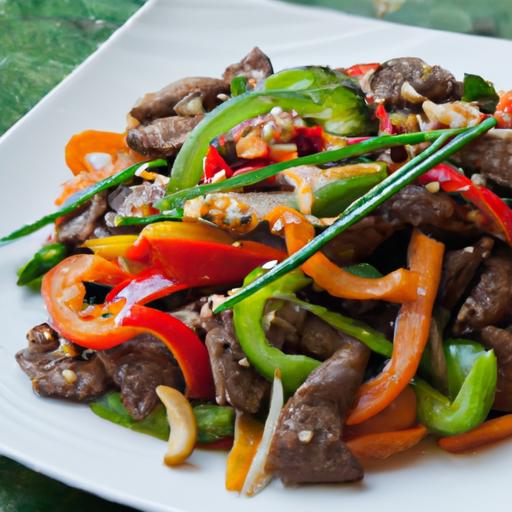
Easy Sweet Treats are a wonderful way to dive into the world of desserts without feeling overwhelmed. Whether you’re just beginning your baking journey or looking for quick, fuss-free creations, understanding how to select the right ingredients and master simple techniques will transform your kitchen into a haven of delicious possibilities. From perfectly ripe fruits to pantry staples like powdered sugar and vanilla extract,each component plays an essential role in achieving effortless dessert success.
Prep and Cook Time
Preparation: 15 minutes Cooking/Baking: 20 minutes (or no-bake for select recipes)
Yield
Serves 6 delicious portions
Difficulty Level
Easy – Perfect for beginners and busy home cooks
Ingredients
- 1 cup all-purpose flour, sifted
- ½ cup powdered sugar, sifted
- ½ tsp baking powder
- ¼ tsp salt
- ½ cup unsalted butter, chilled and cubed
- 1 large egg, room temperature
- 1 tsp pure vanilla extract
- 1 cup heavy cream
- 2 tbsp granulated sugar
- Fresh berries (blueberries, strawberries, raspberries) for topping
- 2 tbsp cocoa powder (optional, for creative twist)
- Honey or maple syrup for drizzle
Instructions
- Prepare your base: In a large bowl, whisk together the sifted flour, powdered sugar, baking powder, and salt until uniformly combined. This ensures no lumps and a smooth dessert foundation.
- Cut in the butter: Add the chilled, cubed butter to the dry ingredients. Using a pastry cutter or your fingertips, blend until the mix resembles coarse crumbs with pea-sized pieces of butter remaining. This method creates a tender texture once baked.
- Mix wet ingredients: In a separate bowl, beat the egg with vanilla extract. Gradually add this to the dry mix, stirring gently until the dough just comes together. Avoid over-mixing to keep the dessert light.
- Chill the dough: Wrap your dough in plastic wrap and refrigerate for 30 minutes. This prevents spreading and enhances texture.
- Bake or no-bake option: For baked delights, preheat your oven to 350°F (175°C). Shape dough into your desired forms and bake on a parchment-lined sheet for 15-20 minutes or until golden at the edges. for no-bake, skip baking and prepare whipped cream topping.
- Whip the cream: In a chilled bowl, pour the heavy cream and slowly add granulated sugar. Whisk until soft peaks form. For a creative twist, fold in cocoa powder for a rich mocha flavor.
- Assemble your dessert: Once the base has cooled, spread the whipped cream gently on top. Artistically arrange fresh berries, then finish with a drizzle of honey or maple syrup for added shine and natural sweetness.
- Final touches: Garnish with a sprinkle of powdered sugar or finely chopped nuts for texture contrast.Serve immediately or chill for 15 minutes to let flavors meld beautifully.
Tips for Success
- For buttery richness, always use cold butter and handle dough minimally to avoid toughness.
- Substitute heavy cream with coconut cream for a dairy-free alternative, enhancing tropical flavors.
- if your dough feels sticky, chill longer or lightly flour your hands before shaping.
- Make-ahead: the baked bases can be stored in an airtight container up to 3 days; whip cream fresh to retain fluffiness.
- Need a gluten-free option? Use a 1:1 gluten-free baking flour blend instead of all-purpose flour.
Serving Suggestions
Present these sweet treats on a rustic wooden board or a clean white platter to highlight the vibrant colors of the fresh berries and creamy toppings. Enhance the visual appeal by adding edible flowers or mint sprigs. Pair with a light herbal tea or a chilled glass of sparkling lemonade for a refreshing balance.

| Nutrient | Amount per serving |
|---|---|
| Calories | 280 kcal |
| Protein | 4 g |
| Carbohydrates | 32 g |
| Fat | 14 g |
For more detailed guidance on selecting quality ingredients, visit Serious Eats’ ingredient guide. to explore additional recipes perfect for beginners, check out our step-by-step baking techniques page.
Q&A
Q&A: Easy Sweet Treats – Simple Dessert Recipes for Beginners
Q1: Why should beginners start with simple dessert recipes?
A1: Diving into the world of baking and sweet treats can feel overwhelming, but starting simple builds confidence and skills without the stress. Easy recipes focus on fundamental techniques and common ingredients, making the process enjoyable rather than intimidating.Plus, there’s nothing quite like the joy of biting into a homemade dessert you whipped up yourself!
Q2: What are some key ingredients to keep on hand for beginner-friendly desserts?
A2: Stocking your pantry with basics like flour, sugar, baking powder, eggs, butter, vanilla extract, and cocoa powder sets you up for success. These versatile staples form the base of countless sweet treats-from cookies and brownies to cakes and puddings-so you’re ready to whip up something delicious at a moment’s notice.
Q3: Can beginners really make delicious desserts without fancy equipment?
A3: Absolutely! Many simple sweet treats require little more than mixing bowls, a whisk or spoon, a baking pan, and an oven or refrigerator. no stand mixer or intricate gadgets needed. Recipes that embrace minimal tools make the journey smoother and less daunting for newbies.
Q4: What’s a foolproof dessert recipe for someone just starting out?
A4: A classic chocolate chip cookie recipe is the quintessential beginner dessert. It’s forgiving,quick to make,and tastes like a warm hug. The steps are straightforward-mix, scoop, bake-and the result is a crowd-pleaser. Plus, once you master cookies, you can experiment with add-ins and flavors!
Q5: How can beginners avoid common dessert-making mistakes?
A5: Patience and precision are key. Measure ingredients carefully, follow the recipe steps in order, and don’t rush baking times. It’s also helpful to prepare all ingredients beforehand (called mise en place) so nothing gets missed or added too early. Remember, practice makes perfect, and every “oops” is a learning experience that sweetens your skills.Q6: What role does creativity play in simple dessert recipes?
A6: Creativity turns a basic recipe into your personal masterpiece. Once you grasp the fundamentals, try swapping chocolate chips for dried fruit, adding a sprinkle of sea salt, or drizzling caramel on top. Personal touches make desserts uniquely yours and keep the adventure deliciously fun!
Q7: Are no-bake desserts good starting points for beginners?
A7: Definitely! No-bake treats like fridge-set cheesecakes, mousse, or layered parfaits eliminate the oven hassle and lower the risk of overbaking. They often come together faster and allow you to focus on assembling flavors and textures-wich is a fantastic way to build dessert confidence.
Q8: How can beginners get inspired to keep exploring dessert recipes?
A8: Inspiration flows from tasting, experimenting, and sharing. Follow baking blogs, watch tutorial videos, or join friendly baking groups online.Sharing your creations with friends and family fuels motivation.Don’t be afraid to try new recipes and have fun-each dessert is a sweet step on your delicious journey!
To Wrap It Up
Whipping up delightful desserts doesn’t have to be daunting. With these easy sweet treats, even beginners can step confidently into the kitchen and create mouthwatering delights that impress and satisfy. Remember, the sweetest success comes from simple steps and a sprinkle of creativity. So next time a craving strikes, don’t hesitate-grab your ingredients, follow these approachable recipes, and enjoy the magic of homemade desserts made just for you. Happy baking!