Quick & Fluffy: Mastering Microwave Scrambled Eggs Fast hinges on selecting the right tools carefully. While it might seem trivial, the choice of bowl plays a pivotal role in achieving that perfect, airy texture you crave with every fluffy bite. Opt for a microwave-safe glass or ceramic bowl with sloped sides-it allows the eggs to expand evenly and helps retain moisture, ensuring the fluffiness doesn’t escape during cooking. Avoid metal or dark-colored containers, as they interfere with microwave waves, causing uneven cooking and a rubbery finish.
Why the Right Bowl Matters for Microwave Scrambled Eggs
Using a bowl with ample space-ideally one that can comfortably hold at least 2 cups-provides room for the eggs to rise and swirl while cooking. The smooth interior also aids quick cleanup and prevents eggs from sticking, preserving their tender texture. This small detail dramatically influences how your eggs fluff up, making even novice cooks feel like pros.
Secrets to Achieving Perfect Fluffiness Every Time
The foundation of flawless microwave scrambled eggs lies in the mixing technique. Whisk your eggs thoroughly until the yolk and whites are fully blended,introducing air that acts as a natural leavening agent during cooking. Adding a splash of milk or cream (about 1 tablespoon per 2 eggs) lightens the mixture further, inviting that melt-in-your-mouth silkiness. Season with salt just before microwaving to avoid drawing out excess water, which can weigh down the fluff.
Creative Additions to Elevate Your Microwave Scrambled Eggs
Imagine your microwave scrambled eggs fast transforming into a gourmet moment by adding vibrant flavors or textures. Stir in finely chopped herbs like chives or parsley before cooking for a fresh burst of color.Grated cheese-sharp cheddar or creamy feta-melts into pockets of savory indulgence throughout the fluff. For seasoning, a hint of smoked paprika or a dash of hot sauce can introduce depth without extra effort. Leftover veggies, diced tomatoes, or precooked sausage bits add welcoming contrasts, making the dish uniquely yours.
Timing and Power Settings for Consistent, Fast Results
Mastery lies in microwave settings: cook on medium power (50-70%) for 30-second intervals, stopping to stir gently each time. This technique prevents overcooking and promotes even fluffiness by redistributing heat and air pockets.Expect about 1-2 minutes total for 2 eggs-a perfect balance of speed and texture. If you undercook slightly, residual heat finishes the process without drying out your eggs. Avoid high power settings, which can quickly turn eggs rubbery and dense.
Prep and Cook Time
- Planning: 3 minutes
- Cooking: 2 minutes
- Total Time: 5 minutes
Yield
Serves 1 hungry individual (adjust ingredients accordingly for more servings)
Difficulty Level
Easy – perfect for beginners and those pressed for time
Ingredients
- 2 large eggs, preferably room temperature
- 1 tablespoon milk or cream (whole or plant-based)
- Salt and freshly ground black pepper, to taste
- 1 teaspoon butter or oil (optional, for richness)
- Fresh herbs (such as chives, parsley), finely chopped, optional
- Grated cheese (cheddar, feta, or your choice), optional – ~2 tablespoons
- Diced veggies or cooked meat bits (mushrooms, tomatoes, bacon), optional – 2 tablespoons
Instructions
- Crack the eggs into your chosen microwave-safe bowl. Add milk, salt, and pepper.
- Whisk vigorously with a fork or small whisk until mixture is pale yellow and frothy.
- Stir in optional add-ins like herbs, cheese, or veggies to personalize your scramble.
- Microwave on medium power for 30 seconds. Remove and gently stir to redistribute the cooking eggs and air pockets.
- Repeat microwaving in 15- to 30-second intervals, stirring in between, until eggs are almost set but still slightly glossy and soft.
- Let eggs rest for 30 seconds; residual heat will complete cooking, preserving moisture and fluff.
- Garnish and serve immediately for peak fluffiness and warmth.
Tips for Success
- Mix thoroughly: The more air incorporated during whisking, the fluffier the eggs become.
- control seasoning timing: Salt early if you prefer a firmer texture; salt later for creamier eggs.
- Adjust microwave power: Every oven differs; experiment with 50-70% power levels initially.
- Try different milks or cream: For a vegan or dairy-free option, use oat or almond milk.
- Make ahead: You can pre-chop add-ins and pre-mix eggs for a quick morning assembly.
Serving Suggestions
Plate your eggs with a vibrant sprinkle of fresh herbs or a few halved cherry tomatoes to uplift the presentation. Pair with toasted sourdough or a buttered English muffin to introduce crunch and soak up silky bits. Drizzle a touch of hot sauce or a dollop of avocado crema for creaminess and a spicy kick. For a brunch-worthy touch, layer your fluff atop wilted spinach or crispy bacon. Photograph your creation with natural light to capture its inviting golden hues and fluffy texture-the perfect visual appetiser!

| Nutrient | Per Serving |
|---|---|
| Calories | 180 kcal |
| Protein | 12 g |
| Carbohydrates | 2 g |
| Fat | 14 g |
For more quick microwave recipes that complement your fluffy eggs, check out our Microwave Breakfast Ideas. For in-depth understanding on the science behind egg fluffiness, visit the Serious Eats guide.
Q&A
Q&A: Quick & Fluffy - Mastering Microwave Scrambled Eggs Fast
Q1: Why choose microwave scrambled eggs over the traditional stovetop method?
A1: Microwave scrambled eggs are all about speed without sacrificing fluffiness. Perfect for mornings when you’re racing the clock, the microwave whips up tender, creamy eggs in under two minutes, freeing you from the stall of waiting while hungry stomachs grumble.Plus, less cleanup means more time to savor your breakfast.
Q2: How do you achieve that coveted fluffiness in microwave scrambled eggs?
A2: The secret lies in the gentle cooking bursts and a touch of dairy. Whisking in a splash of milk or cream before microwaving introduces moisture and fat, which tenderize the eggs. Cooking in short intervals, like 20-30 seconds at a time, lets the curds form slowly, keeping them soft rather than rubbery.
Q3: Can I customize my microwave scrambled eggs with add-ins, or will that compromise cooking?
A3: Absolutely! chopped veggies, shredded cheese, or herbs can be stirred in either before or midway through cooking. Just be mindful of moisture-rich ingredients; they might release water that impacts texture. Adding them mid-cook gives better control to prevent sogginess while still infusing your eggs with flavour.
Q4: WhatS the best type of dish to use in the microwave for scrambling eggs?
A4: A microwave-safe, shallow, and wide dish works wonders. It helps eggs cook evenly and quickly by spreading them out in a thin layer. Avoid deep bowls, which trap steam and can make eggs dense or unevenly cooked.
Q5: How do I avoid overcooked rubbery scrambled eggs in the microwave?
A5: Keep a close eye and embrace the “stop-and-stir” technique. Pause cooking every 20-30 seconds to gently stir the eggs, redistributing heat and halting carryover cooking from residual heat. Pull them out just before they seem fully done-the residual warmth will finish the job,ensuring tender fluffiness.
Q6: Are microwave scrambled eggs as nutritious as stovetop ones?
A6: Nutritionally, yes! eggs cooked in a microwave retain their protein, vitamins, and minerals just and also stovetop versions. The quick cooking time can actually help preserve some nutrients sensitive to prolonged heat exposure. Just watch the added ingredients-heavy cream or excessive cheese can sneak in extra calories.
Q7: What’s a fun twist to try when mastering microwave scrambled eggs?
A7: Experiment with international flair! Throw in a pinch of smoked paprika and diced chorizo for a Spanish vibe, or stir in diced tomatoes, cilantro, and a squeeze of lime for a quick Mexican-style scramble. The microwave makes it easy to play around and personalize your fluffy masterpiece with minimal fuss.
–
Mastering microwave scrambled eggs is like discovering a culinary superpower: lightning-fast, effortlessly fluffy, and endlessly adaptable. Once you nail the technique, mornings will never be the same again!
To Conclude
Whether you’re racing the morning clock or simply craving a warm, fluffy bite in minutes, mastering microwave scrambled eggs is a game-changer. With just a few simple steps and a trusty microwave, you can transform basic ingredients into a protein-packed masterpiece-quickly, effortlessly, and without sacrificing taste or texture. So next time hunger strikes and time’s tight, remember that fluffy, tasty scrambled eggs are just a microwave beep away. Happy cooking, and hear’s to mastering speedy breakfasts that fuel your day with ease!
Sip & Refresh: Quick Juice Recipes for a Fast Detox Boost unlock the true power of fresh ingredients, harnessing their natural nutrients to cleanse and energize your body and mind. Drawing from years of culinary creativity and food styling expertise, I’ve discovered that vibrant, nutrient-dense juices not only taste amazing but also fuel your wellness journey with every sip. Imagine a burst of citrus mingling effortlessly with crisp greens or the subtle sweetness of beetroot brightening your afternoon-simple, quick, and packed with flavor.
Prep and Cook time
Preparation: 10 minutes
Juicing: 5 minutes
Total Time: 15 minutes
Yield
2 servings (12-14 oz each)
Difficulty level
Easy
Ingredients
- 2 medium organic carrots, peeled and chopped
- 1 large green apple, cored and sliced
- 1 cup fresh spinach, washed and packed
- 1 small cucumber, peeled if not organic, chopped
- 1-inch piece fresh ginger, peeled
- ½ lemon, peeled
- ½ cup cold filtered water (optional, for a lighter consistency)
- ice cubes (optional, for serving)
Instructions
- Prepare your ingredients by washing thoroughly and chopping into manageable pieces for your juicer.
- Juice the carrots first, as they add a naturally sweet base that balances the greens beautifully.
- Follow with apple slices to add crispness and natural sweetness.
- Add spinach and cucumber to pack in chlorophyll and hydration, essential for detox nourishment.
- include the fresh ginger and lemon to elevate the juice with a bright, refreshing zing that aids digestion.
- If you prefer a lighter juice or a slightly thinner texture, stir in cold filtered water gently after juicing to maintain vibrancy without diluting flavor.
- Pour over ice cubes in your favorite glass for a refreshing chill, perfect to sip as a cleansing pick-me-up.
Chef’s Notes
- To maximize nutrient absorption and keep juices fresh longer, consume within 24 hours; store in an airtight glass container in the refrigerator.
- Swap out spinach for kale to increase iron content but adjust to taste since kale has a more robust flavor.
- For an antioxidant boost, add a handful of fresh parsley or a pinch of turmeric powder into the juicer.
- if you don’t have a juicer,blend all ingredients with water and strain through a fine mesh for a similar effect.
- Making juice ahead? Fill your container to the brim to minimize oxidation and cover tightly with a lid or cling wrap.
Serving Suggestions
Serve this juice chilled in a tall glass rimmed with a slice of lemon or a sprig of fresh mint to complement the zesty notes. Pair with a light, protein-rich breakfast such as Greek yogurt topped with chia seeds or a handful of raw nuts to sustain energy throughout your morning detox routine. For an Instagram-worthy presentation, garnish with an edible flower and a colorful reusable straw.
| Nutrient | Amount per Serving |
|---|---|
| Calories | ninety-five |
| Protein | 2 grams |
| Carbohydrates | 22 grams |
| Fat | 0.3 grams |
| Vitamin C | 45% DV |
Discover more about the transformative benefits of juicing in our Ultimate Guide to green Juices for Health, and explore scientific insights at the American Society for Nutrition.

Q&A
Q&A: Sip & Refresh – Quick Juice Recipes for a Fast Detox Boost
Q1: What exactly is a detox juice, and how does it help the body?
A1: Think of a detox juice as a revitalizing potion crafted from nature’s freshest fruits and veggies. These juices flood your system with vitamins, minerals, and antioxidants that support your liver, kidneys, and digestive system-your body’s natural detox squad. By gently flushing out toxins and boosting hydration, they leave you feeling lighter, clearer, and energized.
Q2: Why choose quick juice recipes over traditional detox methods?
A2: In today’s fast-paced world, simplicity is king. Quick juice recipes offer maximum nourishment with minimal prep time-like a wellness shortcut. They’re perfect for busy mornings, midday pick-me-ups, or anytime you need a refreshing boost without committing to a full-day cleanse.
Q3: what are some key ingredients to look for in a fast detox juice?
A3: Vibrant greens like spinach and kale are packed with chlorophyll to help purify the blood. Citrus fruits such as lemon and grapefruit add zing and vitamin C to turbocharge immunity. Cucumber and celery provide hydration and a cooling effect, while ginger and turmeric lend anti-inflammatory magic. Combine these powerhouses for a juice that’s as tasty as it is transformative.
Q4: Can quick juice recipes replace meals during a detox?
A4: While these juices are nutrient-dense, they’re best seen as supplements rather then meal replacements-especially if you’re active or have specific dietary needs. Think of them as delicious sidekicks that support your meals and boost your day, not full-on supermeals.
Q5: How often should I sip on detox juices to feel the benefits?
A5: Consistency is key.Starting with one refreshing juice a day can awaken your system and brighten your mood. If you enjoy the ritual, integrating these juices 3-4 times a week can amplify detox benefits without overwhelming your body.
Q6: Any tips for making quick juice recipes even more effective?
A6: Absolutely! Use organic produce when possible to avoid unneeded chemicals. Drink immediately after juicing to capture peak freshness and nutrients. And don’t forget to listen to your body-hydrate, rest, and embrace the vibrant energy that comes with your sip & refresh journey.
Q7: Can kids or sensitive stomachs enjoy detox juices?
A7: Yes-with a gentle approach! Opt for milder, sweeter ingredients like apple and carrot, and keep acidic components light. it’s always wise to introduce new foods gradually and consult a healthcare provider if you have concerns.
Q8: What’s a simple starter juice recipe for beginners?
A8: Here’s a quick favorite: Blend 1 cucumber, 2 celery stalks, 1 green apple, a small handful of spinach, and the juice of half a lemon. Strain if desired, chill with ice, and sip your way to brightened energy and gentle detoxification.
Embrace the sip, refresh your spirit, and let these quick juice recipes become your secret weapon for a fast, delicious detox boost!
The Way Forward
As you embark on your journey to wellness, remember that a quick sip can often be the most powerful reset. These simple juice recipes are more than just drinks-they’re vibrant bursts of nature’s vitality, designed to cleanse, refresh, and invigorate your body in minutes. So next time you need a fast detox boost,reach for a glass of liquid sunshine and let the wholesome flavors revitalize your day. Cheers to sipping smart and feeling fabulous!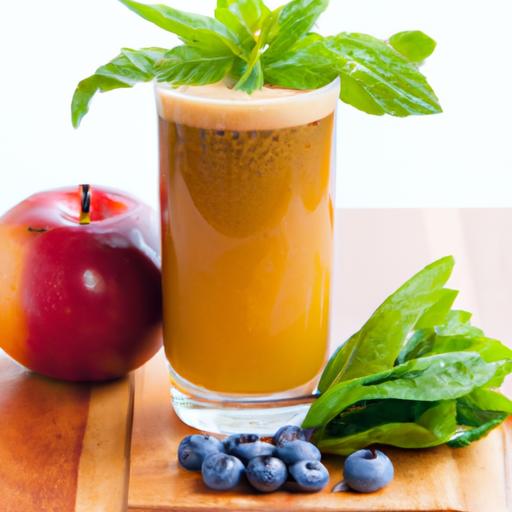
Quick & Tasty homemade Pepper Steak: Simple Recipe Guide
Quick & Tasty Homemade Pepper Steak is a culinary gem that brings together tender cuts of beef and the vibrancy of freshly cracked black pepper, creating a dish bursting with bold, comforting flavors. This classic stir-fry, rooted in Western adaptations of Asian cuisine, has become a go-to for flavorful weeknight dinners, combining speed with satisfaction. Whether you’re a seasoned home cook or just starting out, mastering this recipe offers both ease and delight at your dining table.
Prep and Cook Time
- Preparation: 15 minutes
- Cooking: 10 minutes
- Total Time: 25 minutes
Yield
Serves 4 hearty portions
Difficulty Level
Easy to Medium – perfect for busy evenings but remarkable enough for guests
Ingredients
- 12 oz flank steak, thinly sliced against the grain
- 2 tbsp vegetable oil, divided
- 1 large green bell pepper, sliced into thin strips
- 1 medium onion, thinly sliced
- 3 cloves garlic, finely minced
- 1 tbsp freshly cracked black pepper (adjust for desired heat)
- 3 tbsp soy sauce
- 2 tbsp oyster sauce
- 1 tbsp cornstarch
- 1/4 cup beef broth or water
- 1 tsp sugar
- Optional: 1 tsp toasted sesame oil for finishing
instructions
- Prepare the steak: Toss the thinly sliced flank steak with 1 tablespoon cornstarch and a pinch of salt. This helps seal juices and gives the beef a velvety texture after cooking.
- Make the sauce: In a small bowl, whisk together soy sauce, oyster sauce, beef broth, sugar, and half the cracked black pepper. Set aside.
- Heat the wok or large skillet: Add 1 tablespoon of vegetable oil over high heat until shimmering but not smoking. This intense heat ensures a perfect sear.
- stir-fry the steak: Add the beef in a single layer, letting it sear undisturbed for 30 seconds before tossing.Stir-fry until just browned but still tender, about 2-3 minutes. Remove and set aside.
- cook the aromatics and vegetables: Add remaining oil. Sauté minced garlic, onions, and bell peppers until crisp-tender, about 3 minutes, stirring constantly to preserve their vibrancy.
- Combine & finish: Return steak to the skillet. pour in the prepared sauce and add the remaining cracked black pepper. Toss to coat, stirring frequently until the sauce thickens, about 1-2 minutes. If the sauce is too thick, add a splash of broth.
- Optional touch: Drizzle with toasted sesame oil for a subtle nutty aroma before serving.
Chef’s Notes & Tips for Success
- Choosing the perfect cut: Flank steak or sirloin thinly sliced lies at the heart of tender Quick & Tasty Homemade Pepper Steak.Both soak up sauce beautifully without losing texture.
- Balance bold flavors: Freshly cracked black pepper dominates this dish, so don’t skimp for that signature zing. Adjust the amount to your spice comfort level.
- Marinate for 10 minutes: For extra flavor infusion, marinate the steak with soy sauce and pepper before cooking.
- Quick stir-frying: Use high heat with continuous tossing to prevent steaming. Work in batches if your pan feels crowded.
- Perfect sauce consistency: The key is patience-allow the sauce to bubble and thicken gently without burning to achieve a luscious coating for the beef and veggies.
- Make-ahead: Slice veggies and steak ahead of time. The sauce can be mixed in advance as well.
Serving Suggestions
Serve this luscious pepper steak over a bed of steamed jasmine rice or buttery mashed potatoes to soak up every bit of that glossy sauce.Garnish with thinly sliced green onions and a sprinkle of toasted sesame seeds for a pop of color and texture. For an extra touch of freshness, a side of crisp cucumber salad balances the dish beautifully.

Nutritional Information per Serving
| Calories | Protein | Carbohydrates | Fat |
|---|---|---|---|
| 320 kcal | 28 g | 10 g | 18 g |
Delve deeper into flavor pairings and stir-fry techniques with our Perfect Stir-Fry Techniques Guide. For health insights on beef cuts, visit ChooseMyPlate.gov.
Q&A
Q&A: Quick & Tasty Homemade Pepper Steak – Simple Recipe Guide
Q1: What makes this pepper steak recipe quick and easy?
A1: The recipe uses simple ingredients that come together in under 30 minutes, with a straightforward stir-fry technique that cuts down on prep and cooking time. No complicated marinades or long simmering-just quick searing and a flavorful sauce that’s ready before you know it!
Q2: Can I use any cut of steak for this recipe?
A2: For best results, opt for tender cuts like sirloin, flank, or ribeye, sliced thinly against the grain. These cuts cook fast and stay juicy. Tougher cuts can work if sliced super thin, but may need a bit more attention to avoid chewiness.
Q3: What kind of peppers work best?
A3: Classic bell peppers-red,green,or yellow-are ideal because of their natural sweetness and crunch.Feel free to mix colors for a vibrant dish. If you like a little heat, toss in some sliced jalapeño or chili flakes for a spicy kick.
Q4: Is this recipe gluten-free?
A4: It can be! Use tamari or a gluten-free soy sauce substitute instead of regular soy sauce, and double-check any other sauces or seasonings you add. The rest is naturally gluten-free: fresh veggies,beef,and basic pantry staples.
Q5: can I prepare this recipe ahead of time?
A5: You can slice the beef and peppers in advance to save time, but for the freshest, most tender results, stir-fry everything just before serving. If you make it ahead, store in an airtight container and reheat gently to avoid overcooking the beef.
Q6: What’s the secret to that perfect pepper steak sauce?
A6: The magic lies in balancing savory soy sauce, a touch of sweetness (like brown sugar or honey), and a hint of tang from rice vinegar or Worcestershire sauce. A quick cornstarch slurry thickens it to a glossy, clingy finish that coats every bite beautifully.Q7: What sides pair well with pepper steak?
A7: Keep it classic with steamed white rice or fluffy jasmine rice to soak up the sauce. For a low-carb option, try cauliflower rice or sautéed greens like bok choy or spinach. Even simple noodles make a great base.
Q8: How can I customize this recipe to suit my taste?
A8: Feel free to tweak the spice level by adding fresh ginger, garlic, or chili flakes. Swap the bell peppers for other crisp veggies like snap peas or broccoli. Experiment with garnishes like chopped scallions, sesame seeds, or fresh cilantro for extra punch.
Q9: Is pepper steak healthy?
A9: Absolutely! This homemade version is packed with lean protein and colorful veggies, making it a balanced meal. by controlling the ingredients and avoiding excessive oil or sugar, it’s a nutritious and satisfying dinner option.
Q10: Any tips for slicing the steak perfectly?
A10: Yes! Chill your steak in the freezer for about 15-20 minutes before slicing-this firms it up and makes thin slicing easier.Always cut against the grain (perpendicular to the muscle fibers) for maximum tenderness.
Embark on your quick & tasty pepper steak adventure-no fancy skills needed, just fresh ingredients and a pinch of love!
Closing Remarks
With just a few simple ingredients and a handful of easy steps, whipping up a quick and tasty homemade pepper steak is entirely within your reach. This flavorful dish proves that cooking from scratch doesn’t have to be complicated or time-consuming. Whether you’re aiming for a satisfying weeknight dinner or impressing guests with bold, savory flavors, this recipe is your reliable go-to. So, sharpen your knives, fire up that stove, and get ready to savor every bite of a classic comfort meal made right in your own kitchen. Happy cooking!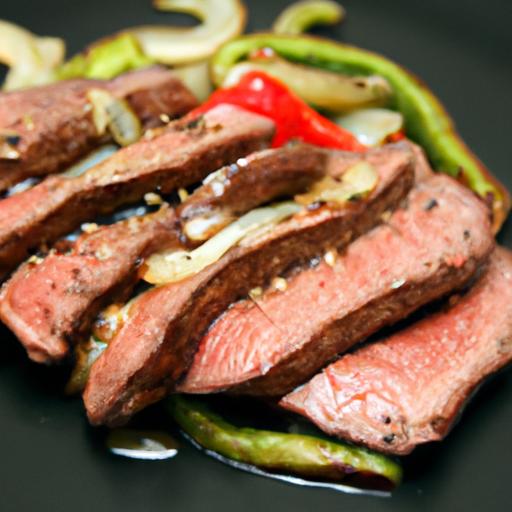
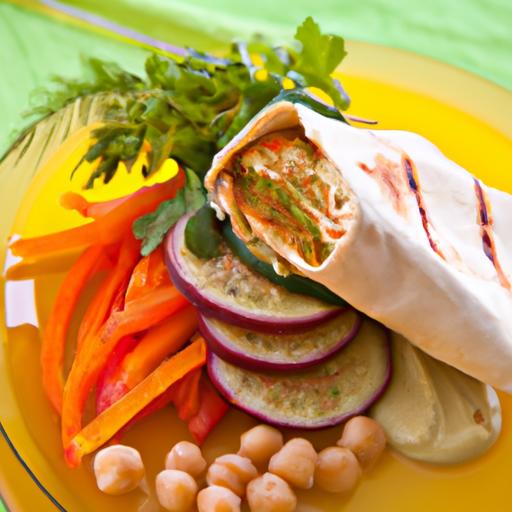
Quick and flavorful ingredients transform these lettuce wraps into a vibrant explosion of freshness and texture that’s perfect for any mealtime. Using crisp, bright iceberg or butter lettuce leaves as a natural vessel, combined with bold seasonings and cleverly chosen proteins, these wraps pack punch without weighing you down. Whether you crave something spicy, savory, or tangy, the beauty lies in thier simplicity and adaptability-turning humble leaves into an irresistible, handheld delight in just 15 minutes.
Prep and Cook Time
- Planning: 10 minutes
- Cooking: 5 minutes
- Total Time: 15 minutes
Yield
Serves 4 generous lettuce wraps (about 2 wraps per person)
Difficulty Level
Easy – perfect for weeknight dinners or quick lunches
Ingredients
- 1 head of butter lettuce or iceberg, leaves separated, washed, and patted dry
- 12 oz ground chicken (or turkey, tofu, or seitan for variations)
- 1 tablespoon sesame oil
- 1 small onion, finely chopped
- 2 cloves garlic, minced
- 1 tablespoon fresh ginger, grated
- 1/3 cup hoisin sauce
- 1 tablespoon soy sauce (use tamari for gluten-free)
- 1 teaspoon sriracha (optional, for heat)
- 1/2 cup shredded carrots
- 1/4 cup chopped water chestnuts, for crunch
- 2 green onions, thinly sliced
- 1/4 cup chopped fresh cilantro
- 1 tablespoon toasted sesame seeds, for garnish
Instructions
- Prep your lettuce: Carefully peel whole leaves from the head, choosing the largest and freshest. Gently wash and dry on paper towels. Keep chilled to maintain crispness.
- Cook the aromatics: Heat sesame oil in a large skillet over medium heat. Add the chopped onion, garlic, and ginger. Sauté until fragrant and translucent, about 2 minutes.
- Add the protein: Crumble in the ground chicken (or substitute). Cook, stirring and breaking apart, until browned and cooked through, about 5 minutes. Be sure to stir occasionally to prevent sticking.
- Flavor boost: Stir in hoisin sauce, soy sauce, and sriracha (if using). Mix in shredded carrots and chopped water chestnuts for texture.Cook another 2 minutes to meld flavors.
- Assemble fresh wraps: Spoon the warm filling into each lettuce leaf.Generously sprinkle with green onions, cilantro, and toasted sesame seeds.
- Serve promptly: For optimum freshness and crunch, enjoy your 15-minute lettuce wraps as soon as assembled. Optionally, serve with extra hoisin or a tangy dipping sauce.
Chef’s Notes & Tips for Success
- Crunch factor: To keep wraps perfectly crisp, always pat dry lettuce leaves thoroughly before filling.
- Protein swaps: Try finely diced mushrooms or lentils for a vegetarian/vegan twist that still delivers hearty umami flavors.
- Make-ahead hack: Prepare the filling a day in advance and refrigerate. Warm gently before filling leaves to maintain texture.
- Spicing it up: Add fresh chili or a splash of lime juice for extra brightness and zing.
- For gluten-free: Ensure all sauces used (hoisin,soy) are gluten-free labeled or use coconut aminos as a substitute.
Serving Suggestions
Present your 15-minute lettuce wraps on a wide,shallow platter with small bowls of extra sauce and chili oil for dipping.Garnish with vibrantly sliced cucumbers, pickled radishes, or a crisp cucumber salad to complement the textures. A sprinkle of crushed peanuts adds a delightful crunch and nutty aroma. For a party, stack wraps alongside steamed jasmine rice or a fresh mango salad for refreshing contrast.

| Nutrient | Per Serving |
|---|---|
| Calories | 270 kcal |
| Protein | 22 g |
| Carbohydrates | 12 g |
| fat | 14 g |
For more inspired fast recipes that complement this dish, check out our Quick Asian-Inspired Recipes page. Learn about the rich history of Asian flavors on Britannica.
Q&A
Q&A: 15-Minute Lettuce Wraps – Quick & Fresh Recipe Ideas
Q1: What makes lettuce wraps a great choice for a quick meal?
A1: Lettuce wraps are incredibly versatile and require minimal cooking time, making them perfect for busy days. using crisp lettuce leaves as edible “bowls” eliminates the need for bread or tortillas, cutting down prep time and adding a refreshing crunch.Plus, they’re naturally low-carb and packed with nutrients!
Q2: Which types of lettuce work best for wraps?
A2: Look for sturdy, yet pliable leaves that can hold fillings without tearing. Romaine, butter lettuce, iceberg, and bibb lettuce are top contenders. Butter lettuce is tender and slightly sweet, while romaine adds a satisfying crunch-both make excellent wrap bases.
Q3: How do I make sure my lettuce wraps don’t get soggy?
A3: To keep things crisp, pat the lettuce leaves dry after rinsing to remove excess moisture.Also, try to serve the fillings warm rather than hot, as extreme temperatures can wilt the lettuce quickly. Assemble just before eating to maintain freshness.
Q4: What are some quick and tasty filling ideas for 15-minute lettuce wraps?
A4: the options are endless! Try sautéed ground turkey or chicken with garlic, ginger, and soy sauce for an Asian-inspired twist.Or go Mediterranean with hummus, chopped cucumbers, tomatoes, olives, and feta cheese.For a vegetarian boost, mix black beans, corn, avocado, and salsa. Fresh herbs like cilantro or mint can add a vibrant punch.
Q5: How can I add more flavor without extra cooking time?
A5: Use pre-made sauces like teriyaki, peanut sauce, or tzatziki, which can be drizzled over the fillings. Toss in chopped nuts or seeds for texture, and squeeze a bit of lime or lemon juice for a bright finish. Fresh garlic, ginger, or chili flakes sprinkled in can elevate the dish in minutes.
Q6: Are lettuce wraps suitable for meal prep?
A6: Yes, but keep lettuce and fillings separate until mealtime to avoid sogginess.Store your cooked fillings in airtight containers in the fridge and wash and dry your lettuce leaves thoroughly.When ready, simply assemble your wraps for a quick grab-and-go meal.
Q7: Can kids enjoy lettuce wraps too?
A7: Absolutely! Lettuce wraps can be customized with kid-friendly ingredients like shredded chicken, cheese, mild salsa, or even turkey and avocado.Their fun, handheld format makes them appealing for picky eaters and perfect for packing in lunchboxes.
Q8: What’s the best way to serve these wraps for a crowd?
A8: Prepare an assortment of fillings and lettuce leaves, then let everyone build their own wraps. This “DIY” style is interactive and allows guests to tailor flavors and textures to their liking. It’s a fresh and lively alternative to more traditional finger foods.
Q9: How do I keep the wraps balanced nutritionally?
A9: Aim for a good mix of protein, healthy fats, fiber, and veggies in your fillings. Lean meats, tofu, or beans provide protein; avocado or nuts add healthy fats; and fresh vegetables bring fiber and antioxidants.This combo keeps you full and energized in under 15 minutes.
Q10: Any final tips for making the most of quick lettuce wraps?
A10: Embrace simplicity and bold flavors. Focus on fresh ingredients, don’t overstuff your wraps, and get creative with herbs and sauces. With a bit of prep and imagination, 15-minute lettuce wraps can become your go-to meal for freshness and speed!
Concluding Remarks
In just 15 minutes, these vibrant lettuce wraps transform simple ingredients into a fresh, flavorful feast that’s as quick to make as it is satisfying to eat. Whether you’re craving a light lunch, a speedy dinner, or a crowd-pleasing appetizer, these wraps offer endless versatility without compromising on taste or nutrition. Next time you need a fuss-free meal that doesn’t skimp on freshness, reach for crisp lettuce leaves and let your creativity run wild-becuase tasty, wholesome eating shouldn’t take all day. Ready, wrap, and enjoy!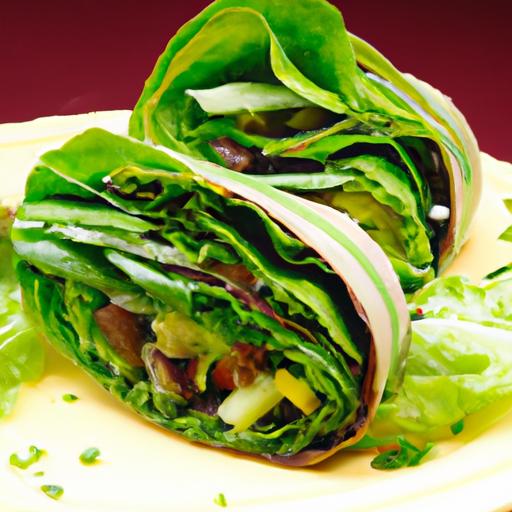
Creamy Delight: Quick & Easy Chicken Alfredo Recipe invites you to experience an indulgent, soul-satisfying classic that combines tender chicken with a luscious, velvety sauce. This dish, rooted in Italian-American tradition, transforms simple ingredients into a masterpiece of comfort and elegance. Every bite delivers the perfect harmony of rich cream, sharp Parmesan, and the savory depth of sautéed garlic, making it a go-to favorite for both weeknight dinners and special occasions. Whether you’re a seasoned home cook or just beginning your culinary journey, this recipe promises a delightful, foolproof approach to mastering the iconic Alfredo sauce paired flawlessly with juicy chicken.
Prep and Cook Time
- preparation: 10 minutes
- Cooking: 20 minutes
- Total Time: 30 minutes
Yield
Serves 4 generous portions
Difficulty Level
Easy – Perfect for cooks of all skill levels
Ingredients
- 2 large boneless, skinless chicken breasts, thinly sliced or pounded to even thickness
- 12 oz fettuccine pasta
- 4 tbsp unsalted butter
- 4 cloves garlic, minced
- 2 cups heavy cream
- 1 ½ cups freshly grated Parmesan cheese
- Salt and freshly ground black pepper, to taste
- 2 tbsp olive oil
- Fresh parsley, finely chopped for garnish
- Optional: A pinch of freshly grated nutmeg or red pepper flakes for depth and subtle heat
Choosing the Perfect Ingredients for a Rich and Flavorful Chicken Alfredo
To achieve the perfect Chicken Alfredo, start with the freshest ingredients you can find. Opt for high-quality chicken breasts that are plump and fresh for tender meat that soaks up the creamy sauce beautifully. When selecting your cream, choose heavy cream with at least 36% fat content for that signature silkiness and body. Use freshly grated Parmigiano-Reggiano cheese rather of pre-grated versions; its complexity and granular texture melt smoothly, enriching every forkful. Lastly, fresh garlic-crushed and minced-injects aromatic intensity that elevates the sauce, while fresh parsley introduces a splash of vibrant color and subtle herbaceous notes. These exceptional ingredients build the foundation for a flavorful, vibrant dish that’s anything but ordinary.
Mastering the Creamy Sauce: Tips for a Smooth and Silky Texture
Creating that iconic Creamy Delight: Quick & Easy Chicken Alfredo Recipe sauce requires attention to temperature and timing. Begin by gently melting butter before adding garlic, allowing the flavors to bloom without burning the cloves. Next,pour in chilled heavy cream slowly,stirring constantly on medium-low heat-this prevents curdling and encourages a luscious texture. Incorporate Parmesan gradually, whisking continuously to melt the cheese evenly without graininess. Adjust seasoning thoughtfully; salt enhances while freshly ground pepper and a hint of nutmeg balance the richness. Avoid boiling the sauce vigorously; rather, keep it at a gentle simmer for that perfect, clingable consistency that wraps each strand of fettuccine in creamy goodness.
Step-by-Step Guide to Quick and Easy Chicken Preparation
- Prepare the chicken: Pat the chicken breasts dry and season both sides generously with salt and pepper.
- Heat olive oil: Warm 2 tablespoons of olive oil in a large skillet over medium-high heat until shimmering.
- Sauté chicken: Place the chicken breasts in the skillet and cook undisturbed for 5 minutes or until a golden crust forms. Flip and cook another 4-5 minutes until cooked through.
- Rest and slice: Remove chicken from the pan and let rest for 5 minutes. Slice into thin strips or bite-sized pieces for easy serving.
- Cook pasta simultaneously: While the chicken cooks, boil salted water and cook fettuccine according to package instructions until al dente.Reserve ½ cup pasta water and drain.
- Combine sauce and pasta: Pour your creamy Alfredo sauce into the skillet; toss in the drained pasta and add reserved pasta water as needed to loosen and coat the noodles beautifully.
- Add chicken: Gently fold sliced chicken into the sauce-coated pasta, letting the flavors meld on low heat.
Serving Suggestions and Pairings to Elevate Your Alfredo Experience
presentation is key to elevating your Creamy Delight: Quick & Easy Chicken Alfredo Recipe. Serve the dish immediately while piping hot, plating a generous nest of fettuccine topped with the golden chicken slices.Garnish with a sprinkle of finely chopped fresh parsley for vivid contrast and a burst of freshness. For added indulgence, shave extra parmesan over the top and crack a few twists of black pepper. Pair this with a crisp Caesar salad or sautéed garlic spinach to introduce textural variety and vibrant greens. A chilled glass of dry Pinot Grigio or a bright Chardonnay perfectly complements the richness, cutting through the creamy sauce for a balanced dining experience. For bread lovers, a warm, crusty garlic bread or homemade focaccia rounds out the meal beautifully.
Chef’s Notes & Tips for success
- Chicken Variations: Substitute boneless thighs for an even juicier result. Just adjust cooking time slightly.
- Make-Ahead Tip: Prepare the sauce in advance and reheat gently,adding reserved pasta water to revive texture.
- Dairy Alternatives: For a lighter option, swap half of the heavy cream with whole milk-but avoid skim, which can curdle.
- Seasoning Balance: Taste the sauce before tossing with pasta; Parmesan adds saltiness, so season cautiously.
- Storage: Leftovers keep well for 2 days refrigerated in an airtight container. Reheat over low heat, stirring often.
Nutritional Information per Serving
| Calories | Protein | Carbohydrates | Fat |
|---|---|---|---|
| 720 kcal | 48 g | 58 g | 35 g |

For more recipes inspired by Italian classics, check out our Classic Italian Pasta Dishes. to learn about the rich history behind Alfredo sauce, visit Encyclopedia Britannica.
Q&A
Q&A: Creamy delight – Quick & Easy Chicken Alfredo Recipe
Q1: What makes this Chicken Alfredo recipe stand out from conventional versions?
A1: Our Creamy Delight recipe balances rich, velvety sauce with a surprisingly quick prep time. We ditch hours of simmering in favor of simple, fresh ingredients that come together in under 30 minutes-perfect for weeknight indulgence without the fuss.
Q2: Can I make this recipe healthier without sacrificing flavor?
A2: Absolutely! Swap heavy cream for half-and-half or a mix of milk and Greek yogurt to lighten the sauce. Use whole wheat pasta or spiralized veggies to add fiber, and lean chicken breasts ensure a protein-packed meal that’s as nourishing as it is delicious.Q3: What are the key ingredients for that irresistibly creamy Alfredo sauce?
A3: The magic trio is butter,garlic,and freshly grated parmesan. Butter creates a luscious base, garlic infuses aromatic depth, and Parmesan gives that signature cheesy punch. Adding a splash of pasta water at the end helps bind the sauce perfectly to your noodles.
Q4: Can I prepare this dish ahead of time?
A4: You can prep the chicken and sauce separately in advance. Reheat gently over low heat with a splash of milk or cream to revive the sauce’s luscious texture before tossing with freshly cooked pasta. Though, for best creaminess, cook and combine just before serving.
Q5: what side dishes pair well with Chicken Alfredo?
A5: Light, fresh sides like a crisp Caesar salad or garlic-roasted broccoli complement the richness beautifully. For a heartier spread, consider warm garlic bread or sautéed mushrooms to enhance the comforting flavors.
Q6: How do I avoid common mistakes like a grainy or separated sauce?
A6: The key is low and slow heat when melting cheese-high temperatures can cause it to clump or separate.Also, temper the sauce with reserved pasta water gradually to maintain smoothness. Stir constantly to marry all elements into a silky, dreamy sauce.
Q7: Can this recipe be customized for other proteins or dietary preferences?
A7: Definitely! Swap chicken for shrimp or tofu for a delightful twist. For gluten-free options, use rice or chickpea pasta. Herb lovers can add fresh basil or parsley for extra zing, and a pinch of red pepper flakes offers a subtle heat to awaken the palate.
Q8: What’s the best way to serve Chicken Alfredo for an impressive presentation?
A8: Twirl the pasta neatly onto plates using tongs, place juicy chicken slices elegantly on top, and drizzle with extra sauce. Garnish with freshly cracked black pepper, chopped parsley, and a few Parmesan shavings to elevate your dish visually and flavor-wise.
Enjoy your journey to creating a truly creamy delight that’s as quick as it is easy!
Key Takeaways
There you have it-a creamy delight that transforms simple ingredients into a comforting, flavorful feast. This quick and easy Chicken Alfredo recipe proves that delicious doesn’t have to mean complicated. Whether you’re cooking for a busy weeknight or impressing guests with minimal effort,this dish delivers rich,velvety satisfaction in every bite. So, grab your skillet, gather your ingredients, and let this timeless classic become your go-to comfort meal-becuase sometimes, the simplest pleasures truly are the most unforgettable.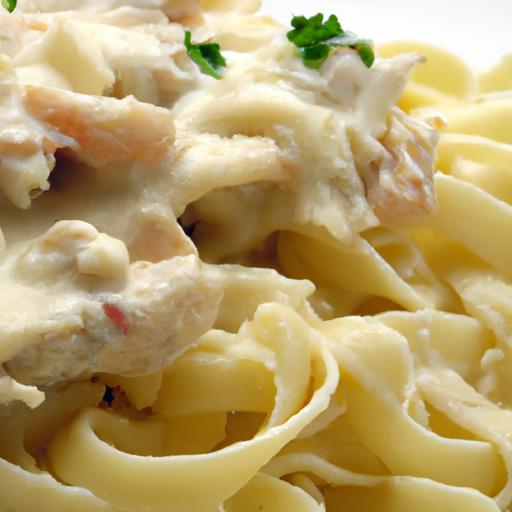
Speedy Sweets begin wiht a flawless cupcake base that’s as adaptable as it is indeed quick to prepare. whether you’re dreaming of rich chocolate,zesty lemon,or decadent vanilla,having a reliable quick cupcake base allows you to unleash creativity without waiting hours in the kitchen. This foundational step ensures every batch springs from a tender crumb and a moist interior that complements any frosting and filling you choose.
Prep and Cook Time
Preparation: 10 minutes
Baking: 15 minutes
Total Time: 25 minutes
Yield
12 standard cupcakes
Difficulty Level
Easy – Perfect for beginners and quick weekend baking sessions
Ingredients
- 1 cup all-purpose flour, sifted
- 3/4 cup granulated sugar
- 1/4 cup unsweetened cocoa powder (optional, for chocolate base)
- 1 teaspoon baking powder
- 1/2 teaspoon baking soda
- 1/4 teaspoon salt
- 1/2 cup milk, room temperature
- 1/4 cup vegetable oil
- 1 large egg, room temperature
- 1 teaspoon vanilla extract
- 2 tablespoons sour cream or Greek yogurt (optional, for moisture)
Instructions
- Preheat your oven to 350°F (175°C) and line a 12-cup muffin tin with cupcake liners to ensure smooth removal.
- mix dry ingredients: In a large bowl, sift together the flour, sugar, cocoa powder (if using), baking powder, baking soda, and salt to avoid clumps.
- Combine wet ingredients: In a separate bowl, whisk the milk, oil, egg, vanilla extract, and sour cream until silky smooth.
- Slowly add the wet mixture to the dry ingredients, folding gently with a spatula until just combined-avoid overmixing to maintain a tender crumb.
- Fill the cupcake liners about 2/3 full with batter, leaving room for rising during baking.
- Bake for 14-15 minutes, or until a toothpick inserted in the center comes out clean. Rotate the tin halfway through baking to ensure even cooking.
- Cool cupcakes in the pan for 5 minutes, then transfer to a wire rack to cool fully before frosting.
Creative Frosting Ideas to Elevate Your Speedy Sweets
While a simple buttercream is always a winner, why not experiment with quick, unexpected frostings to turn your speedy sweets into showstoppers? Try a whipped cream cheese frosting infused with fresh lemon zest for a radiant pop or a smooth chocolate ganache that sets beautifully in minutes. For a fruity twist, blend softened cream cheese with mashed ripe strawberries, or whip coconut cream with toasted coconut flakes and a dash of vanilla.
Time-Saving Tips for baking and Decorating Cupcakes
- Prep all ingredients before starting to bake to speed through mixing and reduce stress.
- Use an ice cream scoop for consistent cupcake sizes that bake evenly.
- Cool cupcakes upside down over a parchment-lined tray to keep tops flat-ideal for frosting.
- Piping bag hack: Fill a zip-top bag with frosting, snip a corner, and pipe directly for quick, mess-free decorating.
- decorate in stages: Pipe your frosting, then sprinkle edible glitter, chopped nuts, or fresh berries immediately before serving to maximize freshness.
Perfect Pairings and Presentation for Every Party
Fresh cupcakes deserve fresh accompaniments. Serve alongside a vibrant berry compote or a small pitcher of homemade caramel sauce for dipping. Display cupcakes on tiered stands or rustic wooden boards mixed with edible flowers such as pansies or violets for an elegant touch. Complement savory bites at brunch with citrus-poppy seed cupcakes or spice-laden chai cupcakes for autumnal gatherings. Thoughtful presentation can transform these quick treats into centerpieces that steal the show.

Tips for Success
- Ingredient temperature matters: Use room temperature eggs and milk for the fluffiest texture.
- Substitute milk with buttermilk to add tang and softness to the crumb.
- Overmixing causes toughness: Fold until just combined to maintain lightness.
- Make ahead: Bake cupcake bases a day in advance and freeze unfrosted for up to 2 months; thaw fully before frosting.
- Allergy-friendly: Substitute all-purpose flour with gluten-free blends; swap oil with applesauce for moisture with less fat.
Nutritional Information
| Nutrient | Amount per Cupcake |
|---|---|
| Calories | 185 kcal |
| protein | 3 g |
| Carbohydrates | 28 g |
| Fat | 6 g |
For further inspiration on cake bases and speedy sweets, visit our Quick Baking Tips guide or explore expert baking techniques at King Arthur Baking Company.
Q&A
Q&A: Speedy Sweets - Quick Cupcake Recipes for Every Occasion
Q1: What inspired the creation of “Speedy Sweets: Quick Cupcake Recipes for Every Occasion”?
A: We wanted to make the joy of baking cupcakes accessible to everyone, no matter their schedule. Life gets busy, but that shouldn’t mean sacrificing delicious homemade treats. “speedy Sweets” was born from the desire to simplify cupcake baking without skimping on flavor or fun.
Q2: how quick are these cupcake recipes really?
A: Many of the recipes in “Speedy Sweets” can be whipped up,baked,and frosted in under 30 minutes. From start to finish, including ingredient prep and decoration, these cupcakes are designed to satisfy your sweet tooth with minimal wait-perfect for last-minute celebrations or unexpected guests.
Q3: Are these recipes beginner-friendly?
A: Absolutely! Whether you’re a seasoned baker or a novice, the step-by-step instructions and handy tips make these cupcakes approachable for everyone. We’ve included shortcuts and handy hacks that keep the process fun and foolproof.
Q4: What types of occasions do these recipes cater to?
A: From casual family gatherings to birthday parties, office celebrations, and impromptu date nights, ”Speedy Sweets” covers it all. There are themed cupcakes for holidays, kid-friendly flavors, and even elegant options for more formal events – all made quick and easy.
Q5: Do the recipes accommodate dietary restrictions?
A: Yes! The book includes speedy recipes that cater to gluten-free, dairy-free, and vegan diets without compromising taste or texture.We believe everyone deserves a sweet treat, no matter their dietary needs.Q6: Can these cupcakes be customized?
A: Definitely. each recipe comes with variation suggestions-from swapping fillings to experimenting with frostings and toppings. These creative twists let you tailor your cupcakes to personal preferences or the theme of your event.
Q7: What’s the secret to making cupcakes both fast and fluffy?
A: It’s all about ingredient balance and simple techniques. Quick-mix batters, room-temperature ingredients, and smart leavening choices help achieve that soft, airy crumb without long prep times.Plus, our tips ensure your cupcakes rise perfectly every time.
Q8: Any advice for decorating speedy cupcakes?
A: Keep it simple and stylish.Use ready-made frostings with fresh fruit or edible decorations, or try no-fuss swirls using a piping bag. The book also includes fun,low-effort decorating ideas that look impressive but take mere minutes.Q9: How can I ensure my speedy cupcakes stay fresh?
A: Store them in an airtight container at room temperature for up to two days or refrigerate for longer freshness. For best results, frost cupcakes right before serving, especially on hot days.
Q10: Where can I find “Speedy Sweets: Quick Cupcake Recipes for Every Occasion”?
A: You can grab your copy online at major bookstores, as well as through digital platforms for eBook versions. Get ready to bake fast and enjoy sweet results!
Closing Remarks
With these speedy sweets in your baking arsenal, you’re always just minutes away from delightful cupcakes that brighten any occasion.Whether it’s a last-minute celebration or an everyday craving,these quick cupcake recipes prove that deliciousness doesn’t have to come with a long wait. So grab your mixing bowl, whisk up some magic, and let your kitchen become the sweetest spot in the house-one speedy cupcake at a time.happy baking!
Quick & Easy Microwave Mug Brownie: Dessert in Minutes
If you’re craving a decadent chocolate fix but short on time, this Quick & Easy Microwave Mug Brownie is your ultimate solution. Born from the need to satisfy sweet tooths in a flash, this recipe combines simple pantry staples to deliver a rich, moist, and fluffy brownie that’s ready in minutes – ideal for solo indulgences or impromptu dessert cravings.
Prep and cook Time
- Preparation: 3 minutes
- Cooking Time: 1 minute 30 seconds
- Total Time: 4 minutes 30 seconds
Yield
1 mug serving – perfect for a single decadent treat or scaled up for a quick batch of individual brownies.
Difficulty Level
Easy: Minimal ingredients,no baking expertise required!
Ingredients That Make Your microwave Mug Brownie Irresistibly Rich
- 4 tablespoons all-purpose flour,sifted - for a tender crumb
- 4 tablespoons granulated sugar – imparts the perfect sweetness
- 2 tablespoons unsweetened cocoa powder – for deep,chocolatey richness
- 1/8 teaspoon salt - to balance and elevate flavor
- 3 tablespoons vegetable oil – ensures moistness and softness
- 3 tablespoons milk – adds fluffiness and helps blend the batter
- 1/4 teaspoon vanilla extract - gives a fragrant,warm aroma
- Optional: 2 tablespoons chocolate chips or chopped nuts - for delightful texture contrast
Step by step Guide to Perfectly Moist and Fluffy Mug Brownies
- Mix Dry Ingredients: In a microwave-safe mug (roughly 12 oz capacity),whisk together the sifted flour,granulated sugar,cocoa powder,and salt until well combined to avoid lumps and bitterness.
- Add Wet Ingredients: Pour in the vegetable oil, milk, and vanilla extract. Stir vigorously with a fork or small whisk until a smooth, thick batter forms. Avoid overmixing to keep the brownie tender.
- Fold in Extras: Gently incorporate chocolate chips or nuts if desired – these add a marvelous flavor burst and texture.
- Microwave Carefully: Place the mug in the microwave and cook on high for 90 seconds. Watch closely; microwave powers vary, so start with less time and add 10-second increments as needed. The brownie should look set on top but remain moist inside.
- Cool Slightly: Let the brownie cool for 2 minutes before digging in. This resting time allows the molten texture to set just right without overcooking.
Tips for Customizing Your Dessert with Mix-Ins and Toppings
- Swap cocoa powder: Try dark cocoa for an intense chocolate hit or add a teaspoon of espresso powder to deepen the flavor.
- Mix-ins: Consider adding mini marshmallows,crushed pretzels for salty crunch,or shredded coconut for tropical flair.
- toppings: top your mug brownie with a scoop of vanilla ice cream, a drizzle of caramel or raspberry sauce, or a sprinkle of sea salt flakes for contrast.
- Healthier tweaks: Substitute half the oil with applesauce to reduce fat, or swap sugar for coconut sugar for a subtle caramel flavor.
- Vegan version: Use almond milk and coconut oil, plus crushed flaxseed as an egg substitute (1 tbsp flaxseed + 3 tbsp water, rested 5 min).
Troubleshooting Common mug Brownie mishaps for Flawless Results
- Dry or rubbery texture: most frequently enough from overcooking. Reduce microwave time by 10 seconds and test frequently.
- Raw batter in the center: Power may be low; extend cooking by 10-second intervals but do not exceed 2 minutes in total to avoid dryness.
- Uneven cooking or cracked surface: Use a microwave-safe mug with straight sides and stir batter well before cooking. Avoid using plastic mugs.
- Too dense or heavy: Make sure to sift the flour and cocoa powder. also, do not overmix once wet ingredients are combined.
- Flavor imbalance: Always include the salt and vanilla to bring depth and balance, countering the sweetness and bitterness of cocoa.
Chef’s Notes
Make-ahead option: Mix dry ingredients in bulk and store in an airtight jar. When ready for brownie time, scoop 10 tablespoons of the mix into your mug, add wet ingredients fresh, and microwave.
Microwave wattage tip: If your microwave exceeds 1000 watts, reduce cook time to 1:10 for the best results. Adjust based on your appliance.
Presentation: Use a mini silicone spatula to loosen edges before serving for a neat, easy lift from the mug.
Internal link suggestion: for other speedy sweets, check out our quick No-Bake Desserts.
External resource: Learn more about microwave cooking tips from serious Eats.
Serving Suggestions
- garnish with a fresh dusting of powdered sugar or cocoa powder for a classy touch.
- Add a dollop of whipped cream or a spoonful of Greek yogurt for creaminess and contrast.
- Sprinkle chopped toasted pecans or walnuts for an earthy crunch.
- Serve alongside a bright scoop of fruit sorbet or fresh berries to cut through the richness.
- Pair with a warm cup of coffee or chai tea for the ultimate cozy combo.

| nutrient | Per Serving |
|---|---|
| Calories | 320 kcal |
| Protein | 4 g |
| Carbohydrates | 42 g |
| fat | 15 g |
Q&A
Quick & Easy Microwave Mug Brownie: Dessert in Minutes – Q&A
Q1: What makes a microwave mug brownie so special?
A1: A microwave mug brownie is the superhero of desserts-ready to rescue your sweet tooth in mere minutes! It’s a single-serving treat cooked right in a mug, eliminating the need for bowls, pans, or long baking times. Perfect for last-minute cravings or those “I need chocolate now” moments.
Q2: Can I really make a brownie in the microwave that tastes as good as a conventional one?
A2: Absolutely! While it might not have the same crispy edges as an oven-baked brownie, the microwave mug brownie is rich, fudgy, and delightfully gooey. The secret lies in the right balance of ingredients and timing. Plus, it’s warm, melty, and perfect for dunking a spoon straight in!
Q3: What basic ingredients do I need?
A3: The classic recipe calls for a few pantry staples: flour, sugar, unsweetened cocoa powder, a pinch of baking powder, a splash of milk, a bit of vegetable oil (or melted butter), and a tiny sprinkle of salt. Optional extras like chocolate chips or vanilla extract can amp up the flavor to brownie perfection.
Q4: How long does it take to cook and how do I avoid overcooking?
A4: Typically, your brownie will be ready in 40 to 90 seconds, depending on your microwave’s power.The key to avoiding a rubbery brick is to stop the microwave when the top looks just set but still soft. It continues to cook slightly in the mug once out, so err on the side of slightly undercooked for that ideal fudgy center.
Q5: Can I customize my microwave mug brownie?
A5: Oh yes! Think of your mug brownie as a blank canvas. stir in nuts for crunch,swirl in caramel or peanut butter,sprinkle with sea salt,or toss in some dried fruit. You can even experiment with flavors like espresso powder or chili flakes for an adventurous twist. Your mug, your rules!
Q6: Is it healthy or just a guilty pleasure?
A6: While it’s undeniably a dessert treat, you can tweak the recipe for a slightly healthier spin-substitute whole wheat flour, use less sugar, or add a handful of oats. But honestly,sometimes a quick indulgence is exactly what the soul craves. Moderation is key, and the speed makes it easy to enjoy just one portion!
Q7: Any tips for serving and enjoying the mug brownie?
A7: Serve it straight from the mug for that cozy “just for me” vibe. top with a scoop of vanilla ice cream, a drizzle of chocolate syrup, or a dollop of whipped cream for extra decadence. And if you’re feeling fancy, sprinkle crushed candies or a pinch of cinnamon. Ready, set, spoon!
Q8: What if I want to make multiple servings at once?
A8: Simply multiply the ingredients by the number of servings and prepare each in its own microwave-safe mug, cooking them one at a time or side-by-side if your microwave is large. quick,easy,and perfect for sharing that midnight craving-or a surprise dessert for friends!
Ready to whip up your chocolatey miracle? Your microwave and mug are waiting!
Closing Remarks
With just a few simple ingredients and mere minutes in the microwave,your craving for a rich,fudgy brownie can be satisfied anytime-no oven required. This quick & easy microwave mug brownie proves that indulgent desserts don’t have to be elaborate or time-consuming. So next time the sweet tooth strikes, reach for your favorite mug, follow these simple steps, and enjoy a warm, comforting treat that’s ready before you know it.Dessert bliss has never been this effortless!
Quick Bites reveals the fascinating interplay of science and flavor found in microwave meals, transforming a common kitchen appliance into a powerhouse of culinary innovation. Weather you treasure the convenience of ready-to-eat dishes or crave nutrition without compromise, mastering the chemistry behind microwave cooking is your key to vibrant taste and optimized nutrition.
Prep and Cook Time
readiness: 10 minutes | Cooking: 6-8 minutes | Total Time: 18 minutes
Yield
Serves 2 generously
Difficulty Level
Easy – Perfect for beginners and busy home cooks
Ingredients
- 1 cup cooked quinoa (preferably cooled for even heating)
- 1 cup mixed frozen vegetables (carrots, peas, and corn)
- 1/2 cup cooked and shredded chicken breast
- 2 tbsp low-sodium soy sauce
- 1 tbsp toasted sesame oil
- 1 tsp grated fresh ginger
- 1 clove garlic, minced
- 1/4 cup chopped scallions
- Freshly ground black pepper, to taste
Instructions
- Combine quinoa and mixed frozen vegetables in a microwave-safe bowl. Cover loosely with a microwave-safe lid or vented plastic wrap to allow steam to escape, preserving moisture balance.
- Microwave on high for 3 minutes, then stir gently to promote even heating, a key to avoiding cold spots and maximizing flavor release.
- Add the shredded chicken, garlic, and grated ginger, stirring well to distribute aromatics evenly throughout the mixture.
- Drizzle in the soy sauce and sesame oil,incorporating flavors without overpowering the dish’s natural taste. Stir once more.
- Cover again, and microwave for an additional 3-5 minutes on medium power to finish cooking and warm through without drying out proteins or vegetables.
- Carefully remove from microwave (steam will be hot!). Garnish with freshly chopped scallions and a pinch of black pepper for brightness and depth.
tips for Success
- Use vented lids or microwave-safe covers that allow steam to escape, ensuring uniform heat distribution, which boosts flavor retention.
- Stir midway to prevent uneven cooking and hot pockets, a common microwave challenge.
- Opt for high-quality frozen vegetables with no added salts or sauces to maintain clean flavors and optimal nutrition.
- Adjust the soy sauce and sesame oil to taste, balancing saltiness with the nutty aroma of toasted oils.
- Make-ahead idea: assemble this dish the night before and reheat for a quick, nutritious lunch, taking advantage of microwave technology’s speed without losing texture.
Serving Suggestions
This vibrant quinoa bowl is delightful served in a shallow ceramic dish that showcases its colorful medley. Garnish with extra scallions, a sprinkle of toasted sesame seeds, or a drizzle of fresh lime juice to brighten every bite. Pair with a crisp side salad or steamed edamame for a complete, nutrient-rich meal that tastes freshly prepared despite its rapid microwave cooking.
| Nutrient | Per Serving |
|---|---|
| Calories | 320 kcal |
| Protein | 25 g |
| Carbohydrates | 35 g |
| Fat | 8 g |

For those curious about the cutting-edge science that keeps microwave meals flavorful and nutritious, explore our detailed guide on microwave nutrition optimization strategies. Further insights into packaging advancements that preserve texture and taste can be found at the FDA’s official page on food packaging technologies. Together, these innovations ensure every bite from your microwave can be a delightful culinary experience.
Q&A
Q&A: Quick Bites – Unlocking the Science of Microwave Meals
Q1: What exactly happens to our food when we zap it in a microwave?
A1: When you hit “start,” electromagnetic waves called microwaves penetrate the food, exciting water molecules inside. These vibrating molecules generate heat, cooking your meal from the inside out-think of it as a tiny dance party where water molecules jiggle until heat is born!
Q2: Why do microwave meals sometimes cook unevenly?
A2: Microwave ovens don’t heat with a uniform hug. Some spots get more microwave energy than others due to standing waves inside the oven cavity. Plus, different ingredients heat at different rates (water heats faster than fat or sugar). That’s why rotating your meal or stirring midway helps spread the warmth evenly.
Q3: Are microwave meals less nutritious than freshly cooked food?
A3: Not necessarily! Microwaving actually retains nutrients well because cooking times are shorter and use less water than conventional methods. However,pre-packaged microwave meals can vary in nutritional quality depending on ingredients and preservatives-read those labels carefully!
Q4: How do manufacturers design microwave meals to cook properly?
A4: It’s a culinary and scientific balancing act. Ingredients are layered thoughtfully-denser veggies might be placed where microwaves penetrate less, while sauces designed to heat quickly go on top. Packaging materials and venting systems also control steam to ensure optimal texture and safety.
Q5: Can microwaving food produce harmful compounds?
A5: unlike high-heat frying or grilling, microwaving rarely produces harmful compounds like acrylamide or PAHs. The key safety concerns are more about reheating evenly to avoid cold spots where bacteria can survive. Proper heating and handling ensure your quick bite is safe and healthy.
Q6: What surprising benefits do microwave meals offer in today’s fast-paced world?
A6: Microwave meals are time-saving marvels that reduce energy use compared to oven cooking, minimizing your carbon footprint. They also reduce food waste by offering portion control and longer shelf life-perfect for busy lives craving convenience without compromise.
Q7: How is the future of microwave meals shaping up?
A7: Expect smart packaging with sensors that tell you when your meal is perfectly heated, plus recipes formulated with fresh, whole-food ingredients designed specifically for microwave cooking. Advances in microwave technology could even bring about faster, tastier, and more nutritious quick bites than ever before.
Next time you hear that beep,remember: your microwave meal is the tasty result of fascinating science that’s as quick as it is clever!
In retrospect
As we’ve uncovered,the humble microwave meal is far more than a shortcut for busy days-it’s a fascinating blend of science,convenience,and culinary engineering. From the way microwaves excite water molecules to the carefully crafted recipes designed to optimize flavor and nutrition, these quick bites represent a marvel of modern food technology. So next time you press “start,” take a moment to appreciate the intricate dance happening inside that little box, where science and sustenance come together in a matter of minutes. Unlocking the secrets behind microwave meals not only changes how we view convenience foods but also opens the door to innovative possibilities for nourishing a fast-paced world.
Quick & Flavorful: 15-Minute Quinoa Pilaf Recipe Guide unlocks the secret to creating a light, fluffy, and vibrant quinoa pilaf that bursts with aroma and layered flavor. This dish, inspired by Middle Eastern and Mediterranean flavors, marries wholesome grains with fragrant herbs and toasted nuts – a perfect canvas for colorful vegetables and savory accents. Whether you’re cooking for a busy weeknight or prepping a satisfying side, this guide ensures quinoa’s natural nutty essence is elevated to a gourmet experience without any fuss.
Prep and Cook Time
- Prep Time: 5 minutes
- Cook Time: 10 minutes
- total Time: 15 minutes
Yield
Serves 4 generous portions
difficulty Level
Easy – perfect for beginners and busy cooks alike
Ingredients
- 1 cup organic quinoa, rinsed thoroughly
- 2 cups vegetable or chicken broth (for richer flavor)
- 1 small yellow onion, finely chopped
- 2 cloves garlic, minced
- 1 tbsp extra virgin olive oil
- 1/3 cup toasted slivered almonds or pine nuts
- 1/4 cup fresh parsley, chopped
- 1/4 cup dried cranberries or golden raisins
- 1 tsp ground cumin
- 1/2 tsp smoked paprika
- Salt and freshly ground black pepper to taste
- Juice of half a lemon (about 1 tbsp)
instructions
- Rinse quinoa under cold water until water runs clear to remove natural bitterness. Drain well.
- In a medium saucepan, heat olive oil over medium heat. Add chopped onion and sauté until translucent and slightly golden, about 4 minutes.
- Add minced garlic, cumin, and smoked paprika. Sauté for 30 seconds until fragrant to bloom spices without burning.
- Stir in the rinsed quinoa, coating each grain in the spiced oil. Toast quinoa gently for 2 minutes, stirring constantly to enhance nuttiness.
- Pour in broth and add a pinch of salt and pepper. Increase heat to bring to a boil.
- Once boiling, reduce heat to low, cover with a tight-fitting lid, and let it simmer gently for 12 minutes-avoid lifting the lid.
- Remove from heat and let quinoa rest,covered,for 5 minutes to steam fully and fluff.
- Fluff the quinoa gently with a fork. fold in toasted nuts, dried cranberries, fresh parsley, and lemon juice. Adjust seasoning with salt and pepper.
- Serve warm, garnished with extra parsley and a drizzle of olive oil if desired.
Tips for Success
- Rinsing quinoa is key to remove saponins-the natural coating that can taste bitter.Don’t skip this step!
- Using broth rather of water adds richer flavor and depth.
- Toast the quinoa and nuts separately for an added layer of crunch and aroma.
- If you prefer a more herbaceous profile, stir in 1 tbsp chopped fresh mint alongside the parsley.
- Make ahead: Quinoa keeps beautifully in the fridge for up to 3 days, perfect for quick meals or batch prep.
- For a vegan pilaf, ensure broth is plant-based and add a squeeze of lemon to brighten flavors.
Serving Suggestions
This quinoa pilaf pairs beautifully with grilled chicken, baked salmon, or roasted vegetables to create a balanced and colorful plate.Garnish with crumbled feta for a tangy twist, or offer a side of tzatziki for a creamy contrast. For an eye-catching presentation, mound pilaf onto wide shallow bowls, sprinkle with pomegranate seeds, and serve with lemon wedges for an added pop of freshness.
| Nutrient | per Serving |
|---|---|
| Calories | 220 kcal |
| Protein | 7g |
| Carbohydrates | 35g |
| Fat | 6g |
Explore more wholesome grain bowl recipes to complement your meal. For detailed quinoa nutrition, visit britannica’s quinoa overview.

Q&A
Quick & Flavorful: 15-Minute Quinoa Pilaf Recipe Guide - Q&A
Q1: What makes quinoa a great choice for a quick pilaf?
A: Quinoa is a nutritional powerhouse that cooks rapidly-usually in about 15 minutes-making it ideal for speedy meals. Its natural nuttiness and fluffy texture absorb flavors beautifully, setting the perfect base for a vibrant pilaf.
Q2: How do I prepare quinoa so it’s fluffy and not mushy?
A: Rinse quinoa thoroughly under cold water to remove its natural coating, saponin, which can taste bitter. Use a 2:1 water-to-quinoa ratio and bring it to a boil, then simmer with the lid on for about 15 minutes. Let it rest off the heat for 5 minutes, then fluff it gently with a fork.
Q3: Can I customize the pilaf to suit different flavors or dietary needs?
A: Absolutely! The beauty of quinoa pilaf lies in its versatility.Add roasted vegetables, fresh herbs, nuts, or dried fruits. Spice it up with cumin, turmeric, or smoked paprika. For a vegan version, stick to vegetable broth and omit dairy; for extra protein, toss in chickpeas or tofu.
Q4: What’s a quick way to add flavor without a complicated spice mix?
A: Start by using a flavorful broth instead of plain water. Sauté garlic and onions before adding quinoa, and finish with a splash of lemon juice or a sprinkle of fresh herbs like parsley or cilantro to brighten the dish instantly.
Q5: Is this recipe suitable for meal prep? How should I store it?
A: Yes! Quinoa pilaf keeps well in the fridge for up to 4 days. Store it in an airtight container and reheat gently on the stove or microwave, adding a splash of broth or water to revive its moisture and flavor.
Q6: Can I make this pilaf gluten-free?
A: Definitely. Quinoa is naturally gluten-free, making this pilaf an excellent choice for anyone avoiding gluten.Just be sure to use gluten-free broth and watch out for any added ingredients to keep the dish safe.
Q7: What sides or main dishes pair well with quinoa pilaf?
A: Quinoa pilaf is a versatile side that complements grilled chicken, roasted fish, or sautéed veggies. It can also shine as a main dish when tossed with beans, nuts, or a colorful medley of garden-fresh vegetables.Q8: How can beginners master this recipe without stress?
A: Keep it simple! Follow the basic sauté-rinse-cook-fluff steps, use ingredients you love, and don’t worry about being perfect. Quinoa is forgiving, and the pilaf’s natural textures and flavors will shine through with minimal effort.
Ready to whip up a quick, tasty quinoa pilaf? With these insights, you’re all set to create a flavorful, nutritious dish in just 15 minutes-your new go-to meal for busy days!
Final Thoughts
With just a handful of fresh ingredients and a touch of culinary curiosity, this 15-minute quinoa pilaf transforms the humble grain into a vibrant, flavor-packed dish that fits perfectly into any busy schedule. Whether you’re racing against the clock or simply craving a nourishing meal without the fuss, this quick and flavorful recipe proves that healthy cooking doesn’t have to be complicated. So next time you’re pressed for time but hungry for something satisfying, let your stove work its magic and enjoy a bowl of wholesome goodness that’s ready before you know it. Happy cooking-and even happier eating!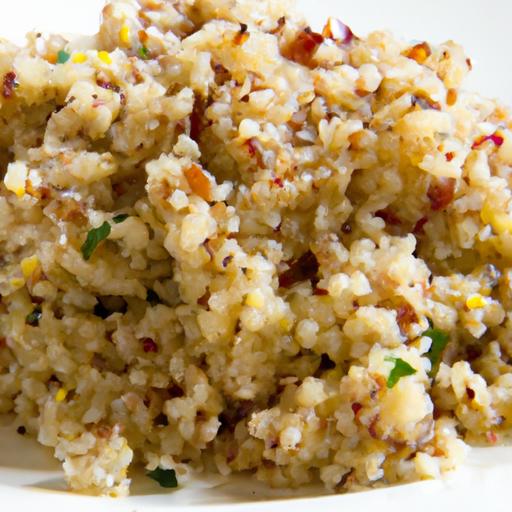
Quick & Tasty Chinese Beef and cabbage Stir Fry Recipe
Quick & tasty Chinese beef and cabbage stir fry recipe brings the best of both worlds: tender, flavorful beef paired with crisp, vibrant cabbage-wrapped in an authentic savory sauce bursting with umami. This dish is a perfect representation of home-cooked Chinese comfort food that’s both speedy and satisfying, ideal for weeknight dinners when time and flavor must both be prioritized.
Prep and Cook Time
- Preparation: 15 minutes
- Cooking: 10 minutes
- Total: 25 minutes
yield
4 generous servings
Difficulty Level
Easy – perfect for cooks at any skill level wanting a quick, flavorful meal
Ingredients
- 300g flank steak, thinly sliced against the grain
- 1/2 medium green cabbage, shredded (approx. 4 cups)
- 3 cloves garlic, minced
- 1-inch piece fresh ginger, finely grated
- 2 tbsp vegetable oil
- 2 tbsp soy sauce, preferably light
- 1 tbsp oyster sauce
- 1 tsp Shaoxing wine or dry sherry (optional)
- 1 tsp toasted sesame oil
- 1 tsp cornstarch, mixed with 2 tbsp water (slurry)
- 1/2 tsp freshly ground black pepper
- 2 stalks scallions, sliced on the diagonal
- 1 tsp sugar
- Red chili flakes (optional, to taste)
Instructions
- Prepare the beef: Pat the flank steak slices dry with paper towels to ensure a good sear. Toss them in 1 tsp soy sauce, 1 tsp cornstarch slurry, and black pepper. Set aside for 10 minutes to marinate; this will tenderize the beef and give it a glossy texture.
- Heat a wok or large skillet: Add 1 tbsp vegetable oil, heating over high heat until nearly smoking. Add the beef in a single layer and stir-fry quickly for about 2-3 minutes until browned but not fully cooked. remove beef and set aside to avoid overcooking.
- Stir-fry the aromatics: Lower heat to medium-high and add the remaining 1 tbsp oil. Toss in minced garlic and grated ginger, cooking until fragrant-about 30 seconds. Avoid burning by stirring continuously.
- Cook the cabbage: Add shredded cabbage along with a pinch of salt and sugar. Stir-fry briskly for 3-4 minutes, keeping the cabbage moving to retain its bright color and satisfying crunch. Avoid overcooking to preserve nutrients and texture.
- Create the savory sauce: Mix together soy sauce, oyster sauce, Shaoxing wine (if using), toasted sesame oil, and the remaining cornstarch slurry. Pour the sauce over the cabbage in the wok and toss to combine evenly.
- Return the beef: Add the beef back into the wok along with scallions and chili flakes (if using). stir-fry together for another 1-2 minutes until beef is cooked through and everything is coated with the luscious sauce.
- Serve instantly: Remove from heat and transfer to a warmed serving dish. Garnish with extra scallions or toasted sesame seeds if desired.
Tips for Success
- Choosing the perfect cuts of beef: For maximum flavor and tenderness,flank steak or skirt steak are ideal due to their grain and robust texture-just slice thinly across the grain to ensure tenderness.
- Mastering the stir-fry technique: keep your wok or pan hot and ingredients moving quickly. This high-heat, fast-cooking method seals in juices and preserves the crunch and nutrients of cabbage.
- Sauce crafting tip: Balance salty soy with slightly sweet oyster sauce and a hint of aromatic sesame oil to create a multidimensional authentic flavor profile.
- Make it your own: Swap oyster sauce with hoisin for a sweeter twist or add bell peppers for color and sweetness.
- Advance prep tip: Slice and marinate beef up to 1 hour ahead. Cabbage can be shredded and stored wrapped in a damp towel in the fridge for day-of cooking.
Serving Suggestions
This quick & tasty Chinese beef and cabbage stir fry recipe truly shines when served piping hot alongside fluffy steamed jasmine rice or noodles. For a refreshing contrast, plate it with a simple cucumber salad dressed in rice vinegar and sesame seeds. Garnish with sliced scallions, a drizzle of extra sesame oil, or a sprinkle of toasted peanuts for a delightful crunch.

| Nutrient | Per Serving |
|---|---|
| Calories | 280 kcal |
| Protein | 31 g |
| Carbohydrates | 8 g |
| Fat | 12 g |
For a deeper dive into stir-fry techniques and balancing flavors, visit Serious Eats: How to Stir Fry. Also, you might enjoy our Easy Chinese Beef and Broccoli Recipe for another quick and satisfying Chinese-inspired meal.
Q&A
Q&A: Quick & Tasty Chinese Beef and Cabbage Stir Fry Recipe
Q1: What makes this Chinese beef and cabbage stir fry quick and easy?
A: The beauty of this recipe lies in its streamlined prep and cooking process. Thinly sliced beef cooks in minutes,and cabbage-being a quick-wilting vegetable-adds crunch and color without lengthy cooking. Plus, the simple sauce blends in seconds, meaning you’re at the dinner table before you know it!
Q2: Can I use other cuts of beef for this stir fry?
A: Absolutely! While flank or sirloin steak are perfect for their tenderness and flavor, you can also substitute with skirt steak or even thinly sliced ribeye. The key is slicing the beef thinly against the grain for maximum tenderness and quick cooking.
Q3: Is this recipe adaptable for vegetarians or vegans?
A: For a plant-based twist, swap the beef with firm tofu or seitan. Use a mushroom or vegetable broth instead of beef broth, and make sure your soy sauce or other seasonings are vegan-friendly. The cabbage and sauce create a robust flavor base that works beautifully with these alternatives.
Q4: What are the essential flavors in the stir fry sauce?
A: This sauce balances savory umami from soy sauce with a touch of sweetness-usually from a little brown sugar or honey-plus the zesty brightness from ginger and garlic. A splash of rice vinegar or a hint of chili can add complexity and kick if you like.
Q5: How do I get the perfect stir fry texture for the cabbage?
A: The trick is high heat and short cooking time. Start by cooking the beef just until browned, then toss in the cabbage and stir-fry quickly so it stays crisp-tender. Avoid overcooking to preserve its natural sweetness and crunch.
Q6: can I prepare this dish ahead of time?
A: While its best enjoyed fresh for that signature stir-fry texture, you can prep ingredients in advance-slice the beef, chop cabbage, and mix the sauce. Store them separately in the fridge and cook everything up in just minutes when you’re ready.Q7: What sides pair well with this beef and cabbage stir fry?
A: Steamed jasmine or brown rice is a classic choice, soaking up all those flavorful juices. For a lighter option, try cauliflower rice or even stir-fried noodles. A side of steamed dumplings or a simple cucumber salad can round out the meal beautifully.
Q8: How can I spice up this recipe without overpowering the flavors?
A: A dash of chili flakes or a drizzle of chili oil at the end adds a pleasant heat without overwhelming the dish. You can also toss in sliced fresh chilies with the garlic and ginger during cooking for a more integrated kick.
Q9: Is this recipe suitable for meal prepping?
A: Yes! cook the beef and cabbage separately and store them in airtight containers. reheat gently in a skillet to maintain texture, and toss with the sauce just before serving to keep everything fresh and flavorful.Q10: What kitchen tools do I need to make this stir fry?
A: A good sharp knife for quick slicing,a large wok or skillet for high-heat cooking,and a spatula for constant stirring.Having a small bowl for mixing your sauce ingredients beforehand will also keep things seamless.
This Q&A helps demystify the Quick & Tasty Chinese Beef and Cabbage Stir Fry, showing how creativity and simplicity come together in every sizzling bite!
future Outlook
Whip up this Quick & Tasty Chinese Beef and Cabbage Stir Fry any night you crave a meal that’s as satisfying as it is speedy. With tender strips of beef mingling perfectly with crisp cabbage, all enveloped in a savory sauce, this recipe strikes the ideal balance between flavor and convenience.Whether you’re a seasoned stir-fry pro or a kitchen newcomer, this dish promises a burst of authentic Chinese-inspired goodness that won’t keep you waiting. So next time hunger calls, remember: delicious, home-cooked comfort is just one sizzling pan away.