Savor the Flavor is your go-to guide for transforming humble garden veggies into irresistible, cooked veggie cups bursting with vibrant taste and wholesome nutrition. Selecting the freshest vegetables and marrying them with perfected cooking techniques and inventive seasonings ensures every bite delivers maximum satisfaction. Whether you’re a weeknight warrior or an aspiring gourmet, these tips and tricks will inspire you to elevate simple veggies into elegant, flavorful treats.
Prep and Cook Time
Prep: 20 minutes | Cook: 25 minutes | total: 45 minutes
Yield
4 servings
Difficulty Level
Medium
Ingredients
- 1 cup zucchini, diced
- 1 cup red bell pepper, finely chopped
- 1/2 cup yellow corn kernels, fresh or frozen
- 1/2 cup cherry tomatoes, halved
- 1/2 cup cremini mushrooms, sliced
- 1/4 cup red onion, minced
- 2 cloves garlic, minced
- 2 tbsp olive oil
- 1 tsp smoked paprika
- 1/2 tsp ground cumin
- 1/4 tsp chili flakes (optional)
- 1 tsp fresh thyme leaves or ½ tsp dried thyme
- Salt and freshly ground black pepper, to taste
- 4 small whole wheat or gluten-free pita cups, for serving
- Fresh herbs (parsley or cilantro), for garnish
- 1 tbsp lemon juice
- 2 tbsp crumbled feta cheese or vegan parmesan (optional)
Instructions
- Prepare your vegetables: Rinse and dice the zucchini, red bell pepper, and cherry tomatoes. Slice mushrooms and finely mince the onion and garlic.
- Heat olive oil in a large skillet over medium heat.Add the minced onion and sauté until translucent, about 3 minutes.
- Add garlic, zucchini, and mushrooms. Sauté until veggies are slightly tender and golden brown on edges, around 5 minutes, stirring occasionally to prevent sticking.
- Incorporate the bell pepper and corn kernels. Cook for another 3 minutes until the bell pepper softens but remains crisp.
- Season the mixture with smoked paprika, ground cumin, chili flakes (if using), thyme, salt, and pepper. Stir well to coat all veggies with the spices.
- Fold in the cherry tomatoes and lemon juice. Cook for an additional 2 minutes to warm through. The acid brightens the flavors and balances the earthiness of the veggies.
- Remove from heat and spoon the veggie mixture evenly into the pita cups. Sprinkle crumbled feta or vegan parmesan on top for a creamy, salty kick.
- Garnish with fresh herbs such as parsley or cilantro,adding color and fresh aroma.
- Serve immediately for warm, cozy bites or refrigerate for a chilled, refreshing alternative. Both versions retain rich flavor and stunning texture.
Tips for Success
- Veggie selection: Choose vibrant, crisp vegetables at peak freshness for maximum flavor and nutrition. Seasonal varieties add unique character to each batch.
- Don’t overcrowd the pan: Sauté veggies in batches if necessary to ensure even caramelization and avoid steaming.
- Customize your seasoning blend: Try adding a dash of coriander or smoked chili powder for a smoky twist or fresh minced basil for an herb-forward profile.
- Make ahead: The cooked veggie mixture can be stored in the refrigerator for up to 3 days.Reheat gently on the stovetop or enjoy chilled in pita cups for quick meals on busy days.
- Substitutions: Swap pita cups with crispy phyllo cups or endive leaves for a gluten-free or low-carb option, maintaining exciting presentation and crunch.
Serving Suggestions
These veggie cups are perfect small plates for brunch or an elegant appetizer for dinner parties. Present on a rustic wooden board alongside a dollop of herb-infused Greek yogurt or a zesty avocado crema. Add edible flowers or microgreens on top for an extra pop of color and sophistication. Pair with a chilled white wine or sparkling water with lemon for a refreshing, light feast.
| Nutrient | Per Serving |
|---|---|
| Calories | 180 |
| Protein | 5g |
| Carbohydrates | 25g |
| Fat | 7g |

For more inspiration on vegetable-packed dishes, explore our Healthy Roasted Veggies and consult the USDA’s resources on vegetable nutrition here. Embrace the journey of savoring taste,texture,and wellness through every colorful veggie cup you create.
Q&A
Q&A: Savor the Flavor - The Ultimate Guide to Cooked Veggie Cups
Q1: What exactly are cooked veggie cups?
A1: Cooked veggie cups are delightful,pre-portioned servings of perfectly cooked vegetables,nestled into charming little cups. They’re designed for convenience and flavor, making it easy to enjoy nutritious veggies without fuss. think of them as portable gardens of goodness, ready to brighten your meal or snack time.Q2: Why should I try cooked veggie cups rather of just eating raw veggies?
A2: While raw veggies have their charm,cooking unlocks a whole new world of flavors and textures. Steaming, roasting, or sautéing concentrates natural sweetness, softens fibrous edges, and can even enhance nutrient availability. Veggie cups combine that savory warmth with easy portability – a win-win for taste and convenience.
Q3: What types of vegetables work best in these cups?
A3: The sky’s the limit! Root veggies like carrots and beets, tender greens such as spinach and kale, zesty bell peppers, sweet corn, mushrooms, and even hearty beans or lentils all make excellent candidates. The key is balancing textures and colors for an appealing, tasty combo.
Q4: how do you keep cooked veggie cups fresh and vibrant?
A4: Gentle cooking methods like steaming or blanching preserve color and nutrients.Adding a splash of lemon juice or a sprinkle of fresh herbs right before sealing can brighten flavors and fend off dullness. Store them in airtight containers and chill promptly – freshness is flavor’s best friend!
Q5: Can cooked veggie cups be customized for different dietary needs?
A5: Absolutely! they’re incredibly versatile. Whether you’re vegan, gluten-free, or following a low-carb plan, you can tailor veggie combinations, seasonings, and added proteins like quinoa or tofu to suit your lifestyle perfectly.
Q6: What’s the best way to season and enhance the flavor of cooked veggie cups?
A6: The secret is layering flavors: a base of aromatic garlic or shallots, a dash of spices like smoked paprika or cumin, and finishing touches of fresh herbs, tangy balsamic glaze, or a sprinkle of toasted nuts. Each cup becomes a mini flavor explosion that keeps you coming back for more.
Q7: How can I incorporate cooked veggie cups into my daily meals?
A7: Veggie cups are snack heroes, lunchbox MVPs, and dinner sidekicks. Pop one alongside your sandwich, toss the contents into grain bowls, or enjoy them warm as a comforting side. Their ease and flavor make them suitable anytime – from quick breakfasts to elegant dinner parties.Q8: Do cooked veggie cups have any nutritional benefits over other veggie preparations?
A8: Yes! Cooking can enhance the bioavailability of certain antioxidants like beta-carotene and lycopene. Plus, pre-portioned cups help with mindful eating and ensure you get your veggie quota without guesswork – all wrapped up in a delicious package.Q9: Are cooked veggie cups expensive or time-consuming to prepare?
A9: Not at all. With a bit of planning, you can batch-cook veggies in one go and portion them into cups for the week ahead. Using seasonal produce and simple seasoning keeps costs down. Time saved during busy weekdays more than compensates for a little prep upfront.
Q10: Where can I find inspiration for my own cooked veggie cup creations?
A10: Culinary blogs, cooking shows, and foodie communities are treasure troves of ideas. Experiment with different global spices, try fusion combos, or revisit comfort food classics with a veggie twist. Your pantry and creativity are your greatest tools – happy mixing!
The Way Forward
As you embark on your journey to master the art of cooked veggie cups, remember that each bite is more than just a harmonious blend of flavors-it’s a festivity of nature’s bounty transformed by your own hands. Whether you’re seeking a quick snack, a vibrant side, or a wholesome meal, these versatile cups invite endless creativity and nourishment. So grab your favorite veggies, let your imagination lead, and savor every flavorful moment. After all, the ultimate guide isn’t just about cooking-it’s about making vegetables irresistible, one delicious cup at a time.
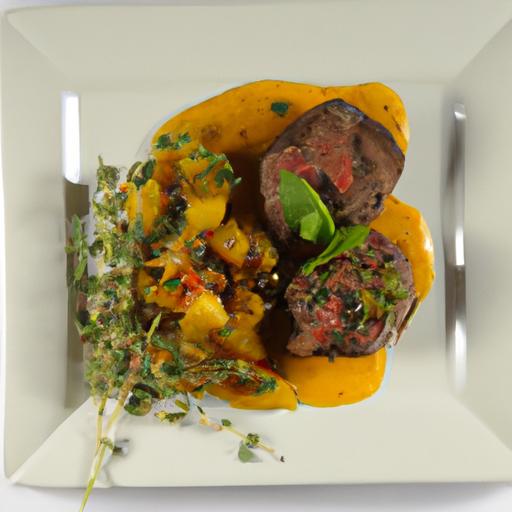
Savor the Flavor: Roasted Potatoes with Mushrooms & Peppers come alive when you choose the freshest, most compatible ingredients and apply time-tested techniques.Selecting the right potatoes and mushrooms is the foundation of this dish, marrying earthiness with a satisfying texture that dances on the palate. Whether you prefer the creamy bite of Yukon Golds or the crisp edges from Red Bliss, pairing them with robust Cremini or delicate Shiitake mushrooms brings depth and umami to every forkful.
Choosing the Perfect Potatoes and Mushrooms for Ultimate Roasting
Selecting potatoes with a medium starch content, such as Yukon Gold or Red Bliss, ensures tender insides and crisp, golden skins. these varieties hold their shape beautifully and develop irresistible caramelization during roasting. For mushrooms, opt for Cremini or button mushrooms for their full-bodied flavor or Shiitakes if you want an earthy, slightly smoky note. Cleaning mushrooms with a damp cloth rather than soaking preserves their texture and prevents sogginess.
Mastering the Art of Seasoning to Elevate Every Bite
Seasoning is where this roasted dish truly shines. A generous coat of extra virgin olive oil not onyl promotes crisping but also enhances flavor absorption. Freshly cracked black pepper and sea salt are must-haves, but layering fragrant herbs like rosemary, thyme, or smoked paprika takes it to the next level. Don’t underestimate the power of garlic-minced or sliced-and a splash of balsamic vinegar that elevates sweetness and tang concurrently.
Techniques to Achieve Crispy Skins and Tender Veggies
Preheat your oven to a high temperature-around 425°F (220°C)-to trigger a Maillard reaction, the magic behind that coveted golden crust. Cut potatoes into uniform pieces to ensure even cooking. Parboiling them briefly before roasting can jumpstart tenderness while drying them well after boiling encourages crispiness. Spread ingredients in a single layer on a rimmed sheet tray, giving space for hot air to circulate. Flip halfway through cooking to guarantee even browning. For mushrooms, roast them separately or after potatoes to avoid excess moisture softening the crisp edges.
Pairing Your Roasted Dish with Complementary Sides and Sauces
To enhance this vibrant medley, pair it with light, fresh sides like a zesty arugula salad tossed with lemon vinaigrette or a creamy herbed yogurt dip. Richer accompaniments, such as garlic aioli or a tangy chimichurri, bring an exciting contrast that harmonizes beautifully with roasted mushrooms and potatoes. For heartier meals, serve alongside grilled chicken or a juicy steak, letting these roasted vegetables steal the spotlight as a flavorful and textured foil.
Prep and cook Time
- Planning: 15 minutes
- Cooking: 35-40 minutes
Yield
Serves 4
difficulty Level
Easy to Medium
Ingredients
- 1.5 pounds Yukon Gold potatoes, washed and cut into 1-inch pieces
- 12 ounces Cremini mushrooms, cleaned and halved
- 1 large red bell pepper, sliced into strips
- 3 tablespoons extra virgin olive oil
- 3 cloves garlic, thinly sliced
- 1 teaspoon fresh rosemary, finely chopped
- 1 teaspoon fresh thyme leaves
- 1 teaspoon smoked paprika
- Salt and freshly ground black pepper, to taste
- 1 tablespoon balsamic vinegar
Instructions
- Preheat your oven to 425°F (220°C). Prepare a large baking sheet by lining it with parchment paper or lightly greasing it.
- Bring a pot of salted water to a boil. Add the potato pieces and parboil for 8-10 minutes until just tender but not falling apart.
- Drain potatoes thoroughly and pat dry with a clean kitchen towel or paper towels to remove excess moisture-this step is crucial for crispy skins.
- In a large mixing bowl, combine the potatoes, mushrooms, and sliced bell pepper. Drizzle with olive oil and balsamic vinegar.
- Add garlic, rosemary, thyme, smoked paprika, salt, and pepper. Toss everything gently to evenly coat the vegetables in the seasoning.
- Spread the vegetables in a single layer on the prepared baking sheet, ensuring they aren’t overcrowded.
- Roast for 20 minutes, then gently flip the vegetables using a spatula for even browning.
- Continue roasting for another 15-20 minutes or until the potatoes are golden and crisp and mushrooms are tender with caramelized edges.
- Remove from oven and let rest for 5 minutes before serving to enhance flavor melding.
Chef’s Notes
- For vegetarian variations, omit balsamic vinegar and swap smoked paprika for cumin for a smoky twist.
- If pressed for time, skip parboiling but roast potatoes an extra 10 minutes at the end, stirring frequently.
- Feel free to add other vegetables like zucchini or cherry tomatoes for a colorful expansion of flavors.
- Make ahead tip: Roast the vegetables up to a day in advance, then reheat in a hot oven for 10 minutes to regain crispiness.
Serving Suggestions
Garnish your roasted potatoes with mushrooms and peppers using freshly chopped parsley or a sprinkle of grated Parmesan to add brightness and umami. Serve alongside a crisp green salad or a cool tzatziki sauce to introduce refreshing textures and a creamy contrast. For dinner parties, plate the dish on rustic wooden boards, allowing guests to savor the flavors with crusty artisan bread and a glass of chilled white wine such as Sauvignon Blanc.
| Nutrient | per Serving |
|---|---|
| Calories | 220 kcal |
| Protein | 5g |
| Carbohydrates | 30g |
| Fat | 9g |

For even more cozy vegetable roasting ideas,explore our roasted vegetable recipes collection. To dive deeper into the science of roasting and optimal seasoning, visit Serious eats for expert tips and techniques.
Q&A
Q&A: Savor the flavor of Roasted Potatoes with Mushrooms & Peppers
Q1: What makes roasted potatoes with mushrooms and peppers a standout dish?
A1: This dish masterfully combines earthy, tender potatoes with the rich, umami depth of mushrooms and the sweet, vibrant crunch of peppers. Roasting brings out the natural sugars in each ingredient, resulting in a harmonious medley of textures and flavors that dance on your palate.
Q2: Which types of potatoes work best for roasting with mushrooms and peppers?
A2: Yukon Gold or red potatoes shine here due to their creamy interior and ability to crisp beautifully on the outside. Their subtle buttery flavor perfectly complements the robust mushrooms and sweet peppers, making every bite a cozy experience.
Q3: How do mushrooms and peppers enhance the overall flavor profile?
A3: Mushrooms add a savory, meaty note that deepens the dish’s complexity, while peppers bring a pop of color and a touch of sweetness or mild spiciness, depending on the variety. Together, they elevate humble roasted potatoes into a vibrant, satisfying feast.
Q4: What’s the secret to achieving perfectly roasted potatoes?
A4: The trick lies in balance-toss the potatoes in olive oil, salt, and herbs, then give them space on the pan to crisp evenly. Preheating the oven to a high temperature (around 425°F/220°C) helps develop that irresistible golden crust while keeping the inside soft and fluffy.
Q5: Can this dish be customized to suit different tastes or diets?
A5: Absolutely! Swap bell peppers for fiery chilies if you crave heat, or add fresh herbs like rosemary or thyme for an aromatic kick. For a vegan boost, drizzle with a tahini dressing post-roast, or incorporate garlic and onion powder to intensify flavors without extra calories.
Q6: What pairs well with roasted potatoes, mushrooms, and peppers?
A6: This dish is versatile-it can stand alone as a hearty vegetarian meal or accompany grilled meats, roasted chicken, or even a crisp green salad.A tangy yogurt dip or a drizzle of balsamic glaze can add an extra layer of flavor to complement the roasted elements.
Q7: How can I make this dish ahead of time without losing its deliciousness?
A7: Roast the potatoes, mushrooms, and peppers a few hours ahead, then gently reheat in the oven to revive their crispness. For meal prep, store them in an airtight container and refresh in a hot skillet or oven before serving to maintain that fresh-from-the-oven charm.
Q8: Any pro tips for elevating the dish to restaurant-quality?
A8: Finish with a sprinkle of flaky sea salt and fresh herbs just before serving, and consider adding a squeeze of lemon juice or a drizzle of infused oil (like garlic or chili oil) to brighten the flavors. Presentation counts, so arrange the components artfully on the plate to entice both eyes and taste buds!
Final thoughts
As the last golden morsel melts on your tongue, you’re reminded that simple ingredients-when roasted to perfection and combined thoughtfully-can transform into a symphony of flavors. Roasted potatoes, mushrooms, and peppers don’t just fill a plate; they tell a story of comfort, warmth, and rustic elegance. whether enjoyed as a hearty side or a standalone delight, this dish invites you to savor not only each bite but also the moments shared around the table.So next time you crave something both familiar and intriguingly vibrant, let this roast remind you that the best flavors often come from the humblest roots.
Savor Simplicity with authentic Chinese home cooking begins by embracing a handful of essential ingredients that bring out deep, vibrant flavors reminiscent of bustling street markets and timeless family kitchens. Fresh ginger, fragrant garlic, and the unmistakable umami in soy sauce form the backbone of countless dishes, while sesame oil adds that nutty warmth that rounds off every bite. Incorporating these staples ensures your meals carry an unmistakable authenticity that both excites and comforts the soul.
Prep and Cook Time
- Preparation: 15 minutes
- Cooking Time: 20 minutes
- Total Time: 35 minutes
Yield
Serves 4 generously
Difficulty Level
Easy – ideal for weeknight cooking and beginner-friendly
ingredients
- 2 tablespoons vegetable oil (for stir-frying)
- 3 cloves garlic, finely minced
- 1 tablespoon fresh ginger, grated
- 200g boneless chicken breast, thinly sliced
- 1 red bell pepper, julienned
- 1 cup snap peas, trimmed
- 2 green onions, chopped (white and green parts separated)
- 3 tablespoons light soy sauce
- 1 tablespoon oyster sauce
- 1 teaspoon toasted sesame oil
- 1 teaspoon cornstarch mixed with 2 tablespoons water (slurry)
- Cooked jasmine rice, for serving
Instructions
- Heat the vegetable oil in a large wok or skillet over medium-high heat until shimmering.
- Add the minced garlic and grated ginger, sauté for about 30 seconds until aromatic – be careful not to burn.
- Toss in the sliced chicken breast and stir-fry until it turns opaque and just begins browning, approximately 4-5 minutes.
- Add the red bell pepper, snap peas, and white parts of the green onions. Continue to stir-fry for 3-4 minutes until veggies are crisp-tender.
- Pour in the light soy sauce, oyster sauce, and toasted sesame oil, stirring to coat all ingredients evenly.
- Slowly stir in the cornstarch slurry, allowing the sauce to thicken and cling to the chicken and vegetables, about 1-2 minutes.
- Remove from heat and garnish with the green onion tops for a fresh, vibrant finish.
- Serve immediately over steaming jasmine rice to soak up the rich, flavorful sauce.
Tips for Success
- Use high heat and keep ingredients moving in the wok to achieve that signature smoky “wok hei” flavor.
- Thinly slicing the chicken ensures quick, even cooking and tender bites.
- Substitute chicken with firm tofu or shrimp for delightful variations that keep weeknight meals exciting.
- Prep all ingredients before cooking: stir-frying is fast-paced and leaves little room for multitasking.
- Make the sauce ahead by mixing soy, oyster, and sesame oil to streamline mealtime.
- Leftover stir-fry keeps well in the fridge for up to 2 days,perfect for quick reheat dinners.
Serving Suggestions
Present your stir-fry sizzling over fluffy jasmine rice, garnished with a sprinkle of toasted sesame seeds and fresh cilantro sprigs. Add a side of cooling cucumber salad or steamed bok choy to balance bold flavors with refreshing crispness. Pair this with a light green tea or a crisp lager for an effortlessly satisfying meal that honors the heart of home-style Chinese cooking.
| Nutrient | Per Serving |
|---|---|
| Calories | 320 kcal |
| protein | 28 g |
| Carbohydrates | 18 g |
| Fat | 12 g |

For further inspiration on authentic Chinese flavors, explore our easy Chinese Noodle Recipes or deepen your understanding of classic stir-fry techniques with Serious Eats’ Stir-Fry Guide.
Q&A
Q&A: Savor Simplicity – Easy Chinese Dishes for home Cooks
Q1: What makes Chinese cooking approachable for home cooks?
A1: chinese cuisine is all about balancing flavors and textures with straightforward techniques. Many customary dishes rely on simple ingredients and quick cooking methods like stir-frying and steaming, making them perfect for home cooks looking to whip up something delicious without fuss. Plus, with a handful of pantry staples like soy sauce, ginger, garlic, and scallions, you’re already halfway there!
Q2: Which easy Chinese dishes are perfect for beginner home chefs?
A2: Start with classics like stir-fried beef with broccoli, egg fried rice, or mapo tofu. These dishes use minimal ingredients and have forgiving cooking steps,so even if your timing isn’t perfect,the flavors usually come together nicely. Dumplings and spring rolls are also fun, hands-on options that let you get creative without overwhelming complexity.
Q3: How can I make authentic-tasting Chinese dishes without exotic ingredients?
A3: Authenticity is more about technique and balance than rare ingredients. Stock your pantry with essentials like soy sauce, sesame oil, rice vinegar, and Chinese five-spice powder-they’re widely available now and elevate any dish instantly.Fresh aromatics like garlic, ginger, and green onions create that unmistakable Chinese flavor, and simple stir-fry techniques bring it all to life.
Q4: What cooking tools do I need to start making easy chinese meals?
A4: A wok is ideal but not mandatory-any large skillet or sauté pan works well. A sharp chef’s knife, a sturdy cutting board, and a pair of chopsticks or tongs for tossing stir-fries are great starters. A bamboo steamer or a steaming rack is perfect for dumplings and buns, but you can improvise with a metal strainer in a pot of boiling water.
Q5: How do I balance flavors in chinese cooking?
A5: Chinese cuisine thrives on harmony-sweet meets salty, spicy tangs balance with savory depths. Taste as you go and adjust with sugar, soy sauce, vinegar, or chili to find your ideal mix. Remember, fresh ingredients like crisp veggies or fragrant herbs add brightness and textural contrast, helping your dish sing.Q6: Can I adapt Chinese recipes for dietary preferences?
A6: Absolutely! Chinese cooking is incredibly versatile. Swap pork for tofu or chicken for mushrooms to suit vegetarians. Use low-sodium soy sauce to reduce salt, or coconut aminos as a gluten-free choice. The key is to maintain the balance of flavors and textures, so your adapted dish stays just as satisfying.
Q7: What’s a simple weeknight meal inspired by Chinese flavors?
A7: Try a quick garlic ginger stir-fry with colorful veggies and your protein of choice, served over steamed rice or noodles. The beauty lies in the speed and adaptability-you can mix and match whatever’s in the fridge, add a splash of soy sauce and a drizzle of sesame oil, and dinner is ready in under 20 minutes.
Q8: How can I bring the experience of Chinese home cooking to my table?
A8: Invite family or friends to share the cooking process-rolling dumplings or tossing egg fried rice together turns dinner prep into a communal party. Pair your meal with jasmine tea or a light Chinese lager to enhance the atmosphere. Most importantly, savor each bite slowly-appreciate the flavors, textures, and stories woven into every simple dish.
To Wrap It Up
As you embark on your culinary journey with these easy Chinese dishes, remember that savoring simplicity doesn’t mean sacrificing flavor. Each recipe is a doorway to rich traditions and vibrant tastes, crafted to fit seamlessly into your busy life. whether it’s the humble stir-fry or a fragrant bowl of noodle soup, these dishes invite you to celebrate the art of home cooking with confidence and joy.So, roll up your sleeves, gather your ingredients, and let simplicity lead you to delicious discoveries right in your own kitchen. Happy cooking!
Discovering Seoul’s Street Food Wonders From Tteokbokki to Hotteok
Savor Seoul: Exploring Korea’s vibrant street food scene is an irresistible journey of flavor and texture, where sweet meets spicy, and tradition dances with modern flair. Among the many iconic dishes, tteokbokki – the fiery stir-fried rice cakes – captures hearts with its chewy texture and tongue-tingling sauce, while hotteok delights with its warm, sweet, syrup-filled pockets that caramelize beautifully over a griddle.
Tteokbokki (Spicy Korean Rice Cakes)
This beloved street food staple originated from royal court cuisine and quickly evolved into a popular daily snack for Seoul’s bustling markets. The playful bounce of the rice cakes perfectly complements the rich, spicy sauce made from gochujang (Korean chili paste) and a hint of sweetness – creating an addictive flavor harmony that lingers long after your last bite.
Prep and Cook Time
Prep: 10 minutes | Cook: 15 minutes | Total: 25 minutes
yield
Serves 4 as a snack or light meal
Difficulty Level
Easy
Ingredients
- 1 lb Korean rice cakes (tteok), soaked in warm water for 10 minutes if frozen
- 2 cups water or anchovy broth
- 2 tbsp gochujang (Korean chili paste)
- 1 tbsp gochugaru (Korean chili flakes)
- 1 tbsp soy sauce
- 1 tbsp sugar
- 2 cloves garlic, minced
- 1/2 cup fish cakes, sliced
- 2 green onions, chopped
- 1 tbsp toasted sesame seeds
- Optional: boiled egg halves for garnish
Instructions
- Prepare the sauce: In a large pan, combine water or anchovy broth, gochujang, gochugaru, soy sauce, sugar, and minced garlic. Stir well and bring to a simmer over medium heat.
- add rice cakes and fish cakes: Drain rice cakes and add them to the simmering sauce. Cook for 7-10 minutes until the rice cakes soften and the sauce thickens slightly, stirring occasionally to prevent sticking.
- Incorporate green onions: stir in chopped green onions and cook for an additional 2 minutes, letting their freshness balance the heat.
- Finish and garnish: Transfer to a serving dish, sprinkle toasted sesame seeds, and optionally place boiled egg halves on top for a rich contrast.
Chef’s Notes
- For an even more flavorful broth, use homemade anchovy-dashima broth rather of water.
- Adjust the spiciness by varying the gochugaru quantity or mixing in mild chili paste.
- Try adding mozzarella cheese on top for a gooey, savory twist – a popular Korean fusion variation.
- Tteokbokki is best enjoyed fresh; however, leftovers can be stored in an airtight container for up to 2 days and gently reheated.
Serving Suggestions
Serve tteokbokki steaming hot in rustic ceramic bowls, accompanied by crunchy pickled radish on the side to balance the heat. Add a chilled glass of soju or sweet Korean rice drink (sikhye) for an authentic Seoul street food experiance.

Hotteok (Sweet Korean Pancakes)
Nothing says cozy Korean dessert like hotteok-warm pockets filled with caramelized brown sugar, chopped nuts, and cinnamon that crisp to perfection on a griddle. This snack epitomizes winter comfort on Seoul’s chilly streets and transports you instantly into the heart of Korean festive traditions.
Prep and Cook Time
Prep: 1 hour (including dough resting) | Cook: 15 minutes | Total: 1 hour 15 minutes
Yield
Makes 8 pancakes
Difficulty Level
Medium
Ingredients
- 2 cups all-purpose flour
- 1 tbsp sugar
- 1/2 tsp salt
- 1 tbsp active dry yeast
- 3/4 cup warm water
- 2 tbsp vegetable oil
- 1/2 cup brown sugar
- 1/4 cup chopped walnuts or peanuts
- 1 tsp ground cinnamon
- Oil for frying
Instructions
- Prepare the dough: In a bowl, mix warm water, yeast, and sugar. Let sit for 5 minutes until foamy. Combine flour and salt in a large mixing bowl; gradually add yeast mixture and oil. Knead until smooth and elastic, about 7 minutes.
- let dough rise: cover with a damp cloth and let rise in a warm place for 1 hour or until doubled in size.
- Make filling: In a small bowl, combine brown sugar, chopped nuts, and cinnamon.
- Shape pancakes: Punch down dough and divide into 8 equal balls. Flatten each ball, spoon 1-2 tbsp filling into the center, and carefully pinch edges to seal fully.
- Cook hotteok: Heat a non-stick pan over medium heat and lightly oil it. Place each filled dough ball on the pan and press gently with a spatula to flatten about 1/2 inch thick. Fry for 2-3 minutes until golden brown, then flip and cook second side similarly.
- Caramelize filling: Add a splash of oil and cover pan with a lid for 2-3 minutes more, allowing sugar to melt inside and get deliciously gooey.
- Serve warm: Enjoy hotteok fresh off the pan for the best sweet, crunchy, and chewy experience.
Chef’s Notes
- substitute walnuts with sesame seeds for a traditional nutty flavor.
- if yeast is unavailable, use baking powder (1 tbsp) and skip the rising step, though texture may differ.
- for a healthier twist, swap some flour for whole wheat flour and reduce sugar slightly.
- Hotteok dough can be prepared ahead and refrigerated for up to 24 hours before shaping and cooking.
Serving Suggestions
Pair hotteok with a hot cup of Korean cinnamon punch (sujeonggwa) or barley tea for an authentic street-side dessert experience in Seoul. Garnish with powdered cinnamon or crushed nuts for extra appeal.
| Nutrition | per serving (1 hotteok) |
|---|---|
| Calories | 180 kcal |
| Protein | 3 g |
| carbohydrates | 30 g |
| Fat | 5 g |
To continue your journey through Korean cuisine, discover essential Korean barbecue grilling tips and explore curated restaurants offering authentic bibimbap and japchae.
For deeper insight into gochujang and its cultural significance, visit Korea.net’s K-Food Guide.
Q&A
Q&A: Savor Seoul – Exploring Korea’s Most Iconic Dishes Unveiled
Q1: What makes Seoul’s cuisine stand out on the global food map?
A1: Seoul’s cuisine is a vibrant tapestry woven from tradition, innovation, and bold flavors. It balances ancient recipes passed down through generations with modern culinary twists, creating dishes that are both comforting and exciting. The city’s relentless energy seeps into its food culture, resulting in meals that are as dynamic and diverse as Seoul itself.
Q2: When exploring Seoul’s iconic dishes, where should one start?
A2: A perfect starting point is the humble yet magnificent kimchi. This fermented cabbage side dish sits at the heart of Korean meals, offering a tangy, spicy punch that defines Korean palates. From there, venture into plates like bibimbap, a colorful harmony of rice, veggies, and meat crowned with a sunny-side-up egg-each bite a delightful mosaic of textures and tastes.
Q3: What exactly is bibimbap,and why is it so beloved?
A3: Literally meaning “mixed rice,” bibimbap is a visual and gastronomic feast. Served in a hot stone bowl or a simple ceramic dish, it combines steamed rice with sautéed vegetables, marinated beef, and the signature fiery kick of gochujang (red chili paste). The act of mixing everything just before eating symbolizes unity and balance-two core elements of Korean ideology expressed through food.
Q4: How has street food influenced Seoul’s culinary identity?
A4: Seoul’s bustling streets are an open-air classroom for Korean gastronomy. From crispy tteokbokki (spicy rice cakes) to sweet and chewy hotteok (stuffed pancakes), street food offers fast, affordable snapshots of Korean flavor innovation. This culture of on-the-go eating fuels the city’s fast-paced lifestyle and keeps culinary traditions alive in the hum of everyday life.
Q5: Wich dish best captures the spirit of communal dining in Seoul?
A5: Samgyeopsal, or grilled pork belly, is the perfect ambassador of Seoul’s communal food culture. Gathered around a sizzling grill, diners cook their own meat, wrap it in fresh lettuce with garlic, chili, and dipping sauces, and share laughter alongside bites.It’s an immersive experience that turns eating into an event of connection and celebration.
Q6: Can you recommend a hidden gem dish for adventurous eaters in Seoul?
A6: For those willing to venture off the beaten path, sundae-Korean blood sausage-is a must-try. Made by stuffing pig intestines with a mixture of glass noodles, barley, and pig’s blood, it’s a textural twist that offers a deep dive into Korea’s nose-to-tail culinary philosophy.Frequently enough enjoyed with spicy dipping sauces, it challenges yet rewards with authentic flavors steeped in history.
Q7: How do Korean flavors differ from neighboring cuisines in Asia?
A7: While sharing some common ingredients with its neighbors, Korean cuisine carves its own niche through its distinctive use of fermentation, bold chili heat, and the emphasis on harmony between side dishes (banchan).The interplay of sweet, sour, salty, and umami within a single meal creates a multifaceted taste journey that’s unmistakably Korean.Q8: What role do seasonality and regionality play in Seoul’s iconic dishes?
A8: Though Seoul is a bustling metropolis, it remains deeply connected to the seasons and surrounding regions. Seasonal ingredients like spring’s fresh wild greens or autumn’s hearty root vegetables shape traditional dishes year-round.This celebration of nature’s rythm ensures that each meal resonates with the time and place it’s enjoyed.
Q9: How can visitors best experience Seoul’s food culture firsthand?
A9: To truly savor Seoul, immerse yourself beyond restaurant menus-explore traditional markets like Gwangjang and Namdaemun, join cooking classes, and partake in local festivals celebrating food. Engage with vendors, share meals with locals, and don’t shy away from the unfamiliar.seoul’s food is best experienced with curiosity,openness,and a hearty appetite.
Q10: In one sentence, why should everyone “savor Seoul”?
A10: as in seoul’s iconic dishes lies a flavorful story of heritage, innovation, and communal warmth waiting to be savored bite by unforgettable bite.
Insights and Conclusions
As your culinary journey through Seoul draws to a close, the flavors linger-not just on your palate, but in your memory. From the fiery embrace of kimchi to the delicate dance of bibimbap’s colors and textures, each dish tells a story of tradition, innovation, and a vibrant culture that thrives in every bite. Savor Seoul is more than a feast for the senses; it’s an invitation to explore Korea’s rich heritage through its most iconic dishes. So next time you find yourself craving adventure on a plate, remember that Seoul’s kitchens await, ready to unveil their timeless secrets and satisfy your appetite for finding.
Savor the Richness: The Art of French Onion Soup Gratinée
Savor the richness of French onion soup gratinée-a timeless classic steeped in centuries of French culinary heritage. This deeply flavorful soup, adored for its luscious caramelized onions and bubbling cheese crust, originated from humble beginnings as a peasant dish designed to transform simple ingredients into unusual comfort. Infused with tradition and technique, this savory masterpiece invites you to experience its warm soul and golden allure.
Prep and Cook Time
- Readiness: 20 minutes
- Cooking: 1 hour 15 minutes
- Total Time: 1 hour 35 minutes
Yield
Serves 6 generous portions
Difficulty Level
Medium – Requires patience and attention to detail, but accessible to home cooks ready to embrace culinary artistry.
Ingredients
- 5 large yellow onions, peeled and thinly sliced
- 4 tablespoons unsalted butter
- 1 tablespoon olive oil
- 1 teaspoon salt
- 1/2 teaspoon freshly ground black pepper
- 1 tablespoon sugar (to aid caramelization)
- 3 cloves garlic, minced
- 1/2 cup dry white wine
- 8 cups beef broth, preferably homemade or high-quality low sodium
- 2 teaspoons fresh thyme or 1 teaspoon dried thyme
- 1 bay leaf
- Baguette slices, toasted
- 2 cups grated Gruyère cheese
- 1/2 cup grated Emmental cheese (optional, for extra meltiness)
The Origins and Tradition Behind French Onion Soup Gratinée
Savor the richness by diving into the soul of this hearty soup, whose roots trace back to 18th-century France. Traditionally celebrated as a humble meal for workers and farmers, it was the ingenious French cooks who elevated everyday onions and broth into a dish worthy of royal banquets. Its gratinée, or baked cheese topping, is what gives the soup its iconic golden crown.This layering of caramelized sweetness, savory broth, and melted cheese celebrates culinary craftsmanship that has been lovingly preserved in bistros throughout Paris and beyond.
Choosing the Perfect Onions and Broth for Deep Flavors
The heart of a sublime French onion soup begins with selecting the right onions. Opt for yellow onions-thier natural sweetness and robust flavor balance perfectly with the caramelizing process. Avoid overly sharp white onions, as they can overpower the delicate harmony of the dish. For the broth, don’t shortcut: high-quality beef broth infuses depth and richness that pre-made alternatives often lack. Homemade stock,simmered with marrow bones and vegetables,yields the richest umami foundation. combining stock from authoritative sources like Serious Eats can also inspire kitchen confidence.
Mastering the Caramelization Technique to Unlock sweetness
Transforming onions into golden jewels requires patience and care. Using a mixture of butter and olive oil prevents burning while allowing for even heat distribution. Sprinkle onions with a pinch of sugar to accelerate caramelization without compromising texture.sauté the onions slowly over medium-low heat for 45 to 60 minutes, stirring occasionally, until they collapse into rich, amber ribbons. This step cannot be rushed-true caramelization unlocks a natural sweetness that defines the soup’s iconic flavor profile.
Selecting and Melting Cheese for the Ultimate Golden Crust
The crowning glory is the gratinée: a decadent blanket of glorious melted cheese that bubbles, browns, and crisps atop the soup. Choose Gruyère cheese for its nutty flavor and superb melting quality, perfectly complemented by Emmental for extra creaminess. After ladling the soup into ovenproof crocks, nestle toasted baguette slices on top and generously layer with cheese. Broil until bubbling and golden brown, inviting irresistible aromas and an alluring crust that creates contrasting textures with the silky soup beneath.
Instructions
- Prepare the onions: Thinly slice the peeled yellow onions evenly for consistent caramelization.
- Heat butter and oil: In a large heavy-bottomed pot, melt butter with olive oil over medium heat.
- Add onions: Toss onions into the pot, sprinkle with salt and sugar.
- Caramelize slowly: Stir frequently, cooking low and slow until onions turn deep golden brown, about 45-60 minutes. Avoid rushing to prevent burning.
- Add garlic and deglaze: Stir in minced garlic for 1 minute, then pour in white wine. Scrape up browned bits for extra flavor and reduce wine by half.
- Add broth and herbs: Pour in beef broth, add thyme and bay leaf, then bring to a simmer. Cook gently for 30 minutes, uncovered, to blend flavors.
- Preheat broiler: Prepare oven by heating broiler on high.
- Toast baguette slices: Lightly toast until golden, then ladle soup into oven-safe crocks.
- Assemble: Place toasted baguette slices atop each bowl, cover generously with Gruyère (and Emmental if using).
- Gratinée the soup: Position crocks under the broiler for 3-5 minutes, watching carefully until cheese melts, bubbles, and browns beautifully.
- Serve promptly: let cool slightly before serving for the warmest, most satisfying experience.
Tips for Success
- Patience is key: Caramelizing onions slowly builds the flavor complexity that defines savor the richness in this dish.
- Broth quality matters: Homemade or well-regarded store-bought beef broth enhances umami without overpowering.
- Cheese variations: Try Comté or even a sharp aged cheddar for a twist on the classic gratinée crust.
- Make ahead: Onions and broth can be prepared a day ahead for convenience; assemble and broil just before serving.
- watch the broiler: Cheese browns quickly-stay close to avoid burning.
Serving Suggestions
Present this grand French onion soup gratinée in rustic crocks to showcase the bubbling golden crust. Garnish with a small sprig of fresh thyme for a subtle herbaceous aroma and an elegant visual touch. Pair it with a crisp green salad dressed lightly with mustard vinaigrette and a glass of dry white wine to elevate the dining experience. For added indulgence, serve with crusty parisian bread on the side to soak up every flavorful drop.

| Nutrient | Per Serving |
|---|---|
| Calories | 350 kcal |
| Protein | 20 g |
| Carbohydrates | 30 g |
| Fat | 18 g |
For more classic French recipes, explore our collection of French culinary delights and deepen your recognition for timeless flavors.
Q&A
Q&A: Savor the Richness – The art of French Onion Soup Gratinée
Q1: What makes French Onion Soup Gratinée so special compared to other soups?
A1: French Onion soup Gratinée is a timeless masterpiece that marries deep caramelized sweetness with savory broth, crowned by a golden, bubbling layer of melted cheese. Unlike ordinary soups, it’s as much about texture and presentation as it is about flavor-each bowl a harmonious blend of tender onions, rich stock, crusty bread, and ooey-gooey gratinéed cheese that invites slow, appreciative savoring.Q2: Where did French Onion Soup originate, and why is it called “Gratinée”?
A2: French Onion Soup has humble roots in 18th-century France, often enjoyed by peasants as an economical yet hearty dish. The term “Gratinée” refers to the gratinated top-the soup’s defining feature-a crusty cheese and bread blanket toasted under a broiler or salamander until gloriously brown and crisp. This finishing touch transforms the soup into a sensory experience, combining luscious texture with rustic elegance.
Q3: What is the secret to perfectly caramelized onions in this recipe?
A3: Patience is key. The magic happens when onions are slowly cooked over low heat for 45 minutes to an hour, coaxing out their natural sugars into a deep amber colour. Stirring occasionally prevents burning but allows the Maillard reaction to create that rich, velvety base flavor that’s both sweet and savory, setting the stage for the broth’s complexity.
Q4: What types of cheese work best for the gratinée topping?
A4: Traditional recipes champion Gruyère-a nutty, melting cheese that browns beautifully. Comté and Emmental are also sublime choices, lending their distinctive flavors and creamy texture. some adventurous cooks mix cheeses for depth: a punch of sharp Emmental balanced by mild Gruyère creates a cheese crown that’s both flavorful and melt-in-the-mouth delicate.
Q5: How do you achieve the perfect bread layer beneath the cheese?
A5: The bread acts as a sponge, soaking up the flavorful broth while still standing firm beneath the melted cheese. Classic French baguette slices,lightly toasted or grilled,are ideal-they must be firm enough to hold their shape but porous enough to absorb the soup’s essence. For an extra touch, rub the bread with a clove of garlic before layering.
Q6: Can French Onion Soup Gratinée be adapted for modern or dietary preferences?
A6: Absolutely! For a vegetarian twist, replace the traditional beef or veal stock with a rich mushroom or vegetable broth and deepen the umami with soy sauce or miso paste. Gluten-free bread options or soup-safe croutons can accommodate dietary restrictions. The gratinée cheese topping can swap in dairy-free melts for those avoiding dairy, though the traditional ooze and crust remain the soup’s signature triumph.
Q7: What is the best way to serve French Onion Soup Gratinée?
A7: Serve it piping hot straight from the broiler, in rustic crockery that showcases its golden crust. Pair with a crisp white wine, such as a dry Riesling or Sauvignon Blanc, to cut through the richness.A light green salad with a tangy vinaigrette offers a refreshing counterpoint, making the meal both indulgent and balanced.
Q8: Why has French Onion Soup remained a beloved classic through centuries?
A8: Because it embodies comfort elevated-simple ingredients transformed through artisanal technique into a dish that’s soulful and elegant. Its layers of flavor,texture,and aroma tell a story of tradition,warmth,and conviviality. Every spoonful invites not just nourishment but celebration of culinary artistry at its most heartfelt.
Ready to slow down and savor the rich harmony of caramelized onions, savory broth, crusty bread, and molten cheese? French Onion Soup Gratinée awaits-a delicious journey into France’s gastronomic soul. Bon appétit!
To Conclude
As the golden, bubbling crust of a well-made French Onion Soup gratinée gives way to the deep, caramelized whispers of slow-cooked onions and savory broth, it’s clear that this classic dish is more than just comfort food-it is an edible testament to patience, technique, and tradition. Whether enjoyed in a bustling Parisian bistro or crafted lovingly in your own kitchen, mastering the art of this rich, soulful soup invites you to savor not only its flavors but the stories and heritage steeped within each hearty, cheese-laden spoonful. So next time you crave a dish that warms both body and spirit, remember: beneath that gratinéed crown lies a world of culinary artistry waiting to be discovered, one satisfying bite at a time.
Savoring the rich, aromatic flavors of Paneer Tikka Masala begins with selecting the right paneer and an expertly crafted marinade. This beloved North Indian classic transforms tender cubes of paneer into a smoky, spiced delight that melts effortlessly into a creamy, tomato-based curry. Whether it’s your first time exploring Indian cuisine or you’re revisiting a cherished favorite, this guide will empower you to create vibrant, restaurant-quality Paneer Tikka Masala in your own kitchen.
Prep and Cook Time
- Preparation: 20 minutes
- Marination: 1 hour (minimum)
- Cooking: 25 minutes
- Total Time: 1 hour 45 minutes
Yield
Serves 4 hearty portions.
Difficulty Level
Medium – approachable for cooks familiar with basic stove-top techniques, yet rewarding enough for culinary adventurers.
Ingredients
- Paneer: 400g firm paneer, cut into 1-inch cubes
- For the Marinade:
- 3 tbsp thick yogurt (preferably Greek yogurt), whisked smooth
- 1 ½ tbsp ginger-garlic paste
- 1 tbsp Kashmiri red chili powder (mild and vibrant colour)
- 1 tsp turmeric powder
- 1 tsp garam masala
- 1 tbsp lemon juice
- 2 tbsp mustard oil or vegetable oil
- Salt to taste
- Masala Sauce:
- 3 tbsp butter
- 2 medium onions, finely chopped
- 2 large ripe tomatoes, pureed
- 1 tbsp ginger-garlic paste
- 1 tbsp coriander powder
- 1 tsp cumin powder
- 1 tsp garam masala
- 1 tsp Kasuri methi (dried fenugreek leaves), crushed
- 1/2 cup heavy cream
- Fresh coriander leaves, chopped (for garnish)
- Salt and sugar to taste
Instructions
- Prepare the Paneer Marinade: In a large bowl, combine yogurt, ginger-garlic paste, Kashmiri chili powder, turmeric, garam masala, lemon juice, mustard oil, and salt. Stir until the mixture is smooth and evenly spiced.
- Marinate Paneer: Gently fold in the paneer cubes, ensuring each piece is well coated with the marinade. Cover and refrigerate for at least 1 hour. For deeper flavor, marinate overnight.
- Cook the Paneer: Heat 1 tbsp oil in a non-stick pan over medium heat. Add marinated paneer cubes and sauté until golden and slightly charred on edges, about 5-7 minutes. Set aside on paper towels to drain excess oil.
- Make the Masala Base: In the same pan, melt butter and add onions.Sauté until translucent and golden, about 7 minutes. Stir in ginger-garlic paste and cook till fragrant, 1-2 minutes.
- Add Spices and Tomato Puree: Mix in coriander powder, cumin powder, garam masala, and a pinch of salt. Cook spices for one minute,then add the tomato puree. Simmer for 10 minutes, stirring occasionally until thickened and rich in aroma.
- Incorporate Cream and Kasuri Methi: Reduce heat to low; stir in cream and crushed dried fenugreek leaves. Taste and adjust salt and add a pinch of sugar to balance acidity. Let the gravy simmer gently for 5 minutes.
- Combine Paneer and sauce: Return paneer cubes to the pan and fold gently for them to soak in the sauce. Cover and cook on low heat for another 5 minutes to meld flavors and soften the paneer beautifully.
- Garnish and Serve: Sprinkle freshly chopped coriander leaves and a drizzle of cream on top before serving.
Tips for Success
- Use firm paneer; softer varieties tend to crumble during cooking.
- For an authentic smoky flavor, finish marinated paneer on a hot grill or under a broiler for 2-3 minutes before adding to the masala.
- Adjust chili powder quantity based on your spice preference, but resist skimping on Kashmiri chili for its vibrant color.
- To make the dish vegan, substitute paneer with firm tofu and use coconut or cashew cream instead of dairy.
- Paneer tikka masala tastes even better the next day as flavors deepen-consider making it ahead.
Serving Suggestions and Pairings
Serve your luscious Paneer Tikka Masala with warm,buttery naan bread or steamed basmati rice,allowing the rich,creamy gravy to be soaked up effortlessly. A side of cucumber raita refreshes the palate, balancing the bold spices with cooling yogurt and a hint of mint. Garnish with finely sliced ginger for a subtle zing and a sprinkle of roasted cumin seeds for extra aroma.
For a vibrant, restaurant-style presentation, arrange the paneer tikka masala in a shallow bowl and drizzle with cream swirls and fresh coriander sprigs. Pair your meal with a light, chilled green tea or a sparkling lime soda for a refreshing contrast.

| Nutrient | Per Serving |
|---|---|
| Calories | 420 kcal |
| Protein | 19g |
| Carbohydrates | 15g |
| Fat | 32g |
Discover more comforting Indian recipes like Butter Chicken to expand your flavorful repertoire at home.
Q&A
Q&A: Savor the Spice – Easy paneer Tikka Masala Recipe Guide
Q1: What makes Paneer Tikka Masala a beloved dish in Indian cuisine?
A1: Paneer Tikka Masala is a vibrant party of flavors-creamy, smoky paneer cubes marinated in spices, grilled to perfection, and then swathed in a luscious tomato-based gravy. It’s beloved for its rich texture, aromatic spices, and the comforting warmth it brings to the table, making it a staple for vegetarians and spice lovers alike.
Q2: Why is paneer the perfect protein for tikka masala?
A2: Paneer, a fresh Indian cottage cheese, is mild yet sturdy, wich allows it to soak up bold marinades without falling apart. Its subtle flavor balances the intense spices, creating a harmonious dance of taste and texture that’s both satisfying and versatile.
Q3: How can beginners make the paneer tikka marinade easily at home?
A3: Start with a simple blend of yogurt, ginger-garlic paste, turmeric, red chili powder, garam masala, cumin, and a pinch of salt. Whisk these ingredients together and coat the paneer cubes thoroughly. Let them soak up the magic for at least 30 minutes-this is the secret to tender, flavorful bites!
Q4: What’s the easiest way to “grill” paneer tikka without a tandoor?
A4: No tandoor? No problem! Simply pan-fry the marinated paneer on a hot skillet or bake in the oven at 200°C (400°F) until golden and slightly charred. Both methods mimic that delicious smoky exterior while keeping your kitchen cozy and mess-free.
Q5: How do you create the signature creamy masala sauce?
A5: The sauce begins with sautéing onions, garlic, and ginger until fragrant and soft. then add pureed tomatoes seasoned with turmeric, chili powder, coriander, and garam masala. Simmer until thickened before swirling in cream or cashew paste for that silky, indulgent finish.
Q6: Can the recipe be adjusted for dietary preferences?
A6: Absolutely! Swap dairy cream with coconut cream for a vegan twist, or reduce spices for milder palates. The recipe is wonderfully flexible-spice it up or tone it down, tailoring it to your soul’s craving.
Q7: What sides best complement paneer tikka masala?
A7: This dish pairs beautifully with fluffy basmati rice, buttery naan, or even quinoa for a healthier flair. Fresh cucumber raita or a tangy salad balance the richness and add a refreshing crunch.
Q8: Any tips to elevate the flavor profile?
A8: Toast whole spices like cumin seeds or cardamom before grinding for a deeper aroma. Add a dash of smoked paprika or a sprinkle of chaat masala just before serving for an authentic twist that will make your taste buds sing.
Q9: How long does the entire cooking process take?
A9: From marination to the final simmer, expect about 1 hour.The marination only needs 30 minutes for a speedy fix, but longer (up to overnight) means more intense flavor. It’s a satisfying project that rewards patience with every mouthful!
Q10: Where can I find paneer and the spices needed for this recipe?
A10: Paneer is widely available in Indian grocery stores and manny supermarkets nowadays. Spices like garam masala, turmeric, and cumin are pantry staples or easy to source online. Fresh ginger and garlic add authenticity and freshness, rounding out your kitchen’s flavor arsenal.
Embark on this culinary adventure with confidence, and savor the spice of homemade Paneer Tikka Masala-a dish that turns everyday meals into a feast of colors, textures, and unforgettable tastes!
Final Thoughts
As the aroma of your homemade Paneer Tikka Masala fills the kitchen, you’ve not only crafted a meal but also embraced a timeless tradition of bold flavors and comforting spice. this easy recipe invites both novice cooks and seasoned food lovers to savor every moment-from marinating the paneer to stirring the creamy, tangy sauce. So next time hunger calls for a burst of vibrant taste, remember that the magic of Indian cuisine is just a few simple steps away.Dive in, experiment with your favorite spices, and let every bite tell a story of warmth, passion, and delicious discovery.Your culinary adventure with Paneer Tikka Masala has only just begun.
Savor budget-friendly roasted garlic Parmesan zucchini delight is a dish that marries the robust, aromatic essence of garlic with the rich, nutty depth of Parmesan cheese, transforming simple zucchini into an irresistible side or light main. Inspired by Mediterranean flavors and a love for economical cooking, this recipe elevates humble ingredients into a flavorful feast without straining your wallet. The crisp edges of roasted zucchini combine perfectly with garlic’s pungency and Parmesan’s salty tang,creating a harmony that’s both comforting and elegant.
Prep and Cook Time
- Preparation Time: 10 minutes
- Cook Time: 20 minutes
- Total Time: 30 minutes
yield
Serves 4 generous portions, ideal for a family meal or a cozy gathering.
Difficulty Level
Easy – perfect for beginners seeking a rapid, satisfying vegetable side.
Ingredients
- 3 medium zucchini,sliced into ½-inch thick rounds
- 3 tablespoons olive oil,extra virgin for the best flavor
- 4 cloves garlic,finely minced or pressed
- ½ cup grated Parmesan cheese,freshly grated if possible
- 1 teaspoon dried Italian seasoning or a mix of oregano,basil,and thyme
- ½ teaspoon salt,adjust to taste
- ¼ teaspoon freshly ground black pepper
- 1 tablespoon chopped fresh parsley,for garnish (optional)
Instructions
- Preheat your oven to 425°F (220°C) and line a large baking sheet with parchment paper or a silicone baking mat to prevent sticking.
- Prepare the zucchini: Wash and slice the zucchini into uniform ½-inch rounds to ensure even roasting.
- Toss zucchini with olive oil, garlic, Italian seasoning, salt, and pepper in a large bowl. Coating each slice thoroughly ensures every bite explodes with flavor.
- Arrange the zucchini slices in a single layer on the baking sheet, leaving slight gaps so they roast rather of steam.
- Roast for 15 minutes, then remove the tray and sprinkle grated Parmesan cheese evenly over the zucchini, pressing lightly to help it adhere.
- Return to the oven and roast for an additional 5 minutes or until the zucchini edges are golden and the cheese is bubbly and lightly crisped.
- Remove from oven and let cool for 3 minutes. Garnish with fresh parsley for a pop of color and freshness before serving.
Chef’s Notes and Tips for Success
- Choose firm zucchini: Look for bright green,firm zucchinis without soft spots to lend the best texture after roasting.
- Garlic intensity: Adjust the amount of garlic according to your preference.Roasted garlic adds sweetness, while raw minced garlic delivers punchier aroma.
- Cheese swap: Parmesan can be replaced with Pecorino Romano or asiago for a different, but equally delicious, flavor profile.
- Make ahead: Roasted zucchini can be prepared a day ahead and reheated gently in the oven or enjoyed cold in salads.
- Prevent sogginess: Avoid overcrowding the baking sheet to keep zucchini crisp and caramelized rather of mushy.
Serving Suggestions
This roasted garlic Parmesan zucchini delight shines as a versatile side. Complement grilled chicken or fish with a warm serving. To create a vibrant vegetarian meal, top zucchini with a dollop of tangy Greek yogurt or tzatziki and a drizzle of lemon juice.For a hearty option, toss roasted zucchini with cooked pasta and fresh basil for an easy weeknight dinner.Garnish with extra Parmesan shavings, a sprinkle of red pepper flakes for mild heat, or toasted pine nuts for added crunch and luxury appeal.
| Nutritional information (per serving) | Amount |
|---|---|
| Calories | 120 kcal |
| Protein | 6 g |
| Carbohydrates | 8 g |
| Fat | 8 g |

For more flavorful and economical vegetable recipes, check out our Budget Vegetable Roasts Collection. To learn about the health benefits of garlic and Parmesan, visit Healthline’s guide on garlic nutrition.
Q&A
Q&A: Savor Budget-Friendly Roasted Garlic Parmesan Zucchini Delight
Q1: What makes Roasted Garlic Parmesan Zucchini Delight an ideal budget-friendly dish?
A1: This dish shines in its simplicity and affordability. Zucchini is an inexpensive and widely available vegetable, while garlic and Parmesan add bold flavors without breaking the bank. Together, they create a savory, satisfying side or snack that’s both tasty and wallet-friendly.
Q2: How do you prepare the zucchini to get that perfect roasted texture?
A2: The secret lies in slicing the zucchini into even, bite-sized pieces, tossing them in olive oil, minced garlic, and seasoning, then roasting at around 400°F (200°C) until they’re tender and slightly caramelized. This method brings out zucchini’s natural sweetness and ensures a delightful crisp-tender bite.Q3: Can I use substitutes for Parmesan cheese if I’m on a tight budget?
A3: Absolutely! While Parmesan offers a distinctive nutty flair, you can swap in grated Pecorino Romano, Asiago, or even a sharp Cheddar. Nutritional yeast is a great vegan alternative that imparts a cheesy, umami taste and is often budget-friendly too.
Q4: Is this dish suitable for meal prepping and make-ahead cooking?
A4: Yes! Roasted Garlic Parmesan Zucchini keeps wonderfully in the fridge for 3-4 days. Simply reheat it in the oven or a skillet to revive its crispy edges.Its perfect for quick lunches or a speedy dinner side when you’re short on time.
Q5: how can I elevate this zucchini delight without spending more?
A5: Enhancing flavor doesn’t always mean adding cost. Try sprinkling fresh herbs like parsley or basil from your garden or dried Italian seasoning. A squeeze of fresh lemon juice before serving adds bright, zesty notes that make each bite pop.
Q6: Can this dish be adapted for dietary restrictions?
A6: definitely! For a dairy-free version, swap Parmesan for a vegan cheese or nutritional yeast. Garlic can be minimized or replaced with garlic-infused oil if sensitivity is an issue. The recipe’s flexible nature welcomes tweaks to fit your needs.
Q7: What occasions is this dish best suited for?
A7: This Roasted Garlic Parmesan Zucchini Delight is perfect for casual weeknight dinners, potlucks, or as a humble star in a budget-friendly holiday spread. Its comforting, familiar flavors appeal to all ages and palates, making it a versatile crowd-pleaser.
The Way Forward
this Roasted Garlic Parmesan Zucchini Delight proves that eating well doesn’t have to come with a hefty price tag. With simple ingredients and straightforward steps, you can transform everyday zucchini into a savory, cheesy masterpiece that satisfies both your palate and your budget. So next time you’re looking to whip up a quick, affordable dish bursting with flavor, remember this guilt-free indulgence-as sometimes, the best culinary treasures are the ones that bring comfort without breaking the bank. Happy cooking and even happier eating!
Wholesome plant-based gluten-free soups to savor offer a vibrant harmony of nutrition and flavor, inviting you to explore the rich bounty of nature’s most wholesome ingredients. Rooted in the tradition of nourishing broths, these soups transform humble vegetables, legumes, and grains into comforting, creamy, and deeply satisfying bowls without relying on dairy or gluten. Whether it’s the velvety silk of pureed butternut squash or the robust earthiness of lentils infused with fragrant herbs, each spoonful tells a story of seasons, health, and culinary creativity.
Prep and Cook Time
- Preparation: 15 minutes
- Cooking: 35 minutes
- Total Time: 50 minutes
Yield
Serves 4 generous bowls
Difficulty Level
Easy – perfect for weeknight meals or casual entertaining
Ingredients
- 1 tbsp extra virgin olive oil
- 1 medium yellow onion, diced finely
- 3 garlic cloves, minced
- 2 cups diced butternut squash (about 1/2-inch cubes)
- 1 large carrot, peeled and sliced
- 1 celery stalk, chopped
- 1 cup cooked chickpeas (or canned, drained and rinsed)
- 4 cups vegetable broth (gluten-free, low sodium preferred)
- 1 cup canned light coconut milk
- 1 tsp ground turmeric
- 1 tsp dried thyme
- Salt and freshly cracked black pepper, to taste
- Fresh parsley for garnish, chopped
- A squeeze of fresh lemon juice to brighten
Instructions
- Heat the olive oil over medium heat in a large soup pot. Add the diced onion and sauté until it becomes translucent and fragrant, about 5 minutes.
- Add the minced garlic, stirring for 1 more minute to release its aroma but avoid burning.
- Incorporate butternut squash, carrot, and celery.Sauté for 7-8 minutes, stirring occasionally until the vegetables start to soften and the edges slightly caramelize, amplifying flavor.
- Stir in turmeric and dried thyme to toast briefly and deepen their earthiness, about 1 minute.
- Pour in the vegetable broth, bring to a simmer, then reduce heat and gently cook uncovered for 20 minutes until all vegetables are tender.
- Transfer roughly half the soup to a blender or use an immersion blender directly in the pot. Blend until silky smooth, then return it to the main pot.
- Stir in the cooked chickpeas and coconut milk, warming thru for 5 minutes.The chickpeas add protein and a subtle creaminess, while the coconut milk enriches texture without dairy.
- Season with salt, pepper, and a squeeze of lemon juice to elevate and balance sweetness and earthiness.
Chef’s Notes: Tips for success
- Boost Texture: For added bite, reserve a handful of sautéed butternut squash cubes and chickpeas, stirring them in at the end for a contrast to the creamy base.
- Seasonal Variation: Swap butternut squash with sweet potatoes or pumpkin during fall, or zucchini and peas in spring for a lighter alternative.
- Substitute Ingredients: Use oat or almond milk to replace coconut milk if you prefer a less sweet profile, and gluten-free tamari as a broth enhancer if desired.
- Make-Ahead: This soup thickens overnight; simply add 1/2 cup vegetable broth or water while reheating to bring back a smooth consistency.
- Herb Highlights: Fresh thyme or sage brighten each bowl; experiment with rosemary or basil for different aromatic layers.
- for Added Depth: Consider roasting the butternut squash and carrots first to infuse a caramelized, smoky note before adding to the soup.
Serving Suggestions
Serve the soup in rustic ceramic bowls to showcase its rich golden-orange hue.Garnish with a sprinkle of freshly chopped parsley, a drizzle of high-quality extra virgin olive oil, and a dash of toasted pumpkin seeds or crushed chili flakes for gentle heat and crunch. Pair with a warm gluten-free baguette or crispy kale chips for textural contrast. A side of lemon wedges encourages diners to personalize brightness at the table.
| Nutrient | Per Serving |
|---|---|
| calories | 210 kcal |
| Protein | 8 g |
| Carbohydrates | 30 g |
| Fat | 7 g |
Explore more wholesome gluten-free meals to expand your culinary repertoire.
For further insights on the nutritional benefits of plant-based gluten-free diets, visit EatRight.org, a trusted authority on balanced nutrition.

Q&A
Q&A: Wholesome Plant-based Gluten-Free Soups to Savor
Q1: What makes a soup both plant-based and gluten-free?
A1: A plant-based soup is crafted solely from ingredients derived from plants-think veggies, legumes, grains, nuts, and seeds-without any animal products.Gluten-free means that the soup avoids wheat, barley, rye, and any derivative gluten-containing grains. Combining these means the soup nourishes you with wholesome, clean ingredients, ideal for those with dietary restrictions or anyone seeking a lighter, healthful option.
Q2: Why are soups such a grate choice for a wholesome plant-based, gluten-free diet?
A2: Soups are incredibly versatile and comforting, making it easy to pack in a rainbow of nutrients in one bowl. They can be hearty or light, simple or complex, and they warm you from the inside out. Plus, soups allow for creative combinations of beans, vegetables, herbs, and naturally gluten-free grains like quinoa or millet, providing balanced nutrition without sacrificing flavor or texture.
Q3: Are there must-have ingredients for these soups to maximize flavor and nutrition?
A3: Absolutely! Aromatics like garlic, onions, and fresh herbs lay a delicious foundation. Nutrient-rich veggies-sweet potatoes, carrots, kale, and mushrooms-add depth. Legumes such as lentils and chickpeas boost protein and fiber. Coconut milk or nut-based creams can add luscious richness without dairy. Spices like cumin, turmeric, and smoked paprika help elevate the flavors, while a splash of acid (lemon juice or apple cider vinegar) brightens the entire dish.
Q4: Can these soups be made ahead and still taste great?
A4: Definately! Many plant-based, gluten-free soups actually deepen in flavor after a day or two. They’re perfect for meal prepping, allowing you to savor a comforting bowl midweek. Just keep in mind that some textures may change-like softening lentils or wilted greens-so it’s best to add delicate ingredients like fresh herbs or spinach right before serving.
Q5: Any tips for thickening plant-based, gluten-free soups without flour or cream?
A5: You can turn to nature’s pantry for thickening magic! Pureed beans or lentils add creaminess and protein.Blending part of the soup and stirring it back in creates luscious body without extra ingredients. Mashed potatoes or cooked sweet potatoes also work wonders. For a nutty twist, consider adding soaked cashews blended into the broth. These options keep the soup wholesome and safe for gluten-sensitive eaters.
Q6: How can I make these soups filling enough for a main course?
A6: Incorporate hearty elements like beans,lentils,tofu cubes,or gluten-free whole grains (quinoa,millet,brown rice). Adding potatoes or squash gives a satisfying starch boost. Consider topping with avocado slices, toasted seeds, or a swirl of nut butter to add healthy fats and extra satiety. Pair your soup with a side of crisp salad or gluten-free bread for a complete meal.
Q7: Where can I find inspiration for new plant-based, gluten-free soup recipes?
A7: Explore vibrant farmers markets for seasonal produce, then experiment with global flavors-think Moroccan chickpea stew, Thai coconut curry soup, or roasted butternut squash bisque. Food blogs, cookbooks dedicated to plant-based and gluten-free cooking, and social media platforms rich in foodie communities offer endless inventive recipes. And remember: the best soups come from playful curiosity and tasting as you go!
Wholesome plant-based, gluten-free soups are a sensory delight-nourishing the body while embracing vibrant colors and flavors. Armed with these insights, your ready to ladle up bowls of cozy, healthful goodness all year round. Bon appétit!
The Conclusion
As the final spoonful warms your soul, it’s clear that wholesome, plant-based, gluten-free soups are more than just a comforting meal-they’re a party of nature’s bounty in every vibrant, nourishing bowl. Whether you seek solace on a chilly evening or crave a light yet satisfying dish, these soups invite you to savor health without compromise. Embrace the rich textures and bold flavors that plant-powered ingredients bring, and let each recipe inspire your kitchen creativity. in the world of gluten-free, plant-based cooking, every pot is a promise: wholesome goodness that delights both body and palate, one savory sip at a time.
Savor the Perfect Grilled Chicken Breast by mastering the essentials of marinade selection, grill temperature timing, and spice rub creativity. This guide invites you to unlock vibrant flavors and tender juiciness, transforming a simple chicken breast into a show-stopping star of your meal. From silky citrus and herb marinades to bold smoky rubs, plus foolproof grilling techniques, you’ll build confidence and flair that elevate every bite.
Prep and Cook Time
- Preparation: 15 minutes (plus 1-4 hours marinating)
- Cooking: 12-15 minutes
- Total: 1 hour 30 minutes (including marinating)
yield
- Serves 4
Difficulty Level
- Easy to Medium
Ingredients
- 4 boneless, skinless chicken breasts (about 6 oz each)
- Marinade Base: ½ cup olive oil
- ¼ cup freshly squeezed lemon juice
- 3 garlic cloves, minced
- 2 tablespoons honey or maple syrup
- 1 tablespoon Dijon mustard
- 1 tablespoon fresh rosemary, finely chopped
- 1 teaspoon smoked paprika
- 1 teaspoon ground cumin
- 1 teaspoon sea salt
- ½ teaspoon freshly ground black pepper
- Optional: pinch of cayenne for a spicy twist
Instructions
- Create the marinade: In a bowl, whisk together olive oil, lemon juice, minced garlic, honey, Dijon mustard, rosemary, smoked paprika, ground cumin, salt, and pepper.Adjust cayenne pepper to taste for mild heat.
- marinate the chicken: Place the chicken breasts in a large resealable plastic bag or shallow dish.Pour marinade over chicken, ensuring all pieces are well coated. Seal or cover and refrigerate for 1 to 4 hours for maximum flavor and tenderness.
- Preheat the grill: Set your grill to medium-high heat,aiming for around 375°F to 400°F. Clean and lightly oil the grates to prevent sticking and create beautiful grill marks.
- Prepare spice rub (optional): For an extra flavor dimension, mix 1 teaspoon each of smoked paprika, garlic powder, onion powder, salt, and black pepper.After marinating, gently pat chicken dry and evenly coat with the rub.
- Grill the chicken: Remove chicken from marinade, shaking off excess. Place directly on grill grates. Cook for 6-7 minutes per side, flipping once, until internal temperature reaches 165°F (use a meat thermometer for precision).
- rest the meat: Transfer grilled breasts to a plate, tent loosely with foil, and let rest for 5 minutes. This step ensures juices redistribute, giving you juicy, tender chicken.
- Serve and garnish: Slice against the grain and garnish with fresh rosemary sprigs, lemon wedges, and a drizzle of extra virgin olive oil or herb-infused oil.
Tips for Success
- Marinate longer: For enhanced tenderness and complexity, marinate overnight. The acidic lemon juice combined with olive oil gently breaks down muscle fibers.
- Don’t skip the thermometer: Use an instant-read meat thermometer to avoid overcooking and dryness. 165°F internal temp is the sweet spot for safety and succulence.
- Experiment with herbs: Swap rosemary with thyme, oregano, or basil depending on your flavor mood. Fresh herbs provide a bright, fragrant lift.
- rest before slicing: Always rest grilled chicken to keep juices locked in and prevent dryness.
- Alternative grill method: If using charcoal, create two heat zones – direct for searing and indirect for gentle finishing – for perfect texture.
Serving Suggestions and Side Pairings to elevate Your Meal
The vibrant nature of grilled chicken breast pairs beautifully with fresh, colorful sides that balance smoky, tangy, and sweet flavor notes. Serve alongside a crisp mediterranean cucumber and tomato salad tossed in lemon vinaigrette, or a vibrant quinoa pilaf studded with toasted pine nuts and fresh herbs.For a heartier touch, creamy garlic mashed potatoes or charred grilled asparagus work wonders. Garnish plates with a sprinkle of crumbled feta or a dollop of tzatziki for an extra burst of flavor and texture contrast.
Drizzle a bright chimichurri sauce or classic basil pesto for herbaceous richness, or opt for a tangy mango salsa to provide a refreshing, tropical contrast. Don’t forget the power of fresh garnishes-thin lemon zest curls,chopped scallions,or a dusting of smoked paprika-these small details turn your plate into a feast for both the eyes and the palate.
| Nutrient | Per Serving |
|---|---|
| Calories | 320 |
| Protein | 45g |
| Carbohydrates | 5g |
| Fat | 12g |

to deepen your grilling expertise, visit our Grilling Tips & Techniques guide, or explore the USDA’s official resource on safe cooking temperatures here. Embrace these methods to savor the perfect grilled chicken breast every time with confidence and flair.
Q&A
Q&A: Savor the Perfect Grilled Chicken Breast – tips and Recipes
Q1: What’s the secret to grilling a juicy, flavorful chicken breast?
A1: The magic lies in balance-marinate for at least 30 minutes to infuse flavor, avoid overcooking by using medium heat, and let the chicken rest after grilling. This ensures tender, juicy bites rather than dry, tough meat.
Q2: How can I prevent my chicken breast from drying out on the grill?
A2: Start by pounding the chicken to an even thickness for uniform cooking. Use a marinade or brine to lock in moisture, grill over medium heat, and flip only once to seal those precious juices inside. And never skip the resting period-five minutes under foil works wonders!
Q3: What are some creative marinade ideas to elevate my grilled chicken?
A3: Think beyond just salt and pepper! Try a zesty lemon-garlic-herb blend, a smoky chipotle-lime mix, or a sweet-and-savory honey-soy marinade. Each adds a unique personality that turns simple grilled chicken into a mouthwatering masterpiece.
Q4: Can I grill chicken breast without it sticking to the grates?
A4: Absolutely! Ensure your grill is clean and well-oiled before cooking. Pat the chicken dry to reduce sticking, and don’t move it around too much once it’s on the grill-letting it sear properly creates a natural release.
Q5: Are there fast and easy grilled chicken breast recipes for busy weeknights?
A5: Definitely. Try marinating chicken breasts in olive oil, garlic, and Italian herbs while you prep your sides. Grill for about 6-7 minutes per side, then slice and serve over a fresh salad or tossed with pasta. Simple, fast, and bursting with flavor!
Q6: How do I know when my grilled chicken breast is perfectly cooked?
A6: use a meat thermometer! The internal temperature should reach 165°F (74°C). If you don’t have one, check by slicing into the thickest part-the juices should run clear, and the meat should be opaque and firm.
Q7: Can grilled chicken breast be used in dishes beyond just serving it whole?
A7: absolutely! Grilled chicken breast is incredibly versatile-slice it for salads, shred it for tacos or wraps, dice it for stir-fries, or toss it with grains like quinoa or rice for a wholesome bowl. The smoky char adds depth to any dish.
Q8: What sides pair best with grilled chicken breast?
A8: fresh seasonal veggies, grilled or roasted, complement perfectly.Think charred asparagus, corn on the cob, or a vibrant tomato and cucumber salad. For carbs, try herbed couscous, garlic mashed potatoes, or even a light couscous salad to keep things balanced and bright.
Grilling the perfect chicken breast isn’t just a cooking technique-it’s an art. With these tips and tantalizing recipe ideas, you’re ready to become a backyard grilling champion, serving juicy, flavorful chicken that everyone will savor bite after bite!
Key Takeaways
With these tips and recipes in your culinary arsenal, mastering the art of the perfect grilled chicken breast is no longer a grilling fantasy but a appetizing reality. Whether you crave smoky char, juicy tenderness, or bold, vibrant flavors, your grill is ready to deliver every time. So fire it up, embrace the sizzle, and savor each bite of your homemade masterpiece-because great grilled chicken isn’t just a meal, it’s a celebration of flavor and technique that brings everyone to the table.Happy grilling!
Savor the Wild: Top Venison Backstrap Recipes to Try Today invites culinary adventurers to delve deep into the rich, robust flavors unique to this prized cut of game meat. Venison backstrap, frequently enough called the “crown jewel” of deer meat, boasts a tender texture and a subtly sweet earthiness that captivates every palate. It’s lean profile makes it perfect for quick cooking methods that preserve its natural flavors,but the secret to elevating venison lies in the marinade and technique-transforming it from simple game meat to an remarkable feast.
Prep and Cook Time
- Preparation: 15 minutes
- Marinating: 4 to 12 hours (recommended)
- Cooking: 10-15 minutes
Yield
Serves 4 elegantly portioned servings
Difficulty Level
Medium – perfect for passionate home cooks eager to master game meat
Ingredients
- 1.5 lbs venison backstrap, trimmed and cleaned
- 1/4 cup extra virgin olive oil
- 3 tbsp balsamic vinegar
- 2 tbsp soy sauce (low sodium preferred)
- 2 cloves garlic, minced
- 1 tbsp fresh rosemary, finely chopped
- 1 tbsp fresh thyme, chopped
- 1 tsp smoked paprika
- 1/2 tsp cracked black pepper
- 1/2 tsp sea salt
- 1 tsp honey or maple syrup (optional, for balance)
Instructions
- Prepare the marinade: In a medium bowl, whisk together olive oil, balsamic vinegar, soy sauce, garlic, rosemary, thyme, smoked paprika, pepper, salt, and honey until fully emulsified.
- Marinate the venison backstrap: Place the cleaned backstrap in a resealable bag or shallow dish, pour the marinade over it, ensuring all surfaces are coated. seal and refrigerate for at least 4 hours, ideally 8-12 hours for optimal flavor infusion.
- Remove and rest: Take the backstrap out of the refrigerator 30 minutes before cooking to bring to room temperature-this promotes even cooking.
- Preheat your grill or heavy skillet: Aim for medium-high heat. A cast iron pan adds wonderful sear and flavor.
- Cook the venison: Remove from marinade, shaking off excess. Sear the backstrap for 4-5 minutes per side, until a beautiful, deep brown crust forms. Aim for medium-rare to maintain tenderness-internal temperature should reach 130°F (54°C).
- Rest the meat: Transfer to a cutting board, tent with foil, and rest for 10 minutes to lock in juices.
- Slice and serve: Cut venom into ½-inch thick medallions against the grain for maximum tenderness. Garnish with fresh thyme sprigs and a light drizzle of pan juices or extra virgin olive oil.
Chef’s Tips for Success
- Marinate adequately: The venison backstrap is lean, so allowing it to soak in a marinade with acid (like balsamic vinegar) and fat (olive oil) tenderizes and enhances complexity.
- Avoid overcooking: Venison is best enjoyed medium-rare; overcooking leads to dryness. use an instant-read thermometer for precision.
- Rest after cooking: Don’t skip resting-it redistributes the juices for succulent bites.
- experiment with flavors: Swap herbs like sage or add a splash of red wine to the marinade for a diffrent twist.
- Make ahead: The marinade can be prepared a day prior, and venison can marinate overnight. For convenience,slice after resting and refrigerate; gently rewarm before serving.
Serving Suggestions
Pair your perfectly cooked venison backstrap with earthy sides like roasted root vegetables,creamy mashed parsnips,or herbed wild rice. A tangy blackberry or juniper berry sauce complements its gamey richness beautifully.Garnish with freshly chopped parsley or microgreens for a pop of color and freshness. Accompany with a full-bodied red wine such as a Syrah or Cabernet Sauvignon to highlight the deep flavors of the meat.

| nutrient | Per Serving |
|---|---|
| Calories | 320 kcal |
| Protein | 45 g |
| Carbohydrates | 3 g |
| Fat | 12 g |
For more expert tips on cooking game meats and unique venison recipes, check out our comprehensive wild game cooking guide. To deepen your understanding of game meat nutrition and handling, visit USDA Food Safety on Preparing Game meat.
Q&A
Q&A: Savor the Wild – Top Venison backstrap Recipes to Try today
Q: What exactly is venison backstrap?
A: Venison backstrap is the tender, lean muscle running along the spine of a deer. Often considered the crown jewel of venison cuts, it boasts a delicate texture and rich, gamey flavor that’s perfect for gourmet cooking. Think of it as the equivalent of filet mignon in the wild world.
Q: Why choose venison backstrap over other cuts of venison?
A: This cut is prized because it’s naturally tender and low in fat, making it both healthy and flavorful. Unlike tougher cuts, backstrap requires minimal cooking time to reach juicy perfection, allowing the natural flavors of the wild to shine.
Q: what are some creative ways to prepare venison backstrap?
A: The options are nearly endless! Classic recipes include pan-seared backstrap with a red wine reduction, or grilled medallions with a rosemary and garlic marinade. for something adventurous, try venison backstrap carpaccio or an Asian-inspired backstrap stir-fry with ginger and soy.
Q: How should I season venison backstrap to highlight its flavors?
A: Keep it simple to let the natural game essence come through. Salt, freshly cracked pepper, garlic, and herbs like thyme or rosemary are classic choices. for a flavor twist, experiment with juniper berries or a splash of balsamic vinegar to add depth.
Q: what’s the best cooking method to preserve tenderness?
A: Quick,high-heat methods like pan-searing,grilling,or broiling work best. Venison backstrap is best enjoyed medium-rare to medium; overcooking can dry it out. Rest the meat briefly after cooking to let juices redistribute, ensuring every bite is luscious.
Q: Can I freeze venison backstrap, and how should I thaw it?
A: Absolutely! Wrap it tightly in plastic and foil or use vacuum sealing to prevent freezer burn. thaw slowly in the refrigerator overnight for best results, preserving texture and flavor.
Q: Are there any complementary sides or sauces that elevate venison backstrap dishes?
A: Rich,earthy sides like roasted root vegetables,creamy mashed potatoes,or wild mushroom risotto pair beautifully. Sauces made from berry reductions-think cranberry or blackberry-add a sweet-tart contrast that complements the gamey meat perfectly.
Q: where can I source quality venison backstrap?
A: Many specialty butchers and game meat suppliers offer venison backstrap, especially during hunting season. Alternatively, connect with local hunters or farmers’ markets that carry sustainably sourced venison to ensure freshness and ethical sourcing.
Q: How do venison backstrap recipes fit into a modern culinary lifestyle?
A: Venison backstrap offers a gourmet twist on sustainable, locally sourced protein choices. Ideal for adventurous foodies seeking novel flavors, it marries rustic wilderness with elegant dining-perfect for impressing guests or elevating your weeknight meals.
ready to unleash your inner wild chef? Grab that venison backstrap and start cooking-you’re about to savor the wild like never before!
To Conclude
whether you’re a seasoned hunter or simply an adventurous foodie eager to explore game flavors, venison backstrap offers a tender, richly flavored canvas for culinary creativity. From smoky marinades to herb-infused rubs and elegant sauces, these recipes invite you to savor the wild in every bite. Embrace the unique taste of venison backstrap, and let your kitchen become a gateway to nature’s bounty-where tradition and innovation meet on your plate. So gather your ingredients, sharpen your knives, and embark on a flavorful journey that celebrates the untamed spirit of the wild.